Page 7For technical questions, please call 1-888-866-5797.Item 59436
OPERATING INSTRUCTIONS
Read the ENTIRE IMPORTANT SAFETY INFORMATION section at the beginning of this manual
including all text under
subheadings therein before set up or use
.
Tool Changing
TO PREVENT SERIOUS INJURY FROM ACCIDENTAL OPERATION: Make sure that the Power Switch is in the
off-position and unplug the tool from its electrical outlet before performing any procedure in this section.
Bit Installation
WARNING! TO PREVENT SERIOUS INJURY:
Use only rotary cutting bits of the correct shank
diameter for the collet mounted. Use only rotary
cutting bits suitable for the speed of the tool.
WARNING! TO PREVENT SERIOUS INJURY:
Carefully inspect router bits for cracks, chips, or
other damage before installing. Do not use bits
that have been dropped, cracked, or damaged.
The bit may shatter causing serious injury.
1. Use only bits (sold separately) with 1/4″ shank size,
that are marked as suitable for the type of material
being cut, and are marked with a speed equal or
higher than the maximum speed marked on the tool.
Do not use a bit with a cutting diameter
larger than the opening in the base.
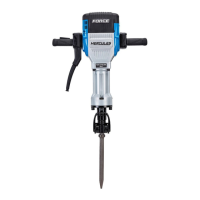
2. Turn Router upside down, open Lock
Lever and remove Base.
3. Press and hold Spindle Lock.
4. Using Large Wrench, turn Collet counterclockwise
to loosen, but do not remove.
5. Insert shank end into Collet as far as it
will go, then pull up slightly so there is a
minimum 1/16″ gap at bottom of bit.
6. Place Small Wrench on Spindle and Large
Wrench on Collet Nut, then tighten Collet Nut.
Router Bit
Collet Nut
Spindle
Lock
Spindle
7. Replace Base on Motor and close Lock Lever.
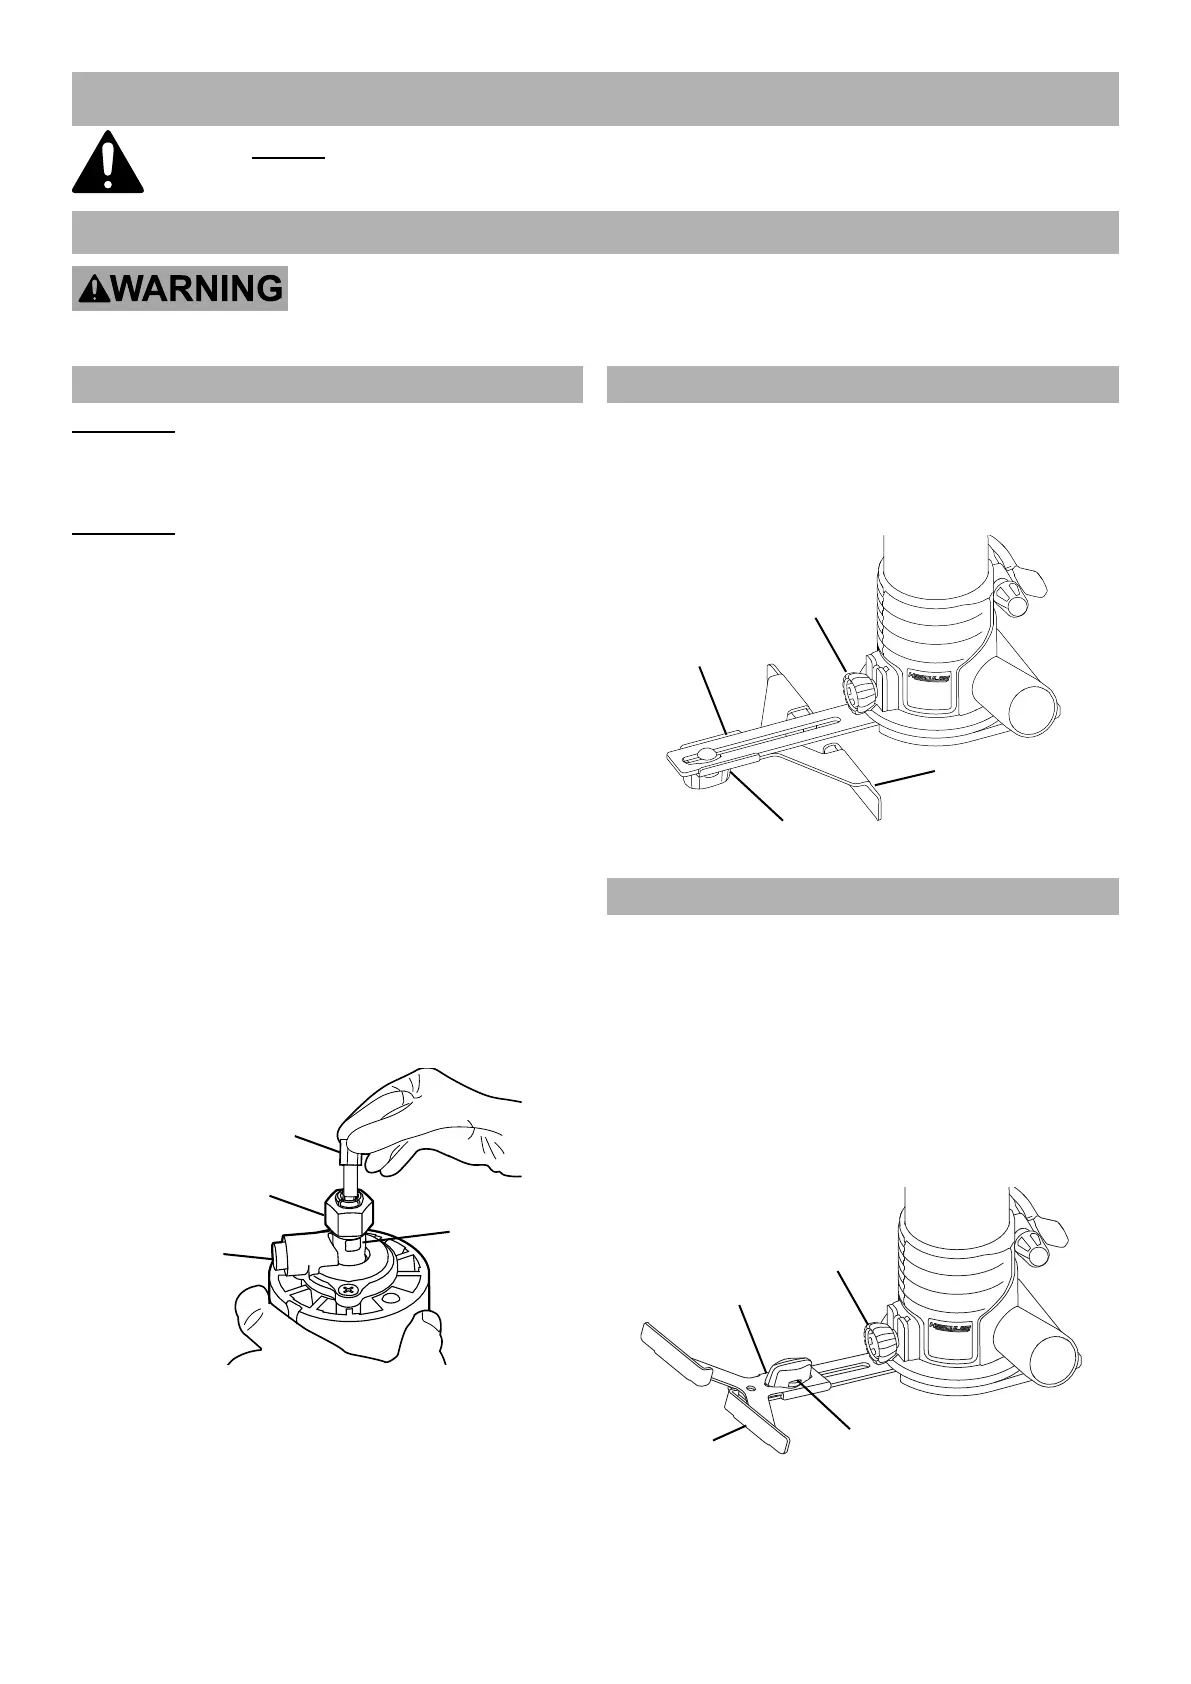
Edge Guide Installation
1. Loosen Edge Guide Knob, then install Edge
Guide with Fence facing inward and down.
2. Tighten Edge Guide Knob securely.
3. Loosen Fence Knob, adjust Fence, then tighten Knob.
Fence
Knob
Fence
Edge
Guide
Edge
Guide
Knob
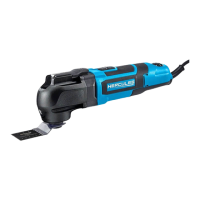
Set Up Temporary Guide
Clamp a temporary guide to workpiece to make a
straight cut which is not parallel to edge of workpiece.
1. Clamp a suitable straight board across
workpiece parallel to desired location of cut.
2. Loosen Edge Guide Knob, then install Edge
Guide with Fence facing outward and up.
3. Tighten Edge Guide Knob securely.
4. Measure proper distance from bit to Fence.
5. Loosen Fence Knob, adjust Fence, then tighten Knob.
Fence
Edge
Guide
Knob
Edge
Guide
Fence
Knob