Page 8 For technical questions, please call 1-888-866-5797. Item 56407
3. Store in temperatures no lower than 50-60°F.
NOTE: The Breaker Hammer has airtight construction,
allowing long periods of use (approximately six
months of regular usage) before lubrication.
Replacing Carbon Brushes
NOTE: The Breaker Hammer will cease operation
once Carbon Brushes are worn. Have brushes
replaced by a qualified technician when necessary.
1. Remove the Fan Cover (70) by removing the
four Bolts (71) and Flat Washers (99).
2. Slide Fan Cover off of Housing (31).
3. Remove Carbon Brush Bracket (61).
4. Remove Carbon Brushes from Bracket.
5. Insert new Carbon Brushes into Bracket.
6. Replace Carbon Brush Bracket and slide
Fan Cover back over Housing.
7. Replace Bolts and Flat Washers
until securely fastened.
Greasing Gearbox
Note: Due to the possibility of accidental damage
and/or contamination, only a qualified technician
should disassemble and lubricate this item.
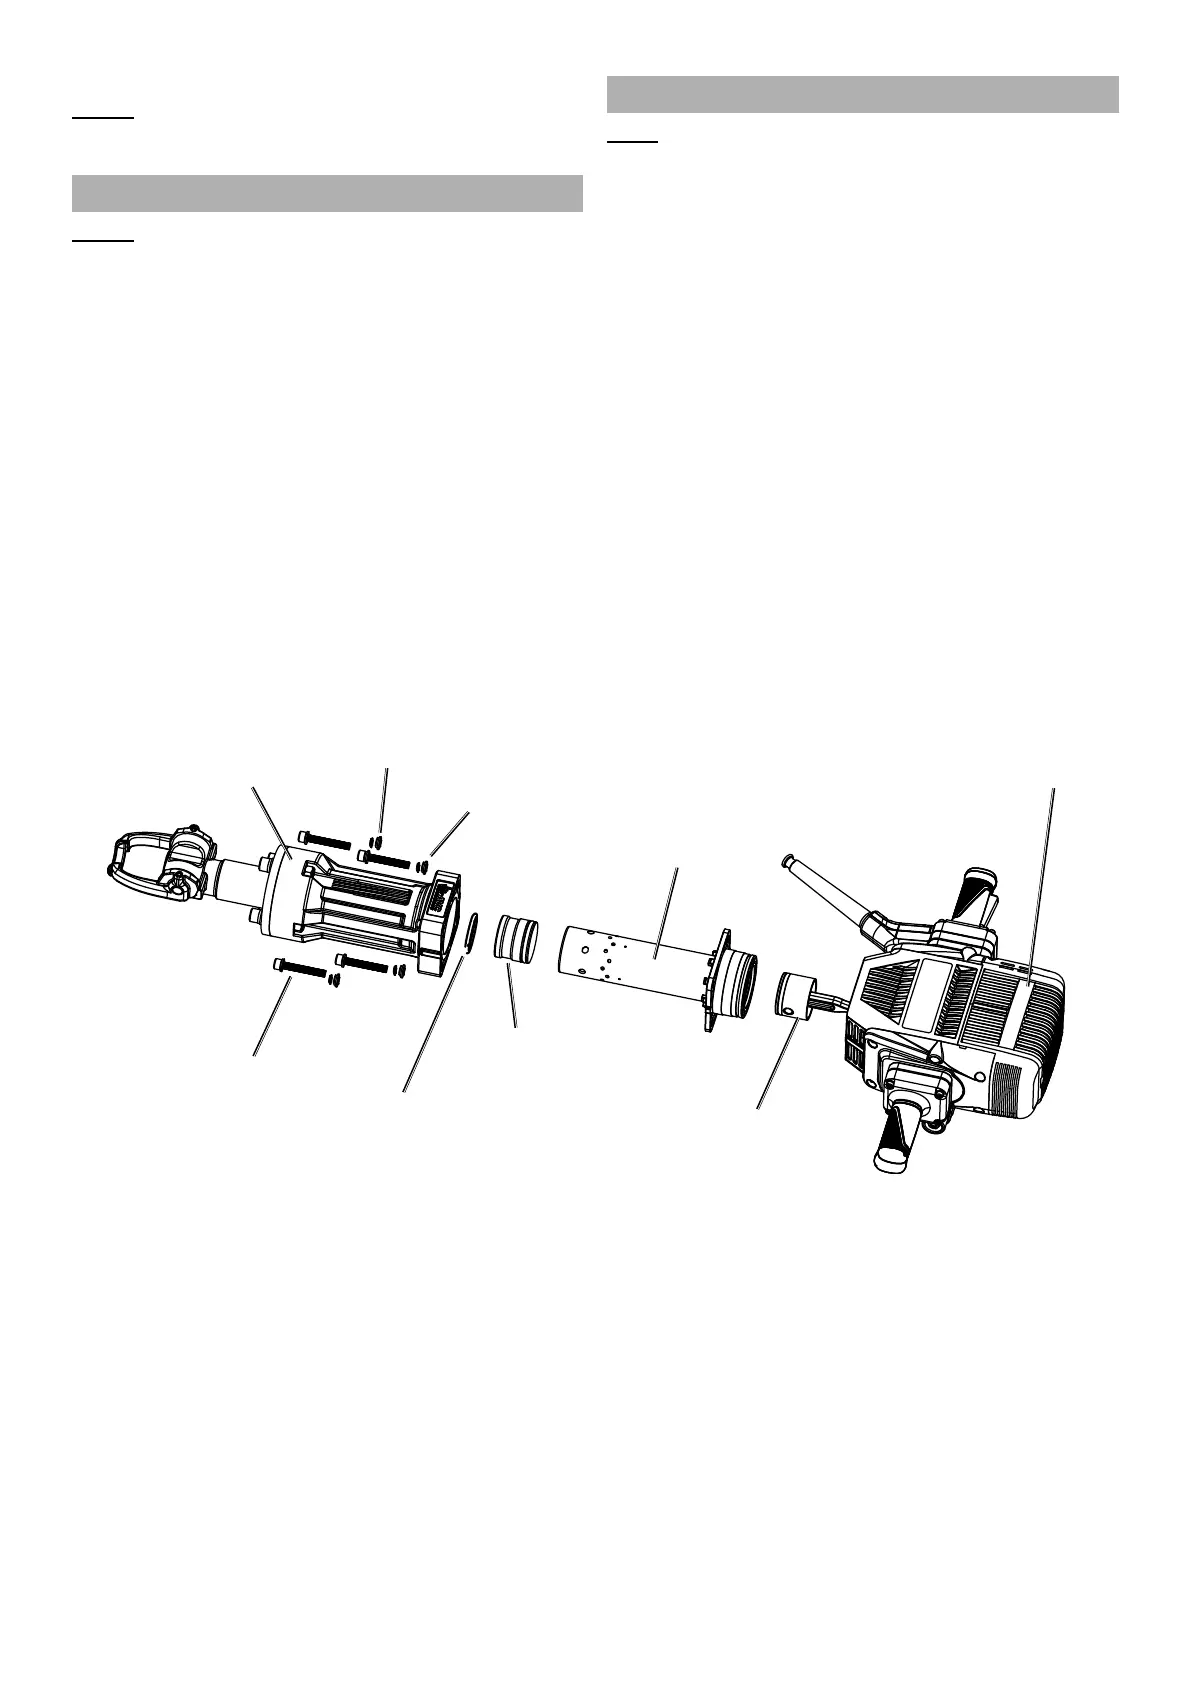
1. Remove the four Socket Bolts (6) and
Washers that connect the Aluminum Housing
(16) to the Housing. Disassemble the
Aluminum Housing, Cylinder (22) and Piston (24).
2. Clean the Aluminum Housing, Piston and
Cylinder thoroughly, inside and out.
3. Check the condition of the O-Ring (20).
If the outside diameter (OD) of the O-Ring is less
than the Piston’s OD, replace the O-Ring.
4. Fill each of the 4 grooves inside the
Aluminum Housing with 0.5 ounces of
synthetic high-temperature grease.
5. Slide the Cylinder back into the Cylinder
Case and fill it with 0.5 ounces of tool oil.
6. Carefully slide the Piston into the Ram, making sure
that the O-Ring stays in place and is not damaged.
7. Replace the Socket Bolts and Washers
to connect the Aluminum Housing to
the Housing and tighten securely.
Impact
Piston (21)
Aluminum
Housing (16)
Cylinder (22)
Piston (24)
Housing (31)
Hex Socket Bolt (6)
Spring
Washer (18)
Flat Washer
(19)
O-Ring
(20)