CARTRIDGE PUMP REPLACEMENT (Cont.)
Clean all colorant residue from the area around the pump. Make sure there
is no colorant on the wiring connector.
Restore power to the dispenser and test the new pump cartridge by
dispensing some colorant. Dispense enough colorant to ensure that all the
air is removed from the line. This equates to approximately 10 oz of product.
Check for leaks and if all is well, replace the rear panel on the dispenser.
Ensure that the power cord and USB cable are not damaged or loose.
UNSTICKING A STALLED/JAMMED PUMP
When a pump stalls or jams creating a loud noise and normally not dispensing colorant,
complete the following steps to attempt to free the pump and return to normal operations:
Disconnect the dispenser from its AC power source
Remove the lower rear panel on the back of the dispenser.
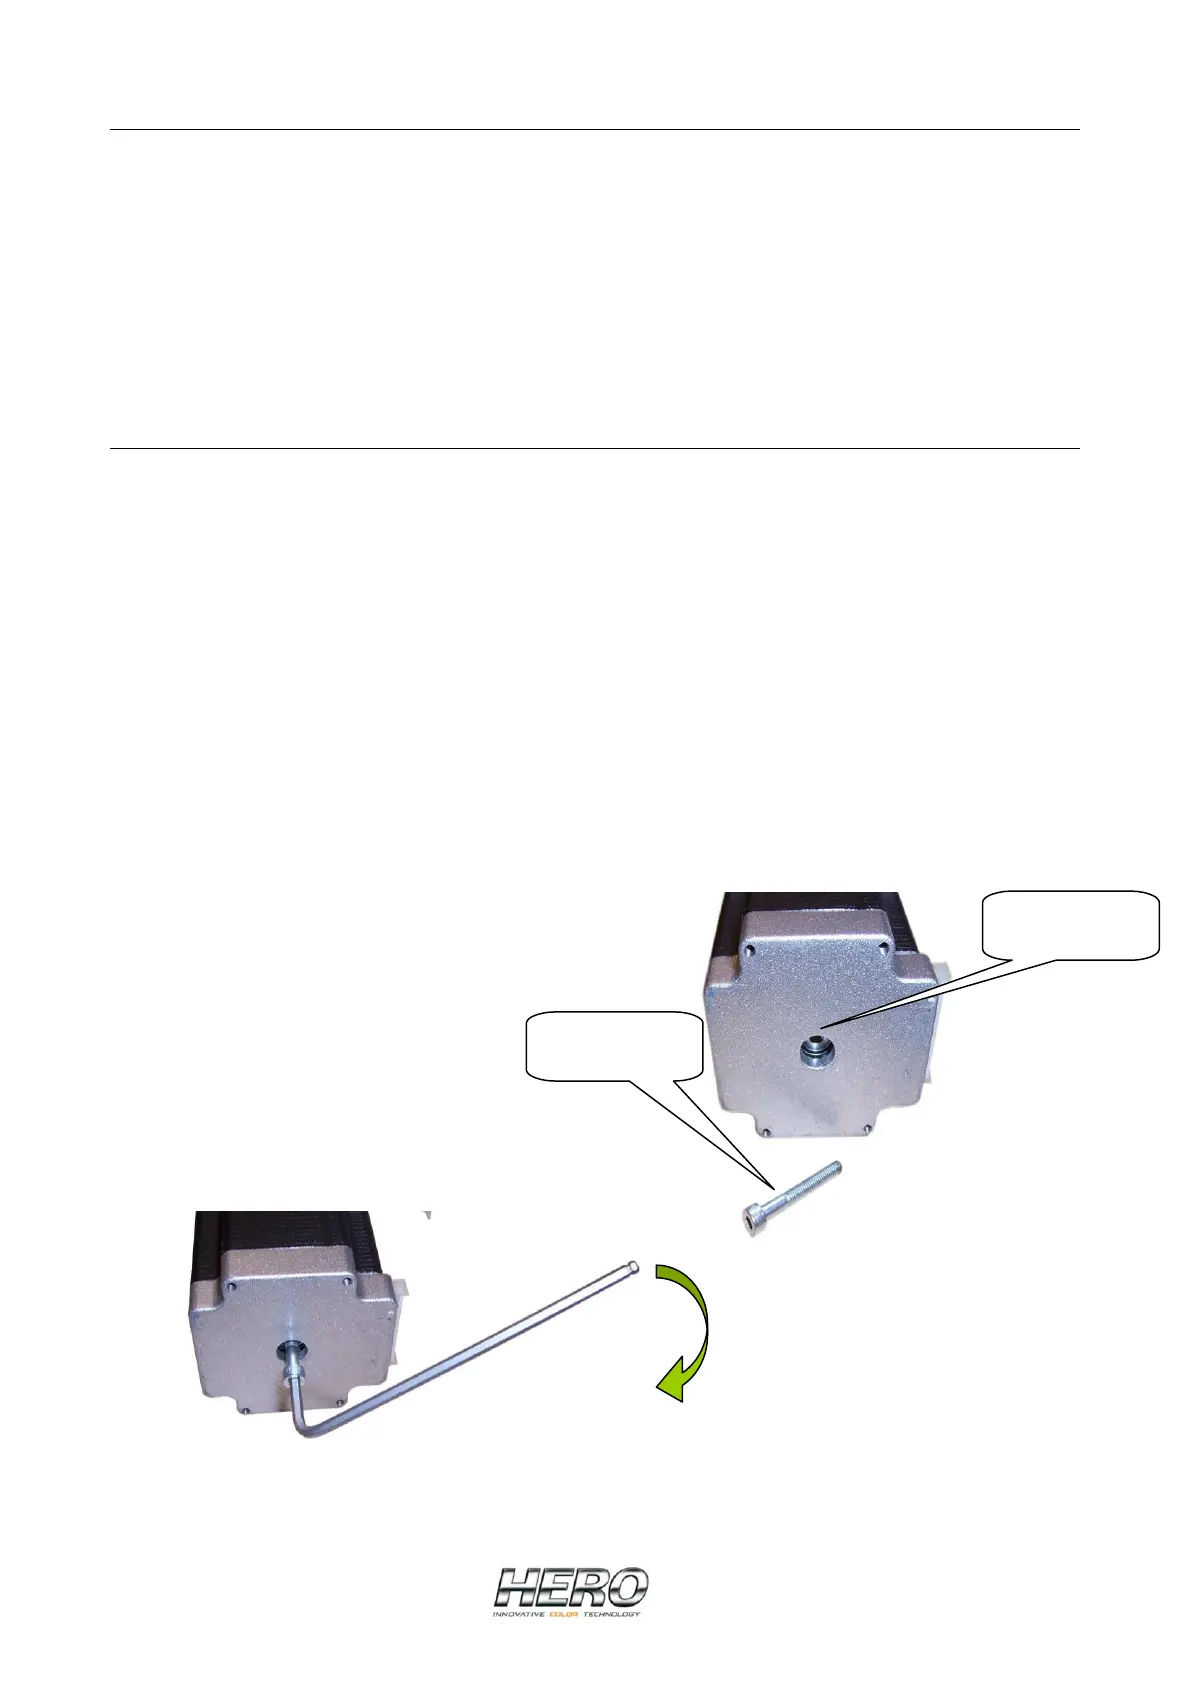
Locate the proper pump cartridge and using the 4 mm key provided with the dispenser, turn
the bolt in the center bottom (facing you) of the stepper motor clockwise. If there is only a
hole and no bolt, thread an M4 (4 mm) X 30 mm screw or bolt into the hole (pump’s drive
shaft-Picture 1) and continue turning it until you feel the pumps’s rotor start to move.
Continue to turn past that point for at least 5 complete revolutions (Picture 2).
Test the pump by dispensing several ounces. Repeat the above process if necessary.
Replace the rear panel on the dispenser. Ensure that the power cord and USB cable are
not damaged or loose.
Reconnect the dispenser to its AC power source.
Pump’s drive
Shaft
Screw/Bolt
M4 x 30
mm
Picture 1
Picture 2
 Loading...