112
EN
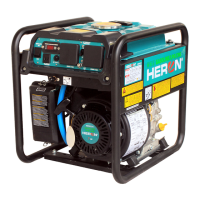
III. Parts and
control elements
Fig. 1, position-description
1) Display -indicator of alternating-current voltage (V),
frequency (Hz), motor hours counter (H) (the toggle button
is under aprotective foil in the bottom part of the display)
2) Circuit breaker of the three-phase power socket 400 V
3) Circuit breaker 48A; for the 16 Aand 32 Asocket combined
4) Circuit breaker for 32 Apower socket
5) Circuit breaker for 16A power socket
6) Choke pull rod
7) On/Off switch
8) Three-phase 400 Vpower socket
9) Toggle switch between 230V power sockets and 400V
power socket; it is not possible to supply from the
230V and 400V power sockets at the same time.
10) 32 Apower socket for amax. draw of 7.3kW
11) Grounding terminal
12) 16 Apower socket for amax. draw of 3.5kW
13) Fuel valve for opening/closing the fuel supply
14) Circuit breaker for 12V power socket
15) 12 Vsocket for charging car batteries
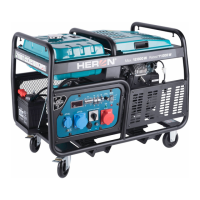
Fig. 2, position-description
1) Fuel filter
2) Spark plug connector
3) Castor wheels (1 pair of castors has brakes)
4) Control panel
5) Oil cooler (radiator)
Fig. 3, position-description
1) Fuel valve purge
2) Alternator cover
3) Rechargeable 12 Vgel battery for the electric start
4) Battery terminals with connection cables
Fig. 4, position-description
1) Exhaust pipe
2) Oil sensor (behind the grille -underside)
3) Spark plug connector
4) Motor oil refill neck plug
5) Oil dipstick
6) Oil filter
Fig. 5, position-description
1) Air filter cover lock nuts
2) Manual pull starter handle
3) Petrol pump
Fig.6, position-description
1) Removable cover for access
to the air filter cover, etc.
2) Handles for removing the cover by lifting
3) Fuel tank cap
4) Fuel level in tank indicator
IV. Preparing the
generator for operation
• WARNING
y Carefully read the entire user's manual before first using
the generator, and keep the manual with the product so
that the user can become acquainted with it. If you lend
or sell the generator to somebody, include this user's
manual with it. Prevent this user's manual from being
damaged. The manufacturer takes no responsibility for
damages or injuries arising from use of the generator
that is in contradiction with this user's manual. Before
using the generator, first acquaint yourself with all the
control elements and parts as well as how to turn it off
immediately in the event of adangerous situation arising.
Before using, first check that all parts are firmly attached
and check that no part of the generator, such as for
example safety protective elements, is damaged or incor-
rectly installed, or missing. Do not use agenerator with
damaged or missing parts and have it repaired or repla-
ced at an authorised service centre for the HERON® brand.
1. After unpacking, check the condition of the
surface, working order of the control ele-
ments of the generator and whether there are
any visible defects, e.g. unconnected cables,
unconnected fuel supply hoses, etc.
2. Place the generator on arigid, level surface in
awell-ventilated location, which is at asafe
distance from ammable and explosive mate-
rials, and away from aammable and explosi-
ve atmosphere.
• ATTENTION
The generator has wheels, where one pair of wheels
has abrake that is controlled by pushing down on it
with one's foot. Pushing down on the large lever (with
the closed padlock symbol) with your foot will engage
the brake, lifting the smaller lever with the open
padlock symbol will release the brake (fig. 7). To secure
the generator in place, always engage the brake on
both wheels. If the generator is standing on aslightly
inclined plane (however at an angle not greater than
10°, see below), place wedges under the wheels to
prevent undesirable movement of the generator. If the
brakes were to fail, the generator could start moving.
• WARNINGS
The generator must not be operated in
enclosed or poorly ventilated areas or
in environments (e.g. in rooms, deeper
outdoor trenches, etc.) since the exhaust
fumes are toxic and may lead to poisoning of people or
animals. Operation in enclosed rooms is only possible
when approved by the workplace safety department
or respective government administration bodies.


 To Next Page