19
wrench. Then you turn the black knurled adjustment nut
towards the pedal arm.
2. Pop the rubber stack out of position by pressing with
2 thumbs on the rear of the pedal backplate.
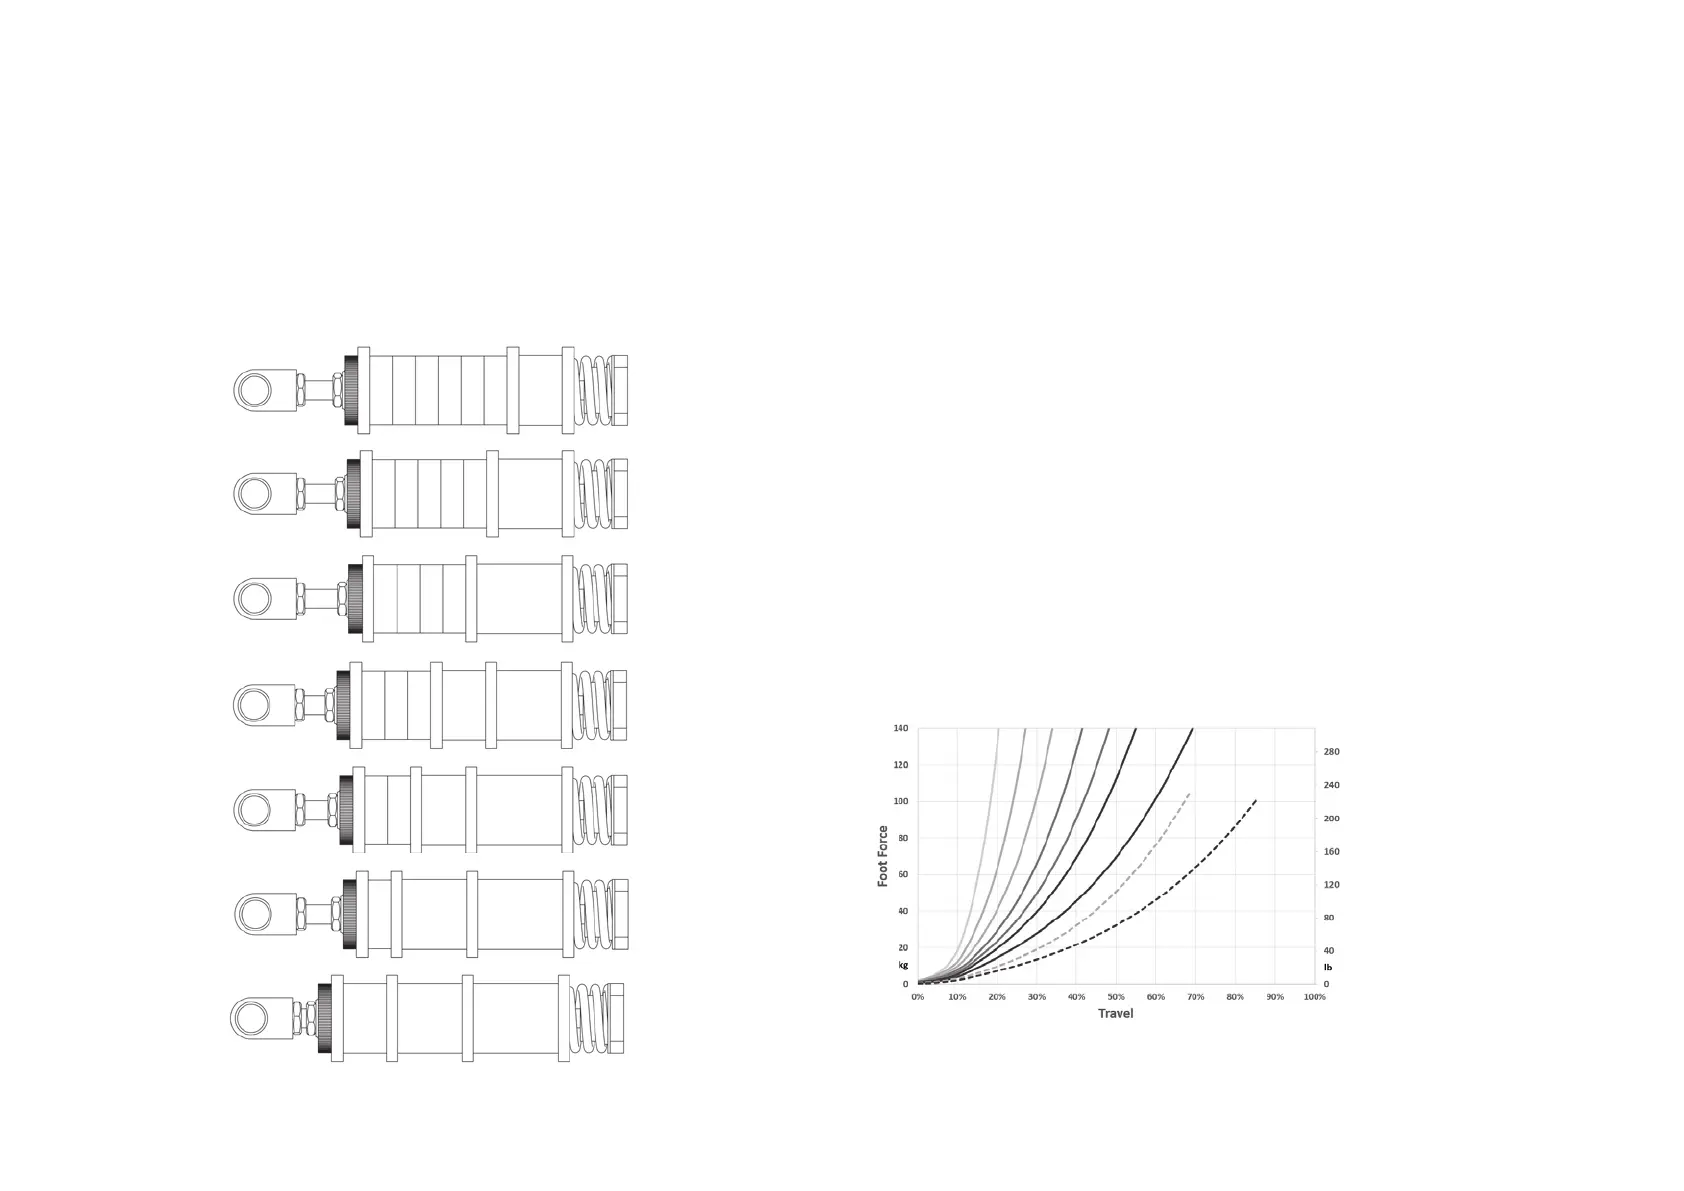
9 possible resistance settings. Dotted lines are soft rubbers.
19
28
37
19 28
19 37
28 37
19 28 37
(A)
(B)
(C)
(D)
(E)
(F) or (X)
(G) or (Y)
A B C D E F G
X
Y
3. Remove or add rubbers, discs and spacers as desired.
Look carefully at the rubber stack schematics to correctly
assemble a rubber stack. There must always be a large disc
before and after every individual rubber.
4. Pop the rubber stack back in position.
5. Re-set the desired preload by turning the knurled nut.
Make sure there is enough tension on the rubber stack so
it won’t pop out. Do not turn the preload adjustment nut
beyond the thread of the rod. If this happens, consider adding
an extra spacer.
6. Lock the knurled nut by tightening the lock nut firmly
against it.
7. Recalibrate the pedals in SmartControl.