EasyManuals Logo
Home>HIKVISION>Digital Camera>2 MP Series

HIKVISION 2 MP Series User Manual

HIKVISION 2 MP Series
10 pages
To Next Page IconTo Next Page
To Previous Page IconTo Previous Page
Page #6 background imageLoading...
Page #6 background image
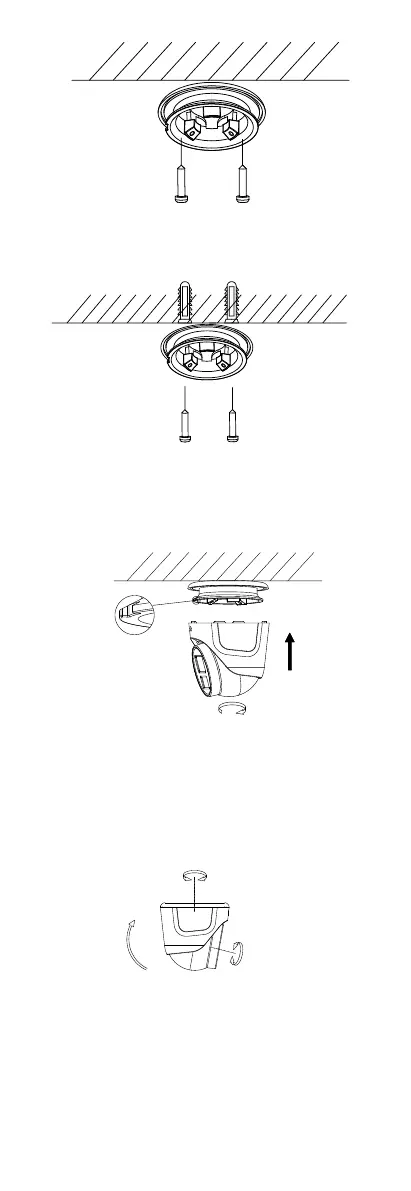
Figure 2-3 Install the Mounting Base to Wooden Ceiling
2). Drill holes for installing expansion bolts at first,
then install the mounting base to cement ceiling
with two PA4 × 25 screws.
Figure 2-4 Install the Mounting Base to Cement Ceiling
Note:
The supplied screw package contains self-tapping
screws, and expansion bolts.
6. Align the screw hole on the main body to the notch,
and press it.
Figure 2-5 Align the screw hole to the Notch
7. Connect the corresponding cables.
8. Power on the camera to check whether the image
on the monitor is gotten from the optimum angle. If
not, adjust the camera according to the figure below
to get an optimum angle.
Pan Position
[0° to 360° ]
Tilt Position
[0° to 80° ]
Rotation Position
[0° to 360° ]
Figure 2-6 3-Axis Adjustment
9. Secure the camera with a screw to finish the
installation.

Questions and Answers:

Question and Answer IconNeed help?

Do you have a question about the HIKVISION 2 MP Series and is the answer not in the manual?

HIKVISION 2 MP Series Specifications

General IconGeneral
BrandHIKVISION
Model2 MP Series
CategoryDigital Camera
LanguageEnglish

Related product manuals