Do you have a question about the HIKVISION DS-TCG406-E and is the answer not in the manual?
Provides instructions for using the product and explains document limitations and terms.
Details product features, service region, and video product initiatives.
Outlines Hikvision's ownership of copyrights and trademarks related to the product.
Limits Hikvision's liability and disclaims warranties for product use and internet risks.
Explains the meaning of symbols like Danger, Caution, and Note used in the manual.
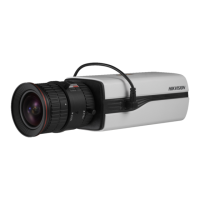
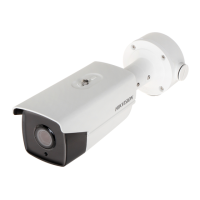
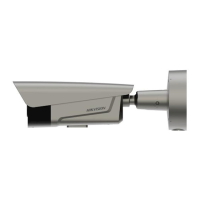
Introduces the Intelligent Entrance ANPR Camera and its applications.
Lists the main technological advancements and functionalities of the ANPR camera.
Explains the initial device activation process using various methods.
Provides default network and login credentials for the device.
Details the steps to activate the device using the SADP software.
Guides users on how to log into the device via web browser for configuration and live view.
Allows for rapid initial setup of capture parameters.
Configures fundamental parameters for quick capture setup, including license plate recognition.
Guides on adjusting image parameters like brightness, contrast, and positioning of detection lines.
Provides advanced configuration options for capture settings.
Configures the device's operating mode for triggering vehicle captures at entrances/exits.
Sets detailed parameters for license plate recognition and supplement light.
Allows users to view live capture feeds and recognized license plate information.
Configures the device to control barrier gates based on vehicle detection.
Manages lists of vehicles allowed or denied entry via the barrier gate.
Sets operational modes and behaviors for the barrier gate linkage.
Configures Wiegand protocol for integration with access control systems.
Describes how to view live video streams and manage playback.
Explains how to initiate and terminate the live video feed.
Allows selection of different visual layouts for the live view.
Configures how multiple video streams are displayed in divided windows.
Chooses between high-quality or fluent video streams based on network conditions.
Instructions for manually capturing still images from the live view.
Instructions for manually recording video clips from the live view.
Enables and disables two-way audio communication with the device.
Controls audio input and output functionality for the device.
Allows users to zoom into specific areas of the live video feed.
Adjusts focus on specific regions of interest within the live view.
Sets the video mode for optimal focus adjustment during setup.
Controls Pan-Tilt-Zoom functions if the camera supports them.
Sets local parameters like live view settings and saving paths.
Describes how to search, play, and download recorded videos from the storage card.
Configures where recorded data is stored, including memory cards.
Details the process of inserting, formatting, and managing the memory card.
Configures FTP parameters for uploading captured pictures to an FTP server.
Configures SDK listening for receiving alarm information and pictures.
Sets up the device to upload captured pictures via an arm host.
Configures ISAPI listening for uploading images.
Configures cloud storage for saving captured pictures as extended storage.
Sets the ratio for video and picture storage allocation.
Configures scheduled recording times for the device.
Adjusts video encoding settings like resolution, bitrate, and frame rate for live view and recording.
Configures camera parameters such as saturation, sharpness, and white balance for clear images.
Manages the Infrared Cut Filter (ICR) mode for day and night image capture.
Configures Region of Interest encoding to prioritize quality in specific areas.
Customizes On-Screen Display information like camera name and date on live view.
Allows specific areas of the image to have their exposure adjusted.
Configures the device's IP address and network interface settings.
Establishes connection to remote management platforms.
Guides on connecting the device to the ISUP (EHome) platform for remote access.
Details connecting the device to the OTAP maintenance platform.
Explains how to connect the device to the Hik-Connect service for remote access.
Configures Dynamic DNS for network access via a domain name.
Configures SNMP for network management and alarm message reception.
Modifies network ports for HTTP, HTTPS, RTSP, SDK, and SADP.
Configures RS-485 serial port parameters for communication with other devices.
Configures RS-232 serial port parameters for debugging or connecting peripherals.
Sets up alarms for network disconnections, IP conflicts, and other exceptions.
Manages user accounts, permissions, and password levels for device access.
Configures IP address filtering to control device access.
Enables user lock feature to enhance data security by locking IP addresses after failed login attempts.
Configures HTTPS for secure remote access, including certificate management.
Guides on creating and installing self-signed SSL certificates for HTTPS.
Details the process of installing authorized SSL certificates for enhanced security.
Manages SSH service for debugging purposes, recommending disabling it for general use.
Configures RTSP authentication to improve network access security.
Implements timeout logout for static pages to enhance network security.
Sets password expiration policies to enforce regular password changes.
Displays basic information, algorithms library version, and device status.
Manages system logs for security audit and troubleshooting.
Enables logging of security audit events to a log server.
Provides tools to search and locate issues within system logs.
Details the process of upgrading the device firmware and plugins.
Explains how to reboot the device via software controls.
Guides on restoring device parameters to default or factory settings.
Synchronizes the device's internal clock with external time sources.
Configures Daylight Saving Time settings based on the device's region.
Provides debugging configurations for technical professionals.
Enables specific functions for device debugging and information display.
Sets vehicle capture and recognition services for debugging purposes.
Exports device configuration parameters for backup or transfer.
Imports configuration files to set up devices with identical parameters.
Exports debug files for troubleshooting and maintenance.
Exports diagnostic information for troubleshooting and maintenance purposes.
| Model | DS-TCG406-E |
|---|---|
| Category | Digital Camera |
| Sensor Type | CMOS |
| Effective Pixels | 4MP |
| Focal Length | 2.8 mm |
| IR Distance | Up to 30 m |
| Resolution | 2560 × 1440 |
| Video Resolution | 2560 × 1440 |
| Lens Type | Fixed |
| Video Compression | H.265/H.264 |
| Audio Compression | G.711A/G.711Mu/AAC |
| Network Interface | RJ45 10M/100M Ethernet |
| Communication Interface | RS-485 |
| Power Supply | PoE |
| Working Temperature | -30°C to 60°C |
| Operating Conditions | Humidity: ≤ 95% |
| Protection Level | IP67 |