This document is a Quick Start Guide for a Hikvision Bullet Network Camera, providing essential information for its installation, operation, and maintenance.
The camera's primary function is surveillance, capturing video footage for security purposes. It is designed for network integration, allowing remote access and management. The device supports various installation methods, including wall and ceiling mountings, and offers flexibility in adjusting its viewing angle.
Usage Features:
The camera is designed for ease of use, with a straightforward installation process. It includes a memory card slot for local storage, a reset button for restoring default settings, and standard network and power interfaces.
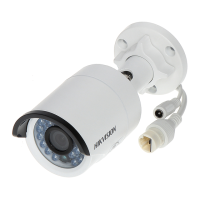
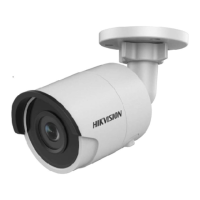
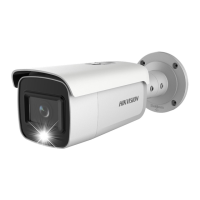
- Installation: The guide details a multi-step installation process. Initially, the camera body is shown with different aesthetic variations, indicating a series of models within the bullet camera range. The installation involves securing the camera to a surface using screws, with a drill template provided for accurate hole placement. For outdoor or exposed installations, a waterproof connection for the network cable is illustrated, emphasizing the importance of protecting connections from environmental elements. Grounding the device is also highlighted as a critical step for safety and proper functioning. The camera's mounting bracket allows for flexible adjustment of the viewing angle, with instructions for rotating the camera body horizontally (0° - 360°) and vertically (0° - 90°), and for rotating the lens (0° - 360°), ensuring comprehensive coverage. An optional accessory, likely a junction box or additional mounting plate, is shown for certain installation scenarios, which can be purchased separately.
- Activation and Access: To activate and access the network camera, users are instructed to scan a QR code provided in the guide. This likely leads to an application or web interface for initial setup, including setting up network parameters and user credentials. The guide notes that mobile data charges may apply if Wi-Fi is unavailable during this process.
- Reset and Restore: The camera features a reset button that, when pressed for approximately 10 seconds during power-on or reboot, restores the device to its default settings. This includes resetting the user name, password, IP address, and port number, which is useful for troubleshooting or reconfiguring the device. The location of the reset button is referenced to the interface introduction page.
Maintenance Features:
The guide provides important cautions and warnings related to the device's handling, power supply, system security, battery, and operating environment, all contributing to its longevity and safe operation.
- General Cautions and Warnings: Users are advised to use the product in compliance with local laws, electrical safety regulations, and fire prevention regulations. During transportation, the device should be kept in its original or similar packaging to prevent damage.
- Power Supply: The power source must meet specific requirements (limited power source or PS2 according to IEC 60950-1 or IEC 62368-1 standard). Users are warned against connecting multiple devices to a single power adapter to avoid overheating or fire hazards. Ensuring the plug is properly connected to the power socket is also emphasized. The standard power supply is 12 VDC or PoE, and users must ensure their power supply matches the device's requirements. Power should be disconnected before wiring, installing, or disassembling the device.
- System Security: The installer and user are responsible for configuring passwords and security settings to protect the device from unauthorized access.
- Battery: The device may contain a battery, and specific warnings are given regarding its handling. It is not suitable for use in locations where children are likely to be present. There is a risk of explosion if the battery is replaced with an incorrect type, and used batteries must be disposed of according to instructions. Improper replacement may defeat safeguards. Batteries should not be disposed of in fire or hot ovens, mechanically crushed or cut, or left in extremely high or low temperatures or low air pressure, as these actions can lead to explosion or leakage of flammable substances. The guide includes symbols for battery disposal and indicates that the battery may contain cadmium (Cd), lead (Pb), or mercury (Hg).
- Maintenance and Cleaning: If the product malfunctions, users should contact their dealer or a service center, as unauthorized repair or maintenance is not covered. Some components, like electrolytic capacitors, require regular replacement, and periodic checking is recommended. For cleaning, a soft and dry cloth should be used on the product cover, avoiding alkaline detergents.
- Using Environment: The device should not be exposed to laser beams, high electromagnetic radiation, or dusty environments. Indoor-only devices require a dry and well-ventilated environment. The lens should not be aimed at the sun or other bright lights. The operating temperature range is specified as -30 °C to 60 °C (-22 °F to 140 °F), with humidity at 95% or less (non-condensing). The device should not be placed in extremely hot, cold, dusty, or damp locations.
- White Light Illuminator (If supported): If the camera includes a white light illuminator, users are warned about possibly hazardous optical radiation. Direct staring at the operating light source is harmful to the eyes. Appropriate eye protection should be worn, or the white light should be kept off during assembly, installation, or maintenance.
- Emergency Procedures: In case of smoke, odor, or noise from the device, users must immediately turn off the power, unplug the power cable, and contact the service center.
- Time Synchronization: For the first-time access, device time should be set manually if not synchronized with the network. This can be done via a web browser or client software.
- Installation Precautions: The wall or mounting surface must be strong enough to withstand at least four times the weight of the device and its mount. No reflective surfaces should be too close to the device lens, as IR light reflection can cause image issues. The device should be firmly secured to any wall or ceiling mounting, with sufficient space for installation and accessories. Before installation, users should ensure the device is in good condition and all assembly parts are included.
- Hot Surface Warning: A sticker indicates that certain parts can become hot and should not be touched without care. Users are advised to wait one-half hour after switching off before handling these parts. This warning is particularly relevant for devices installed in restricted access locations, where only service personnel or instructed users should access.