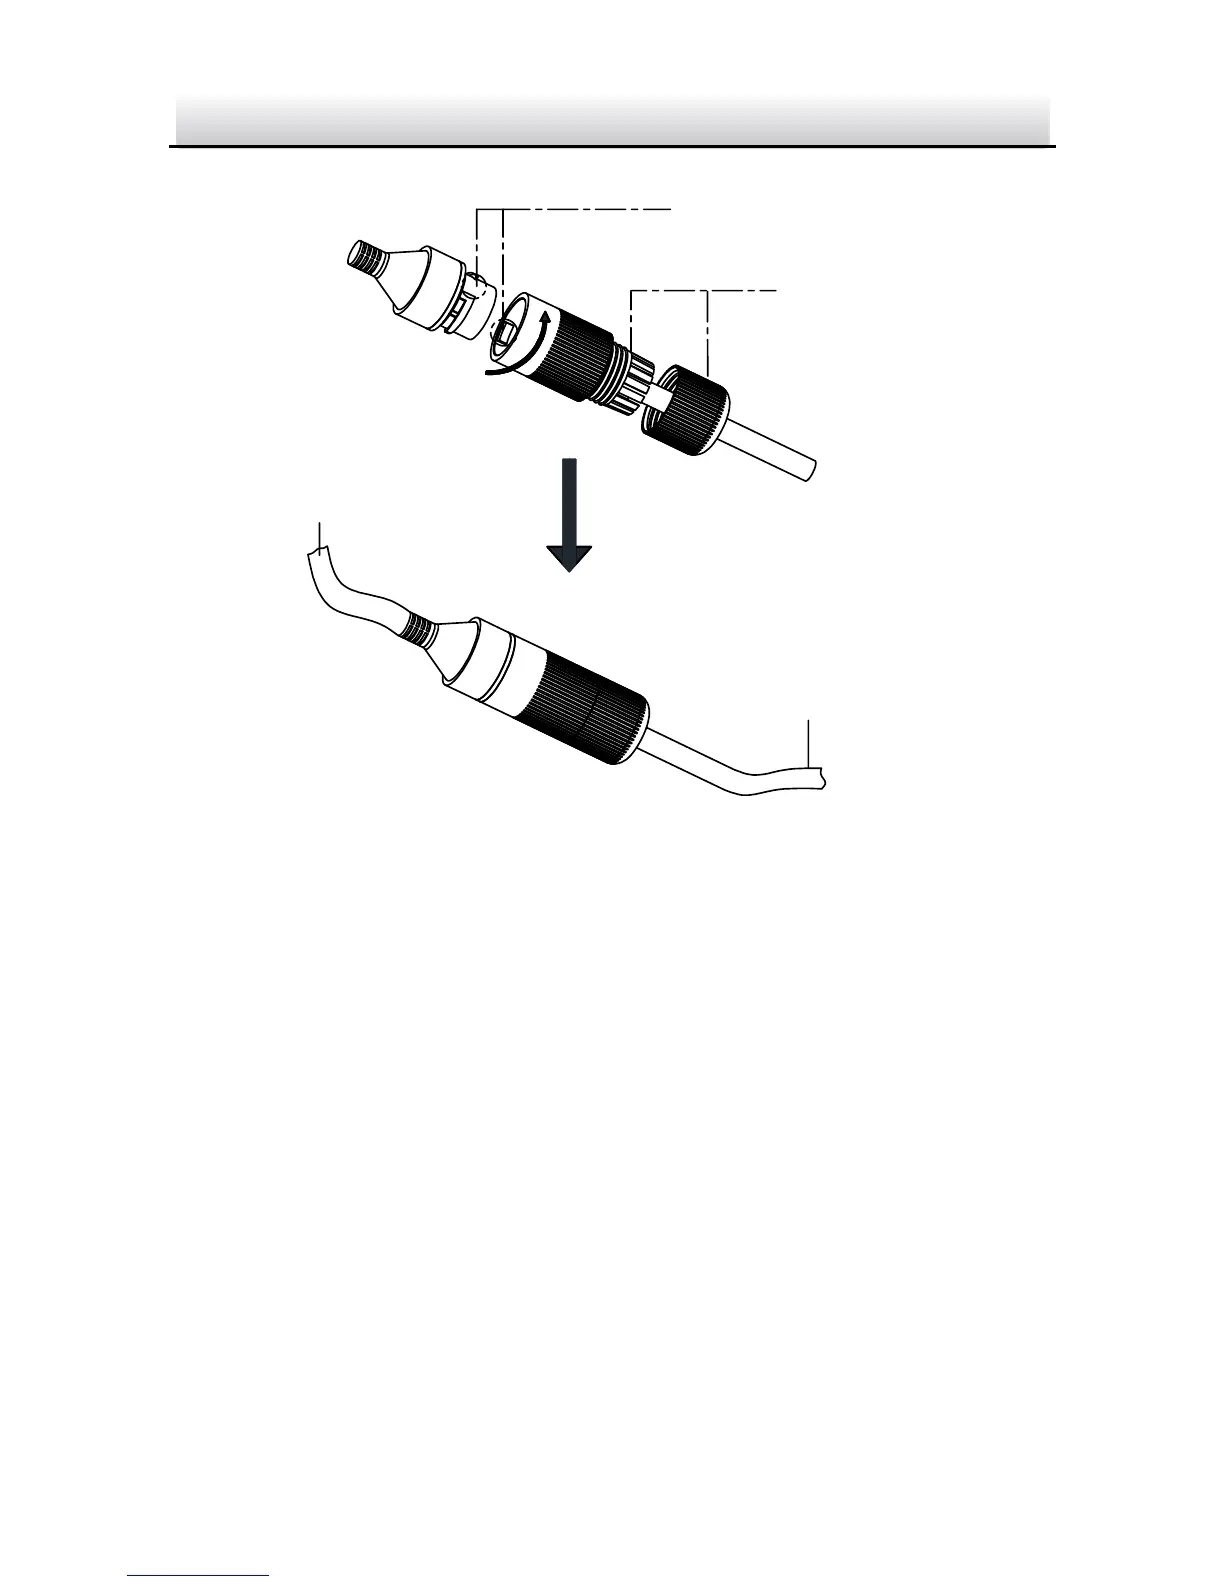
Water-proof Accessory Installation Figure 2-21
Steps:
Feed the plugless network cable ⑦ through the lock nut ⑥, 1.
waterproof rubber gasket ⑤ (rubber gasket inset ridge must
face waterproof endcap), and the water-proof endcap ④ in
order.
Crimp an RJ-45 network plug ③onto the end of the cable, 2.
taking care to insert the twisted pairs of wires in correct order.
Place the O-type gasket ② onto the end of the camera’s 3.
network interface socket ①.



 To Next Page