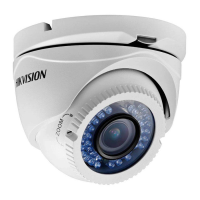
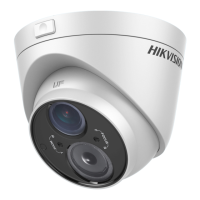
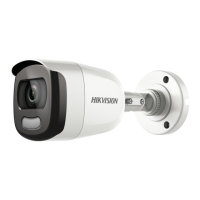
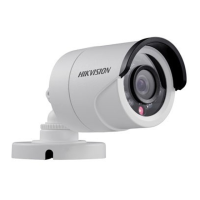
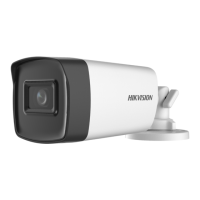
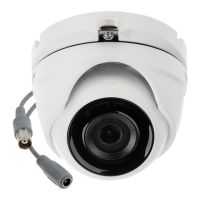
This document describes a Hikvision Turbo HD TVI Bullet & Turret Camera, designed for both indoor and outdoor surveillance applications. The camera is suitable for various environments, including roads, warehouses, parking lots, offices, and campuses. It offers high-performance imaging and a range of adjustable settings to optimize video quality and adapt to different conditions.
Function Description
The camera's primary function is to capture high-definition video surveillance. It utilizes a high-performance CMOS sensor to deliver 1080p resolution, ensuring clear and detailed images. The camera supports various exposure modes, white balance settings, and day/night functionalities to adapt to changing lighting conditions. It also incorporates digital noise reduction (DNR) for improved image clarity in low-light scenarios and a mirror function for flexible image orientation.
Usage Features
Installation:
The camera supports both wall and ceiling mounting, with detailed instructions provided for each type. Installation involves using a drill template to mark screw holes and an optional cable hole for routing cables. The mounting base is then secured to the chosen surface with supplied screws or expansion bolts, depending on the wall material (cement or wood). After securing the base, the camera body is attached and aligned.
3-Axis Adjustment:
The camera features a 3-axis adjustment mechanism, allowing for precise positioning to achieve an optimum viewing angle. This includes:
- Pan Position: Adjustable from 0° to 360° by loosening and tightening a specific screw.
- Tilting Position: Adjustable from 0° to 90° (for Type I and II cameras) or 0° to 180° (for Type III cameras) by manipulating another screw. For Type IV cameras, the tilt position is 0° to 75°.
- Rotation Position: Adjustable from 0° to 360° by adjusting a third screw or rotating the camera body/enclosure.
Menu Navigation:
The camera's settings are accessed through an on-screen display (OSD) menu, which can be called up via the PTZ Control interface of a connected TVI DVR or by calling preset No. 95. Navigation within the menu is intuitive:
- Selection: Use the up/down direction buttons to select an item.
- Confirmation: Press the Iris+ button to confirm a selection.
- Adjustment: Use the left/right direction buttons to adjust the value of the selected item.
Exposure Settings:
- Brightness: Users can adjust the image brightness from 1 to 10, with higher values resulting in a brighter image.
- Exposure Mode: Options include GLOBAL and BLC (Backlight Compensation).
- GLOBAL: This is the standard exposure mode, automatically adjusting lighting distribution and variations.
- BLC: Compensates for strong backlighting to make foreground objects clearer, though it may over-expose the background. BLC brightness can be adjusted from 0 to 8.
- AGC (Auto Gain Control): Optimizes image clarity in poor light conditions. AGC level can be set to HIGH, MIDDLE, LOW, or OFF. Note that AGC may amplify noise.
- DWDR (Digital Wide Dynamic Range): Enhances image clarity in backlight conditions by balancing brightness levels across the entire image, revealing details in both bright and dark areas.
White Balance (WB) Settings:
- ATW (Auto Tracking White Balance): Automatically adjusts white balance based on the scene's color temperature.
- MWB (Manual White Balance): Allows manual adjustment of red (RGAIN) and blue (BGAIN) color shades from 1 to 255.
Day/Night Settings:
- COLOR: The image remains colored at all times.
- B/W (Black White): The image is always black and white.
- SMART: The IR light automatically activates in low-light conditions. The SMART IR value can be adjusted from 0 to 3 to prevent over-exposure, with higher values providing more pronounced effects.
Video Settings:
- Image Mode: Adjusts image saturation, with options for STD (Standard) or HIGH-SAT (High Saturation).
- Contrast: Enhances the difference between light and dark areas in an image, adjustable from 1 to 10.
- Sharpness: Determines the level of detail reproduced by the imaging system, adjustable from 1 to 10.
- Color Gain: Adjusts the color gain, with values ranging from 1 to 10.
- DNR (Digital Noise Reduction): Reduces noise, especially in moving images under poor light, resulting in sharper and more accurate images. DNR can be set from 1 to 9.
- Mirror: Provides options to flip the image: OFF (disabled), H (horizontal 180°), V (vertical 180°), or HV (both horizontal and vertical 180°).
Maintenance Features
General Precautions:
- Power Supply: Ensure the input voltage meets SELV and Limited Power Source standards (12V DC). Avoid connecting multiple devices to a single power adapter to prevent overload and fire hazards.
- Physical Handling: Do not drop the camera or subject it to physical shock. Avoid touching sensor modules with fingers; if cleaning is necessary, use a clean cloth with a small amount of ethanol.
- Environmental Conditions: Do not expose the camera to direct sunlight or extremely bright places, as this can cause blooming/smearing and affect sensor endurance. Keep the camera away from laser beams, as they can burn out the sensor. Avoid placing the camera in extremely hot, cold, dusty, or damp locations, and protect it from high electromagnetic radiation.
- Ventilation: Ensure good ventilation to prevent heat accumulation.
- Liquid Exposure: Keep the camera away from liquids during operation.
- Shipping: When transporting, pack the camera in its original packaging or similar protective material.
Troubleshooting and Support:
- Malfunctions: If the camera malfunctions (e.g., smoke, odor, noise), immediately power it off, unplug the cable, and contact the service center.
- Self-Repair: Users are explicitly advised not to disassemble the camera for repair or maintenance, as this voids responsibility for problems caused by unauthorized intervention.
- Dealer Contact: For any questions, requests, or issues, contact the dealer or the nearest service center.
Reset Function:
- RESET: The camera includes a RESET function within the menu, allowing users to restore all settings to their factory default values.
Saving Settings:
- SAVE & EXIT: After making adjustments, users must navigate to the SAVE & EXIT option in the menu and click Iris+ to save the changes and exit the menu.