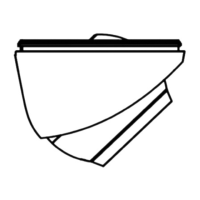
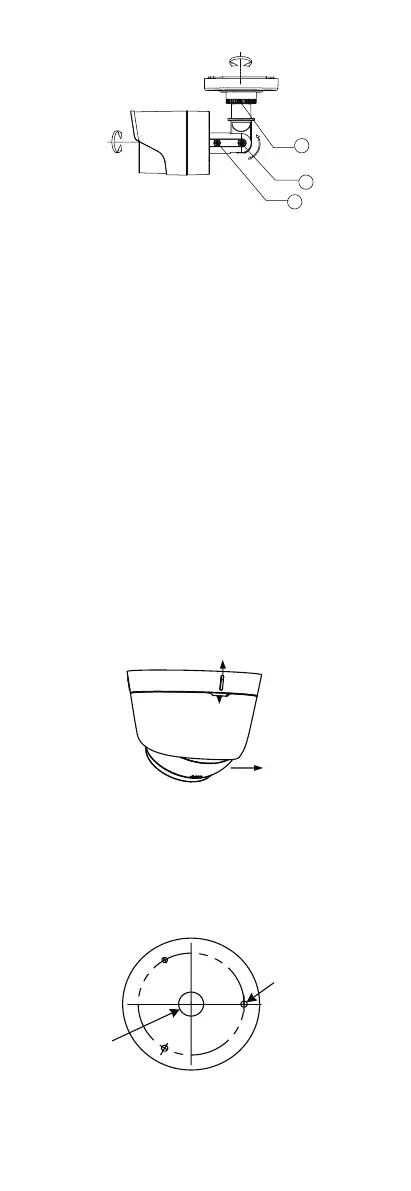
Figure 2. 6 3-Axis Adjustment
1). Loosen the No.1 adjusting screw to adjust the
pan position (0° to 360°).
2). Tighten the No.1 adjusting screw.
3). Loosen the No.2 adjusting screw to adjust the
tilting position (0° to 180°).
4). Tighten the No. 2 adjusting screw.
5). Loosen the No.3 adjusting screw to adjust the
rotation position (0° to 360°).
6). Tighten the No.3 adjusting screw.
2.4 Installation of Type III camera
Before you start:
Both wall mounting and ceiling mounting are suitable
for the turret camera. Ceiling mounting will be taken as
an example in this section. You can take the steps of
ceiling mounting as a reference, when adopting wall
mounting.
Steps:
1. Disassemble the turret camera by rotating the
camera to align the notch to one of the marks, as
shown in Figure 2. 1.
Figure 2. 7 Disassemble the Camera
2. Remove the mounting base from the camera body
with a flat object, e.g., a coin.
3. Paste the drill template (supplied) to the place
where you want to install the camera, and then drill
the screw holes and the cable hole (optional) on the
ceiling according to the drill template.
 Loading...