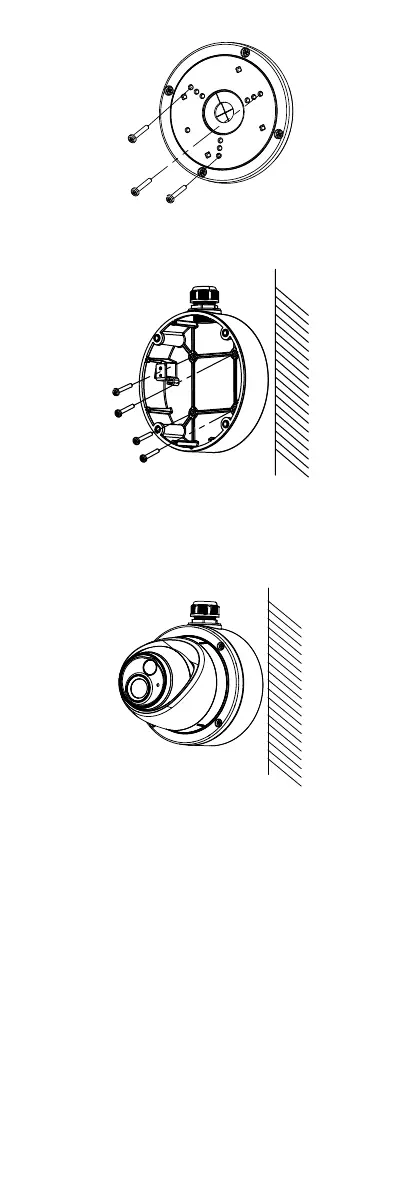
Figure 2-11 Install the Turret Camera’s Mounting Base
5. Secure the junction box’s body to the ceiling/wall
with supplied screws.
Figure 2-12 Secure the Junction Box’ Camera Body to
Ceiling/Wall
6. Combine the junction box’s cover with the its body.
7. Repeat steps 5 to 8 of 2.1 Ceiling/Wall Mounting
without Junction Box. to install the camera to the
junction box.
Figure 2-13 Install the Camera to the Junction Box
2.4 Wall Mounting
Before you start:
You need to purchase a wall mount separately.
Steps:
1. Drill four screw holes in the wall according to the
holes of the mount.
2. Install the mount to the wall by aligning the four
screw holes of the bracket with expansion screws on
the wall.
3. Secure the mount with four hex nuts and washers.

 Loading...