Do you have a question about the HIKVISION DS-7216HVI-SH and is the answer not in the manual?
Lists essential steps and conditions to consider before installing the DVR.
Provides instructions for correctly installing the DVR unit, including rack mounting and grounding.
Details the steps and requirements for installing a hard disk drive (HDD) into the DVR.
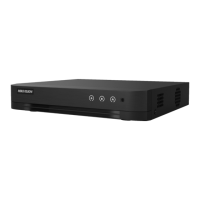
Details the controls and indicators on the front panel for various DVR models.
Illustrates and describes the various input/output ports on the rear panel of different DVR models.
Details on how to wire the alarm input interface of the DVR.
Provides diagrams and steps for connecting alarm output and devices.
Instructions for connecting RS-485 devices, such as pan/tilt units, to the DVR.
Provides specifications for various DS-7200 series models (HFI, HVI, HWI, HVI-SV, HWI-SL).
Provides specifications for DS-7224/7232HVI-SH and DS-7224/7232HWI-SH models.
Provides specifications for DS-7300 series models (HFI, HWI, HI).
Provides specifications for DS-8100 series models (HCI, HFSI, HWSI).
Presents a visual overview of the DVR's menu system and its main categories.
Provides essential procedures for safely starting up and shutting down the DVR to ensure longevity.
Guides users through initial device setup, including resolution and system settings.
Explains the status icons displayed on the live view screen for camera monitoring.
Details how to use the mouse to interact with the live view interface for various functions.
Describes the options available when right-clicking the mouse in live view mode.
Details the interface for managing and adding IP cameras to the system.
Explains the process for adding IP cameras using custom settings and IP addresses.
Guides on setting up continuous or motion detection recording for all channels via the live view menu.
Allows immediate playback of the last five minutes of recorded video for a selected channel.
Enables playback of recorded files for specific channels or simultaneous playback of multiple channels.
Explains the use of the playback interface toolbar and time selection for controlling playback.
Details the process of backing up recorded files to external devices via the export interface.
| Video Input | 16 channels |
|---|---|
| Video Compression | H.264 |
| SATA Interface | 2 SATA interfaces |
| Power Supply | 12V DC |
| Power Consumption | ≤ 20 W |
| Operating Temperature | -10°C to +55°C |
| Video Output | 1 × VGA, 1 × HDMI |
| Recording Resolution | 4CIF/2CIF/CIF/QCIF |
| Playback Resolution | 4CIF/2CIF/CIF/QCIF |
| Frame Rate | 25 fps (PAL), 30 fps (NTSC) |
| Network Interface | 1 RJ-45 10/100/1000Mbps self-adaptive Ethernet interface |
| USB Interface | 2 USB 2.0 ports |
| Audio Output | 1 channel (RCA) |
| Alarm Input | 16-ch |
| Alarm Output | 4-ch |
| Operating Humidity | 10% to 90% (non-condensing) |