ECI-T24Fx Quick Start Guide
QSG ECI-T24Fx 041018NA 8
Note:
Four camera types have the same installation method. We will use the III/IV turret camera
as an example to illustrate the installation.
Before You Start:
Both wall and ceiling mounting are suitable for the turret camera. Ceiling mounting will be
used as an example for this section, and can be used as a reference for wall mounting.
Steps:
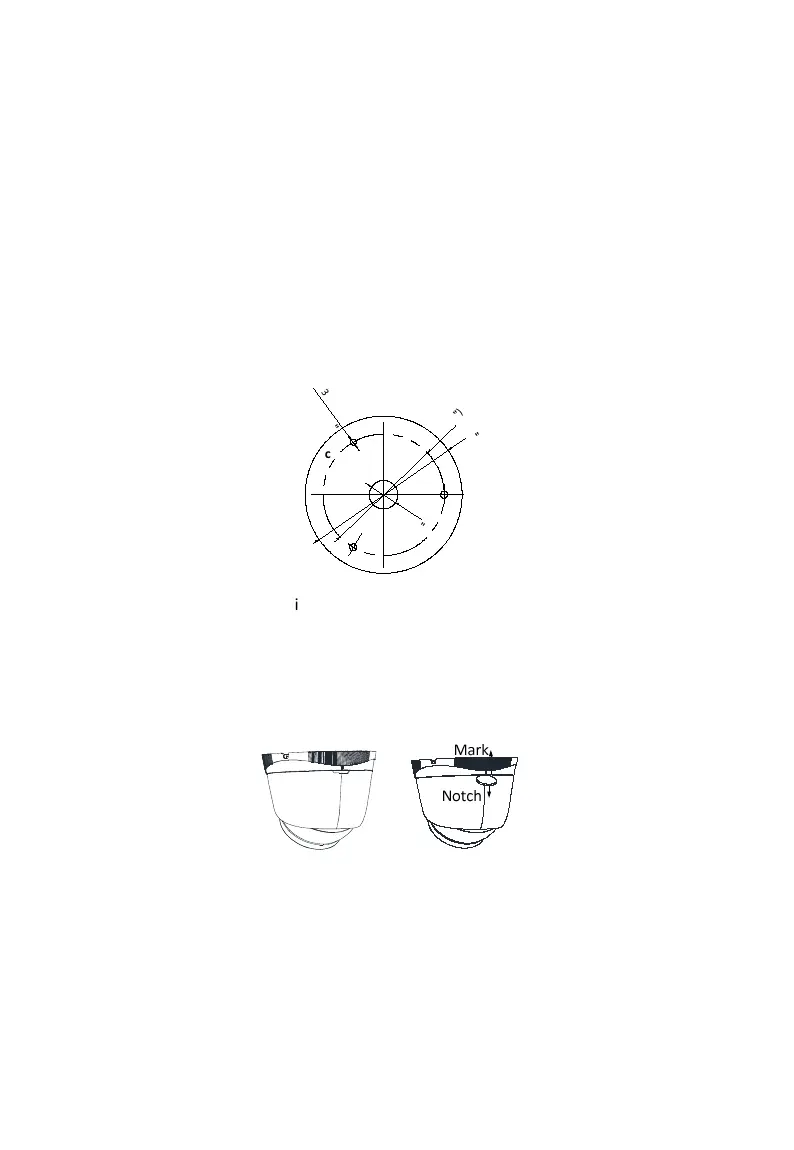
1. Paste the drill template (supplied) to the desired mounting position on the ceiling.
2. Drill the screw holes and the cable hole in the ceiling according to the drill template.
Note:
Drill the cable hole if using the ceiling outlet to route the cable.
Φ
8
5
m
m
(
3
.
3
5
"
)
Φ
1
1
0
m
m
(
4
.
3
3
"
-
Φ
4
.
2
m
m
(
0
.
1
7
"
)
Screw Hole
Φ
2
0
m
m
(
0
.
7
9
"
)
Figure 2-1 The Drill Template
3. Disassemble the camera.
1). Rotate the camera to align the notch with one of the marks.
2). Pry the mounting base with a flat object (e.g., a coin) to remove it from the camera
body.
Figure 2-2 Disassemble the Camera
4. Attach the mounting base to the ceiling with the supplied screws.
Notes:
The supplied screw package contains both self-tapping screws and expansion bolts.
If the ceiling is made of cement, expansion bolts are required to fix the camera. If the
ceiling is made of wood, self-tapping screws are required.
 Loading...