This document is a Quick Start Guide for a Network Turret Camera, providing instructions for installation, setup, and basic operation.
Function Description
The Network Turret Camera is a surveillance device designed for network connectivity, allowing for remote monitoring and management. It captures video and can be integrated into a larger security system. The camera supports various mounting options, including ceiling, junction box, and inclined base mounting, as well as wall mounting with an optional bracket. It is designed to be connected to a network, either directly to a computer or via a switch/router, for configuration and operation. The camera can be activated and managed through a web browser or SADP software, and it supports the HiLookVision app for mobile device access and management.
Important Technical Specifications
The manual outlines several technical aspects and requirements for the camera:
Power:
- The standard power supply is 12 VDC.
- For cameras supporting Power over Ethernet (PoE), power can be supplied along with data on an Ethernet cabling, provided a switch supports PoE functionality.
Network and Connectivity:
- The camera is a network device, requiring network access for full functionality.
- Default IP address: 192.168.1.64. The camera should belong to the same subnet as the computer for initial setup.
- Supports DHCP for automatic IP address assignment.
- Web browser compatibility: Microsoft Windows XP SP1 and above (Internet Explorer 8.0 and above, Apple Safari 5.0.2 and above, Mozilla Firefox 5.0 and above, Google Chrome 18 and above).
- Operating System requirements: CPU 2.0 GHz or higher, RAM 1G or higher, Display 1024x768 resolution or higher.
- Supports HiLookVision service for remote access and management.
Storage:
- The camera supports memory card installation for local storage. The memory card status can be checked and initialized via the Device Settings interface.
- The status changes from Uninitialized to Normal, enabling event-triggered video recording and motion detection.
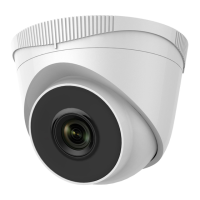
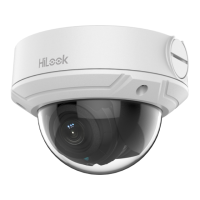
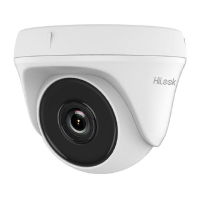
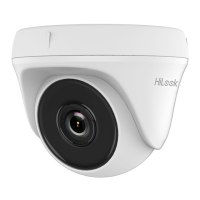
Physical Specifications (Appearance Description - Type I, II, III):
While specific dimensions are not provided, the components are listed:
- Enclosure: The outer casing of the camera.
- Camera Body: The main unit containing the lens and internal components.
- Mounting Base: The part used to attach the camera to a surface.
- Power Cord: For electrical power connection.
- Network Cable: For data and potentially PoE connection.
- Lens: The optical component for image capture (Type II and III).
- MIC: Microphone for audio input (Type III).
- Front Cover: A protective cover (Type III).
- Memory Card Slot Cover: Protects the memory card slot (Type III).
Environmental Considerations:
- For outdoor installation, waterproof accessories or tapes are required to waterproof cables to prevent short circuits or moisture damage.
Usage Features
Installation:
- Memory Card Installation: Rotate the camera to expose the memory card slot, then loosen screws to remove the cover and insert the memory card.
- Ceiling Mounting: Requires a drill template for screw holes and cable routing. The camera body is disassembled, the mounting base is fixed to the ceiling, and then the camera body is reassembled and attached.
- Mounting with Junction Box: Involves using a drill template, fixing the junction box to the wall, securing the camera's mounting base to the junction box, and then attaching the camera body.
- Mounting with Inclined Base: Similar to junction box mounting, but uses an inclined base.
- Wall Mounting: Requires a separate wall mounting bracket. Drill holes, install the bracket, and then attach the camera's mounting base to the bracket.
- Waterproof Measures: Instructions for installing a waterproof jacket on the network cable and wrapping other cables to prevent water ingress.
Network Setup and Activation:
- Direct Connection: Connect the camera directly to a computer using a network cable.
- Via Switch/Router: Connect the camera to a switch or router, which is then connected to a computer.
- Activation via Web Browser: Access the camera's IP address (default 192.168.1.64) in a web browser. A strong password must be set for the "admin" user during activation. The password should be 8 to 16 characters, including at least two kinds of characters (uppercase, lowercase, numbers, special characters).
- Activation via SADP Software: Use the SADP software to detect online devices. Select the inactive device, input and confirm a strong password to activate it.
- Modify IP Address: After activation, the IP address can be modified via SADP software or web browser, either manually or by enabling DHCP.
Access via Web Browser:
- Login to the camera's web interface using the assigned IP address and credentials.
- Install a plug-in to view live video and manage the camera.
Operate via HiLookVision App:
- Enable HiLookVision Service: This can be done via SADP software or web browser. It requires setting a verification code (6 to 12 letters or numbers, or a combination of both).
- HiLookVision Setup: Download and install the HiLookVision app, register an account, and log in.
- Add Camera to HiLookVision: Connect the camera to a router. Scan the QR code on the camera or its packaging, or manually input the verification code and serial number to add the camera.
Memory Card Initialization:
- Check the memory card status in the Device Settings interface. If "Uninitialized," tap to initialize it. This changes the status to "Normal" and enables recording and motion detection.
Maintenance Features
General Precautions and Safety:
- Ensure the device is in good condition and all assembly parts are included.
- Verify the wall is strong enough to withstand the camera's weight and bracket.
- The IR light from the camera may reflect back into the lens, causing reflection; ensure no reflective surfaces are too close.
- Proper configuration of passwords and other security settings is the responsibility of the installer and/or end-user.
- Adhere to local and regional electrical safety regulations.
- Input voltage should meet the SELV (Safety Extra Low Voltage) and Limited Power Source with 12 VDC according to IEC60950-1 standard.
- Avoid connecting several devices to one power adapter to prevent overload, overheating, or fire hazard.
- Ensure the plug is firmly connected to the power socket.
- If smoke, odor, or noise occurs, turn off power, unplug the cable, and contact the service center.
- Make sure the power supply voltage is correct.
- Do not drop the camera or subject it to physical shock.
- Do not touch sensor modules with fingers. If cleaning is necessary, use a clean cloth with a bit of ethanol and wipe it gently.
- If the camera will not be used for an extended period, replace the lens cap to protect the sensor from dirt.
- Avoid aiming the camera at the sun or extra bright places to prevent blooming or smearing.
- The sensor may be burned out by a laser beam; ensure the surface of the sensor is not exposed to laser beams.
- Avoid placing the camera in extremely hot, cold, dusty, or damp locations, and do not expose it to high electromagnetic radiation.
- Ensure good ventilation and avoid heat accumulation.
- Keep the camera away from liquid.
- Pack the camera in its original packaging for delivery.
- Regular part replacement: use electrolytic capacitors of the equipment that should be replaced regularly according to their average enduring time. Contact the dealer for more details.
- Improper use or replacement of the battery may result in explosion. Replace with the same or equivalent type.
- If the product does not work properly, contact the dealer or nearest service center. Do not attempt to disassemble the camera yourself.
Regulatory Information:
- FCC Information: Changes or modifications not expressly approved by the party responsible for compliance could void the user's authority to operate the equipment. The device complies with part 15 of the FCC Rules, designed to provide reasonable protection against harmful interference.
- EU Conformity Statement (CE Mark): The product and accessories are marked with "CE" and comply with applicable harmonized European standards, including EMC Directive 2014/30/EU and RoHS Directive 2011/65/EU.
- WEEE Directive (2012/19/EU): Products marked with this symbol cannot be disposed of as unsorted municipal waste in the European Union. Proper recycling is required.
- Battery Directive (2006/66/EC): Batteries containing cadmium (Cd), lead (Pb), or mercury (Hg) cannot be disposed of as unsorted municipal waste. Proper collection and recycling are required.
- Industry Canada ICES-003 Compliance: The device meets CAN ICES-3 (B)/NMB-3(B) standards.
Safety Instructions:
- Warnings: Serious injury or death may occur if any of the warnings are neglected.
- Cautions: Injury or equipment damage may occur if any of the cautions are neglected.
- Hot Surface Warning: For devices with this sticker, the device is intended for installation in a restricted access location, and access can only be gained by service persons or users who have been instructed about the reasons for the restrictions and any precautions to be taken.