Do you have a question about the Hilti PD 20 and is the answer not in the manual?
Explains how the laser range meter measures distances, its range, and reference point selection.
Details how to measure distances between 0.3 and 30 meters using the white target plate.
Details how to measure distances between 30 and 100 meters using the brown target plate.
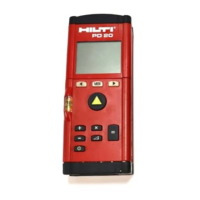
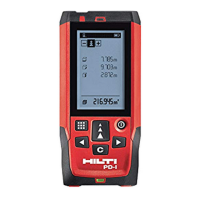
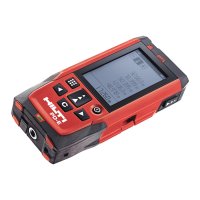
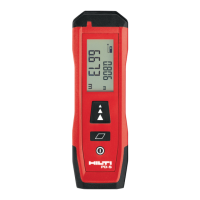
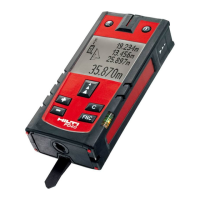
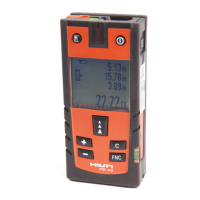
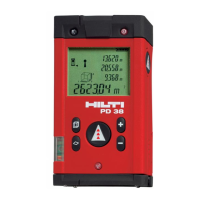
Details the display elements and the functions of the control panel buttons.
Explains the meaning of symbols shown on the display and reference points on the tool.
Details the specific function of each button on the PD 20's control panel.
Provides a quick visual guide to basic operations like inserting batteries and taking measurements.
Illustrates measuring distances from 0.3-30m and 30-100m, and shows mathematical functions.
Lists key technical specifications including measuring range, time, accuracy, beam diameter, and operating modes.
Details battery life, operating/storage temperatures, protection class, mounting points, weight, and dimensions.
Lists all items included in the package: PD 20 laser range meter, operating instructions, batteries, and carrying case.
Emphasizes the importance of reading instructions to identify and eliminate operating risks for safe use.
Defines the intended applications for the Hilti PD 20 laser range meter.
Outlines the specific applications for which the Hilti PD 20 is designed.
Lists common examples of incorrect product usage that can lead to injury, malfunction, or damage.
Continues detailing intended use and provides a warning about misuse risks.
Specifies the conditions under which the tool should not be operated, referring to technical data.
Describes suitable environments for the product and those to avoid, like corrosive or explosive atmospheres.
Defines responsibilities of the manufacturer (Hilti) and other accessory suppliers.
Details the responsibilities of the owner of the equipment for correct usage and safety.
Highlights risks associated with product misuse, incomplete instruction, or incorrect measurements.
Details risks from defective products, incorrect measurements due to surfaces, and cordoning off work areas.
Provides warnings and preventative measures for the proper disposal and recycling of the equipment.
Explains the laser classification (Class 2/II) and safety precautions for laser beam exposure.
Details laser classification standards and provides cautions regarding direct beam exposure with optical aids.
Describes where to find product identification data and warnings on the rear of the Hilti PD 20.
Explains EMC properties and potential interference with other equipment due to electromagnetic radiation.
Provides step-by-step instructions and symbols for inserting new batteries correctly.
Explains how to navigate menus, select options, and adjust settings using buttons.
Shows a visual overview of the available menus and their interconnections.
Details how to select the reference point for measurements (e.g., front edge, tripod axis).
Explains how to enter and use constant values in calculations.
Describes how to control the display illumination (off, on, auto).
Explains how to set a delay time for automatic measurements, useful for difficult positions.
Details how to configure the beep sound settings (on, off, auto).
Explains how to select the desired measurement units (meters, feet, inches).
Provides instructions on how to switch on the tool and perform basic distance measurements.
Details how to measure distances using the spike for corner measurements.
Explains how to fold out the spike for measuring diagonals or from corners where access is difficult.
Describes how to perform continuous measurement (tracking) by moving the tool.
Explains how to activate and use the continuous measurement (tracking) mode.
Details how to use the self-timer function for measurements from inaccessible positions.
Explains how to use an extension rod with the self-timer function for measuring from difficult-to-reach points.
Details how to use the self-timer function for measurements from inaccessible positions.
Explains how to use external objects as targets for measuring distances from edges.
Discusses challenges and methods for measuring from plants, trees, and rough surfaces.
Provides step-by-step instructions and symbols for inserting new batteries correctly.
| Type | Laser Distance Meter |
|---|---|
| Accuracy | ± 1.5 mm |
| IP Protection Class | IP54 |
| Display | Backlit LCD |
| Battery Type | 2 x AAA |
| Operating time with alkaline battery | Approx. 5, 000 measurements |
| Operating temperature range | -10°C to +50°C |
| Laser class | 2 |
| Functions | Area, Volume, Continuous measurement, Pythagorean measurement |
| Resolution | 1 mm |
| Battery Life | 5000 measurements |
| Operating Temperature | -10°C to +50°C |
| Storage Temperature | -20 to +70 °C |