Assembly Instructions
Step 3:
Tighten bolts to handlebar stem, but don’t tighten completely as you may want
to further adjust the angle later to align more precisely. Test the positioning, and
adjust the handlebar to your preferred angle. After determining the best position,
completely tighten all the bolts on the stem.
◆ Front Wheel Installation
Step 1: Lay a mat down to protect both bike and floor from scratches. Next, carefully flip
your bike upside down for the front wheel installation.
NOTICE: In addition to angle, the height of the handlebar can be adjusted by
adding or removing the headset spacers if needed. For those without experience,
we recommend having a professional make such adjustments for safety reasons.
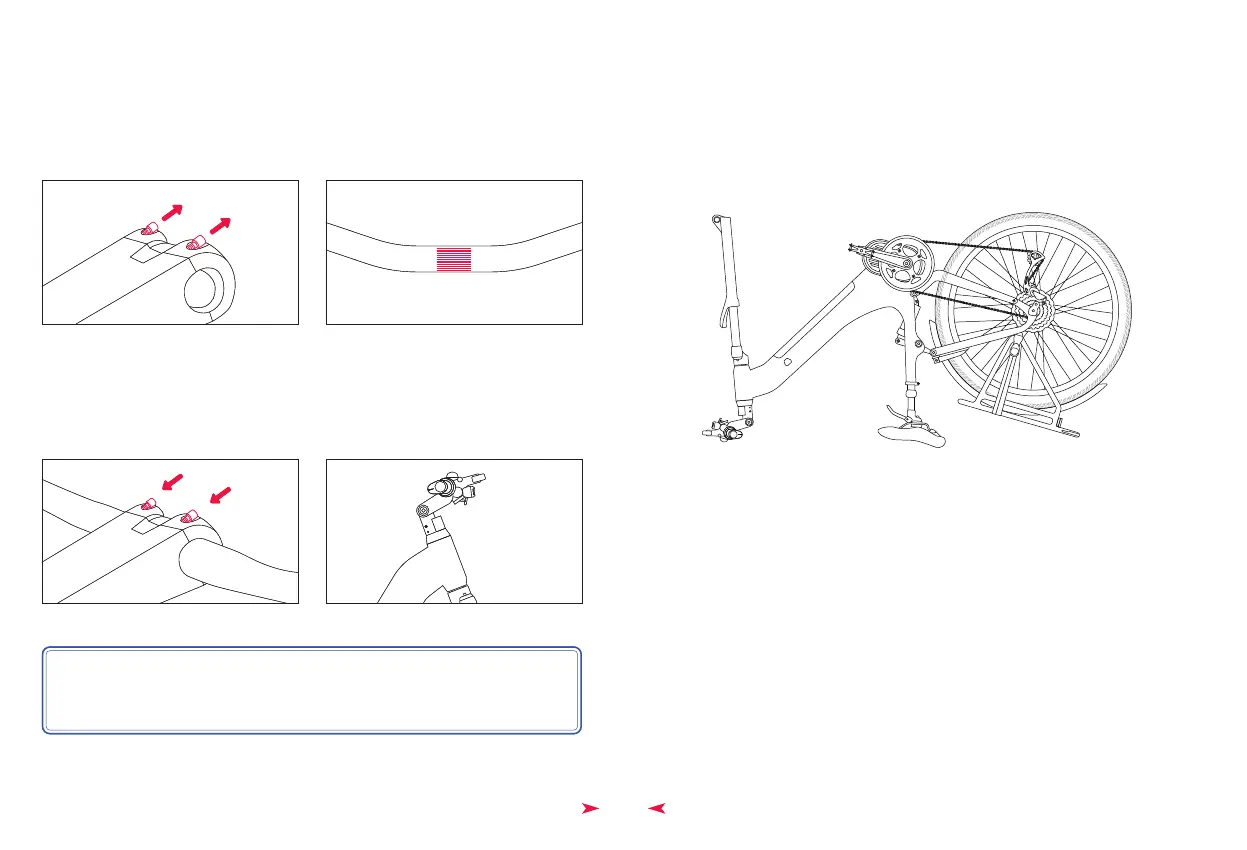
◆ Handlebar Installation(4mm Hex Wrench)
Step 1:
Step 2:
Loosen the bolts on your bike stem.
Center your handlebars and rotate them to align to the marking pointed to in the
below image.
7
Assembly Instructions
Step 3:
Tighten bolts to handlebar stem, but don’t tighten completely as you may want
to further adjust the angle later to align more precisely. Test the positioning, and
adjust the handlebar to your preferred angle. After determining the best position,
completely tighten all the bolts on the stem.
NOTICE: In addition to angle, the height of the handlebar can be adjusted by
adding or removing the headset spacers if needed. For those without experience,
we recommend having a professional make such adjustments for safety reasons.
◆ Handlebar Installation(4mm Hex Wrench)
Step 1:
Step 2:
Loosen the bolts on your bike stem.
Center your handlebars and rotate them to align to the marking pointed to in the
below image.