Plug 2
◆ Charging Procedure for Off-bike Charging
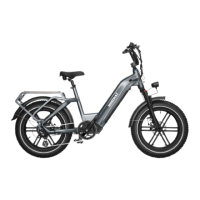
Find the keys located on the handlebar (fig. 3) and remove them. If you cut them
from the handlebars, be careful not to damage any of the wires.
Step 1:
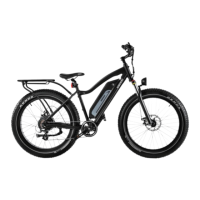
Remove the rubber cover on the charging socket and insert the DC plug (Plug 2)
of the charger into the battery charging socket (fig. 2).
Connect the power plug to the power socket.
Step 3:
Step 4:
Figure 3
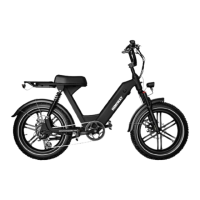
Figure 4
Battery Charging
◆ Charging Procedure for On-bike Charging
Check the battery power indicator on your display.
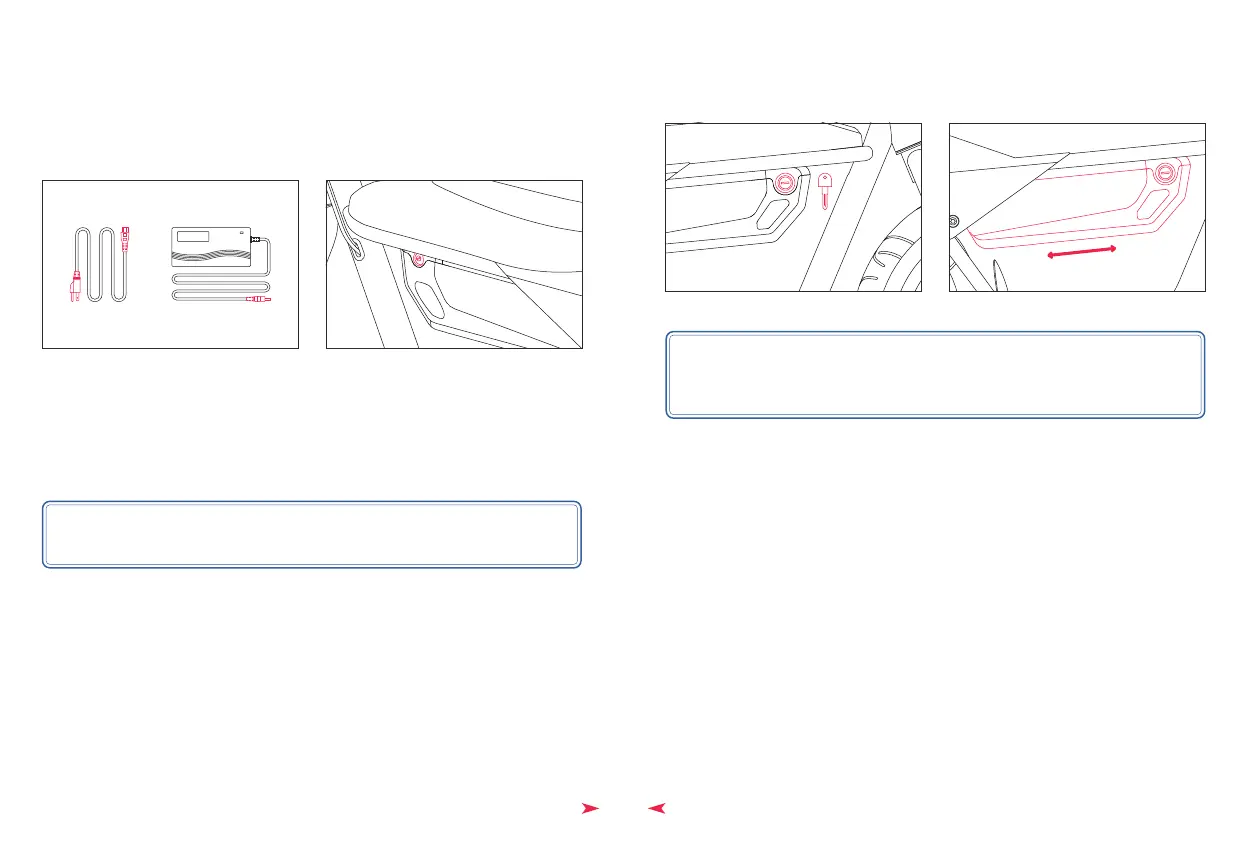
Assemble the charger as shown in Figure 1 by inserting the plug (Plug 1) into
the transformer.
Step 1:
Step 2:
Figure 1 Figure 2
NOTICE: Please keep your key and its spare in a safe place. Once lost, they are
difficult to copy. The key number correlates to the number on the keyhole (fig. 4).
If you have lost the keys, you can give us the key number to get new keys.
NOTICE: This order helps extend the battery life and effectively reduces battery
damage caused by improper charging.
Plug 3 Plug 2
Plug 1
9