EasyManuals Logo

Hisense PL1 Service Manual

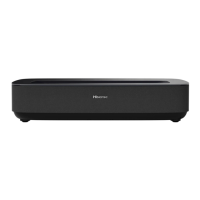
Hisense PL1
16 pages
To Next Page IconTo Next Page
To Previous Page IconTo Previous Page
Page #7 background imageLoading...
Page #7 background image
7
NO.
Part
NO.
Part
1
Display board (including software)
7
DMD board
2
Main Board (including software)
8
Indicator board&IR board Assembly
3
Power Board
9
Terminal adapter board
4
Key board
10
Fan conversion Board
5
Right Eye Protection Board
11
USB board
6
Left Eye Protection Board
12
WIFI Board
4. Factory/Service OSD Menu and Adjustment
4.1 How to enter the Factory Menu
With user’s RC
(1) Power TV on
(2) Press button on the RC then call up “Menu” option.
(3) Move and “ok “button on RC to select Setting-> Sound->Advanced setting
-> Balance
(4) On the Balance, input figure 1->9->6->9 in sequence on RC.
Note: It is important to remember that the hand fingers can’t shield the RC
emitter diode.
(5) Call up a M” on the left-top of TV, then press button again, the Factory
menu appear then
(6) DC power off and DC power on the TV, which can exit Factory OSD.
4.2 Factory OSD Menu
Factory OSD menu list: if you want to learn more about TV, you’d better read it
but would not adjust the value please. The Factory menu may be have
difference for diverse market and customer.
4.2.1 Factory Option
Other manuals for Hisense PL1

Questions and Answers:

Question and Answer IconNeed help?

Do you have a question about the Hisense PL1 and is the answer not in the manual?

Hisense PL1 Specifications

General IconGeneral
Display TechnologyDLP
Light SourceLaser
Throw Ratio0.25:1
HDRHDR10
Smart FeaturesAndroid TV
Lamp Life25, 000 hours
ConnectivityWi-Fi, Bluetooth
Resolution4K UHD (3840 x 2160)
Brightness2100 ANSI Lumens
Screen Size80 - 120 inch
PortsHDMI, USB, Ethernet
AudioDolby Atmos
Built-in SpeakersYes

Related product manuals