EasyManua.ls Logo

Hisense 100L9H - User Manual

Hisense 100L9H
26 pages
Print Icon
To Next Page IconTo Next Page
Loading...
Quick Setup Guide
Before using the Laser TV, please read this guide carefully and keep it for future reference.
Disclaimer: This Quick Setup Guide is intended as a general guideline to help you set up your Laser TV. Images throughout this document are for illustrative purposes only and
may differ from the actual product.
Model 100L9H
Question and Answer IconNeed help?

Do you have a question about the Hisense 100L9H and is the answer not in the manual?

Summary

Register Your Laser TV

Important Safety Information

Safety Warnings

Critical safety precautions regarding laser exposure, device handling, and electrical safety.

Low Blue Light Content

Information on the potential effects of blue light on eyes and product features to mitigate risks.

Health Recommendations

Advice for users to protect their eyes, including taking breaks and performing eye exercises.

Packaged Contents

Laser TV Diagram

STEP 1. Mount the Screen

STEP 2. Set up the Laser TV

Ports and Connections

Details on connecting essential cables like Ethernet, HDMI, and Coaxial to the Laser TV.

STEP 3. Adjust the Display Image and the Screen

Align Image Bottom with Screen

Adjusting the Laser TV position and rotation to ensure the image bottom aligns with the screen.

Adjust Image Corners

Step-by-step guide to adjust the image corners (top-right, top-left) for proper screen fit.

Fill Top of Image to Screen

Instructions on adjusting the projector feet to fill the top of the image to the screen width.

STEP 4. Use Your Remote

Remote Control Overview

Explanation of the buttons on the remote control and their functions for operating the Laser TV.

Remote Control Pairing and Battery Info

Instructions for pairing the remote control, battery installation, and important handling information.

STEP 5 Proceed through the Screen Setup Menu

Projection Mode

How to adjust the image orientation (flip top/bottom, left/right) using Projection Mode.

Automatic Geometric Correction

Guide to automatically correct the image geometry using a mobile device and QR code.

Geometric Correction (Manual)

Manual adjustment of image points (corners, midpoints) for precise geometric correction.

Begin to Enjoy Your Laser TV

Text-to-Speech and Video Description

Enabling accessibility features like TTS and Video Description for enhanced user experience.

Maintenance & Quick Problem-Solving Tips

Maintenance

Guidelines for cleaning and caring for the Laser TV to ensure optimal performance and longevity.

Quick Problem-Solving Tips

Troubleshooting common issues like delayed picture, no sound/picture, or distorted images.

Product Specifications

Certification and Compliance

FCC Notice

Details on regulatory compliance for the device, including interference guidelines and user responsibilities.

Declaration of Conformity

Formal statement of compliance with regulatory standards by the manufacturer.

Overview

This document serves as a Quick Setup Guide for the Hisense Laser TV, Model 100L9H, providing essential information for its setup, operation, and maintenance. It emphasizes safety precautions and offers troubleshooting tips to ensure an optimal user experience.

Function Description

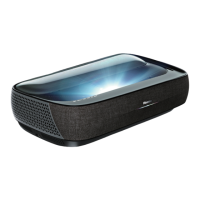
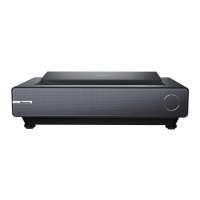
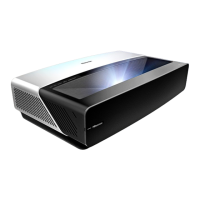
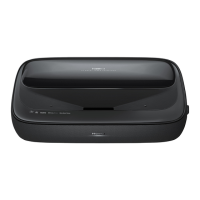
The Hisense Laser TV is a sophisticated home entertainment system that projects a high-resolution image onto a screen, offering a large-format viewing experience. It functions as a smart TV, providing access to various entertainment options, including live channels, Video on Demand, and applications. The device utilizes a laser module for projection, delivering a bright and vibrant display.

The Laser TV includes multiple connectivity options to integrate with other devices and networks. It features HDMI ports for connecting external AV devices like VCRs, DVD players, set-top boxes, and video cameras. USB ports are available for browsing photos, music, and movies from USB memory sticks. An Ethernet port allows for internet connectivity, and an ANT/CABLE port supports outdoor VHF/UHF antennas for receiving broadcast signals. Digital and analog audio output ports facilitate connection to external audio systems, such as speakers and audio amplifiers.

The device is designed with user convenience in mind, offering both automatic and manual geometric correction features to ensure a perfectly aligned and proportioned image on the screen. It also incorporates accessibility features like Text-to-Speech (TTS) and Video Description to assist visually impaired users in navigating menus and understanding program content.

Usage Features

Setup and Positioning: The initial setup of the Laser TV requires careful handling, with a strong recommendation for two people to move the device due to its weight. Users should connect all necessary cables to the back ports before positioning the Laser TV. The device should be placed parallel to the screen surface, and the power cord plugged into a wall outlet to turn it on. Adequate ventilation space is crucial; users must ensure at least 8 inches of space on the sides and 6 inches at the back to prevent overheating.

Image Adjustment: The guide provides detailed instructions for adjusting the projected image to fit the screen perfectly. This includes:

  • Parallel Alignment: Rotating the device clockwise or counterclockwise to ensure the bottom of the image is parallel with the screen.
  • Image Shifting: Moving the Laser TV left or right to center the image on the screen.
  • Width Adjustment: Moving the Laser TV closer to or farther from the screen to adjust the image width.
  • Corner Adjustment: Using a provided wrench to rotate the front and back feet to adjust the height of the image corners, ensuring the top of the image is parallel with the screen. This process may involve rotating the Laser TV clockwise or counterclockwise.

Screen Setup Menu: The Laser TV features a Screen Setup Menu with two primary adjustment modes:

  • Projection Mode: Allows users to flip the image top-to-bottom and/or left-to-right, useful for different mounting configurations.
  • Automatic Geometric Correction: This function requires the Laser TV and a mobile device to be connected to the same wireless network. Users adjust the Laser TV's physical position, then use a mobile app to scan a QR code, take a photo of the screen with an alignment grid, and upload it for automatic correction. This ensures the image is perfectly aligned and in focus.
  • Geometric Correction (Manual): For fine-tuning, users can manually select and adjust 16 points on the alignment grid using the remote's UP/DOWN/LEFT/RIGHT buttons.

Remote Control Usage: The remote control provides comprehensive functionality for operating the Laser TV:

  • Power On/Off: Basic power control.
  • Input Source Selection: Changes the Laser TV's input source.
  • Channel/Number Input: Enters channel numbers and accesses special functions.
  • Live TV Access: Returns to Live TV and displays the Electronic Program Guide.
  • Navigation: D-pad for navigating menus and confirming selections.
  • Menu Access: Opens the main menu.
  • Back Button: Returns to the previous menu or app.
  • Home Screen: Displays the Home screen.
  • Volume Control: Adjusts volume up or down.
  • Google Assistant: Activates the voice assistant.
  • Mute/Accessibility: Mutes sound or displays the Accessibility menu when held.
  • Media Controls: Controls media content playback.
  • Quick Access Buttons: Provides quick access to Media and Apps.
  • Settings: Accesses system settings.

Remote Control Pairing and Battery Information: The remote control needs to be paired with the Laser TV after powering it on by holding the Back and Home buttons simultaneously for at least 3 seconds. The remote operates within a range of up to 26 feet. Battery installation involves inserting two AAA or AA batteries, ensuring correct polarity. Important safety information regarding batteries includes proper disposal, immediate removal of old batteries, and avoiding mixing different battery types.

Accessibility Features: The Laser TV supports Text-to-Speech (TTS) and Video Description. TTS converts on-screen text into voice, aiding visually impaired users in menu navigation. Video Description adds audio narration to programs, describing visual elements. These features can be enabled through the Settings menu under System > Accessibility > TalkBack and Channels & Inputs > Channels > Video Description, respectively.

Maintenance Features

General Care:

  • Temperature: Avoid touching the device when it is running or immediately after turning off, as it may be hot.
  • Cleaning Exterior: If the outside of the Laser TV is dirty, turn it off and wipe with a damp, soft cloth. Avoid using oil, as it can deteriorate the exterior or damage the paint. Prevent contact with rubber or ethylene products for extended periods to avoid stains.
  • Lens Care: The lens is a critical component and requires special care. Do not touch the lens with bare hands. Avoid using ordinary cleaning cloths. Instead, use a dust blower to remove dust. For grease, dirt, or fingerprints, professional cleaning solutions and optical cleaning cloths or lens wiping paper should be used by a professional to prevent damage to the optical film and maintain image quality.
  • Ventilation: Ensure air vents on both sides of the device remain clear of any objects to prevent overheating.
  • Power Off: To turn off the device, press the Power button on the remote control. Do not cut off power directly while the device is operating.

Problem-Solving Tips: The guide offers solutions for common issues:

  • No Sound or Picture: Check power cord connection, activate from standby mode using the remote, and verify the LED light is on.
  • Delay in Picture Appearance: This is normal as the Laser TV initializes and searches for previous settings.
  • No Picture/Sound from External Source: Verify correct cable connections and input mode selection.
  • Picture Normal, No Sound: Check volume settings and ensure 'Mute' mode is off.
  • Sound, No Picture/Black & White Picture: Unplug and replug the Laser TV after 60 seconds, check color settings, and try different channels.
  • Distorted/Wavy Sound/Picture: Move nearby electrical appliances away from the Laser TV or plug the Laser TV into a different power outlet.
  • Blurry/Cut Out Sound/Picture: Check external antenna direction, position, and connection, then adjust or fine-tune the channel.
  • "Clicking" Sound: This is normal and occurs due to temperature-induced expansion or contraction of the plastic cabinet.
  • Remote Control Not Working: Confirm the Laser TV has power, change batteries, and ensure batteries are correctly installed.

Safety Warnings: The document includes critical safety warnings:

  • Laser Exposure: Do not look directly at the lens when the device is on, as the laser light can cause personal injury. The product contains a laser module, and any unauthorized modification can lead to injury.
  • Laser Eye Protection: If repairs are needed, wear laser eye protection with an optical density (OD) of 4 or higher and a wavelength of 459-651 nm.
  • Object Placement: Do not place water-containing vessels, exposed fire sources (like burning candles), or any objects above or in front of the lens, as laser light can make objects flammable.
  • Foreign Objects: If any object or water enters the device, unplug it immediately and contact Hisense service staff.
  • Electrical Safety: Avoid using sharp objects or metal to touch ports or other openings to prevent short circuits, product damage, or electric shock.
  • Battery Safety: Do not expose batteries to direct sunlight or candle light.

This comprehensive guide ensures users can effectively set up, operate, and maintain their Hisense Laser TV while adhering to important safety guidelines.

Hisense 100L9H Specifications

General IconGeneral
Display TechnologyLaser
Resolution3840 x 2160 (4K UHD)
Brightness3000 ANSI Lumens
HDR SupportHDR10, HLG
Light SourceLaser
Light Source Life25, 000 hours
Operating SystemAndroid TV
ConnectivityWi-Fi, Bluetooth
ProcessorQuad-core
Color Gamut107% BT.2020
Throw Ratio0.25:1
Screen Size100 inches
HDMI Ports3

Related product manuals