This document serves as the service manual for the PL1HE series Laser TV, providing essential information for servicing, maintenance, and troubleshooting.
Function Description:
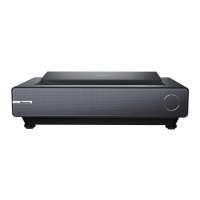
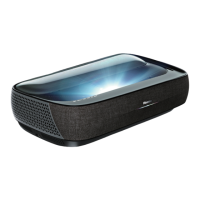
The PL1HE series Laser TV is a smart laser cinema device designed for home entertainment. It features multiple input ports for connecting various multimedia devices and offers advanced settings for picture, sound, and system adjustments. The device incorporates a laser projection system and includes features like eye protection, automatic dust removal, and temperature reminders to ensure optimal performance and user safety.
Important Technical Specifications:
- Input/Output Ports:
- HDMI (HDMI2.0): 3 ports
- USB (USB2.0): 2 ports
- S/PDIF Output: 1 port
- RF Input: 2 ports
- Headphone Output: 1 port
- Internal Components (Circuit Boards):
- Mainboard (Green)
- Power board (Green)
- Display board (including software)
- Key board
- Right Eye Protection Board
- Left Eye Protection Board
- DMD board
- Indicator board & IR board Assembly
- Terminal adapter board
- Fan conversion Board
- USB board
- WIFI Board
- Eye Protection board interface
- Fan adapter board interface
- DMD board interface
- Autofocus interface
- Image pixels enhancing interface
- DMD fan interface
- NTC interface
- Mainboard interface
- Software: The device's main software can be upgraded via a USB disk.
- Safety: The device is designed with an electrocution hazard warning, advising against opening the housing and recommending repairs only by authorized service centers. It emphasizes the use of manufacturer-specified replacement parts to avoid voiding the warranty and to prevent hazards.
Usage Features:
- Factory/Service OSD Menu:
- Access: To enter the Factory Menu, power on the TV, press the "Menu" button on the remote control, navigate to "Setting" -> "Sound" -> "Advanced setting" -> "Balance", and then input the sequence "1->9->6->9". After that, call up "M" on the left-top of the TV and press the button again.
- Exit: DC power off and DC power on the TV to exit Factory OSD.
- Options: The Factory OSD Menu provides access to various settings including Factory Option, Laser Options, Soft Version, and Write Keys. Users are cautioned against adjusting values without proper knowledge.
- Clear EEPROM: The EEPROM data can be cleared from the Factory mode under "Option" -> "Clear all", which will restart the Laser TV automatically and restore default values.
- Software Upgrade:
- User Mode: Main software can be upgraded using a USB disk.
- Factory Mode: If in Factory mode, AC power off the TV, insert the USB disk, then AC power on. The TV will automatically detect and begin the update process, displaying a "Loading data" interface and a progress bar. After the upgrade is complete, the TV will automatically reboot.
- Eye Protection:
- Function: By default, eye protection is enabled. When a person approaches, a prompt box appears (5-second countdown). If the person moves away within 5 seconds, the light machine remains on. Otherwise, it turns off and automatically turns back on when the person moves away.
- Screen Prompt: "In order to protect your eyes, do not look into the lens. This projector is shutting down in 5 seconds."
- Disabling: The eye protection function can be turned off via "Settings" -> "System" -> "Console settings" -> "Eye Protection".
- Fault Determination: If the Eye Protection board fails or has a poor connection, the function will not be effective, and the indicator light will flash 7 times.
- Power Indicator: The Power Indicator lights up when the Laser TV is on. If an error occurs, it flashes to report the error.
- Automatic Dust Removal:
- Function: Automatically triggers every 500 hours of operation. The fan runs at high speed for 3 minutes, with a prompt displayed at the bottom of the screen during the process.
- Behavior: The subtitle prompt disappears directly after the dust removal ends.
- Temperature Reminder:
- Function: When the ambient temperature reaches 36°C, an overheat protection reminder appears. At 41°C, the machine automatically shuts down. The ambient temperature sensor is located at the rear air inlet.
- Screen Prompt: Upon powering on after an overheat shutdown, a message appears: "The previous shutdown was due to the high temperature of the laser TV, and it was automatically turned off for protection."
- Fault Determination: If an overheating warning occurs, check for obstructions around the machine that might hinder heat dissipation.
- Autofocus Function: Accessible via "Setting" -> "System" -> "Console settings" -> "Focus Adjustment". Users can press the up and down keys on the remote control to adjust focus until the screen is clear.
Maintenance Features:
- General Maintenance:
- Keep the device dry and avoid long periods of inactivity.
- Always disconnect the power cord from the AC outlet before replacing parts or modules.
- When connecting or disconnecting HDMI devices, ensure the TV is turned off.
- Cleaning:
- Host: Use an air blower to clean dust. Avoid touching or wiping with hands. For oil stains and fingerprints, use a microfiber cleaning cloth to carefully wipe the optical coating.
- Screen: Clean with a brush or microfiber cleaning cloth. For dirt or fingerprints, first try wiping with a dust-free cloth dampened with clean water. If stubborn, use a dust-free cloth gently dipped in alcohol.
- Safety Checks: After servicing, verify that peripherals have not deteriorated, and all removed screws, parts, and cables are returned to their original positions.
- ESD Precautions: All ICs and many semiconductors are susceptible to electrostatic discharges (ESD). Use anti-static table mats and a grounding wrist strap during repairs.
- Power Disconnection: Always turn off the POWER Button and disconnect the power cable from the power source during servicing, except when adjusting and checking the product. Wait at least 30 seconds after turning off the main power before starting work, and at least 2 minutes when installing/removing the power board.
- Circuit Board Handling: Handle circuit boards by holding large parts like the heat sink or transformer to prevent damage to soldered areas. Avoid stacking circuit boards to prevent scratches, deformation, and short-circuits from residual electric charge.