This document serves as a Quick Setup Guide for the Hisense Laser Cinema, Model PL1, providing essential information for its installation, operation, and maintenance. It is designed to help users set up their new Laser Cinema with ease and includes important safety warnings, packaged contents, a diagram of the device, and steps for adjusting the display image and using the remote control.
Function Description
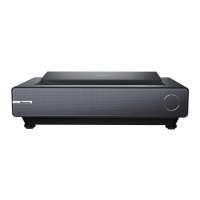
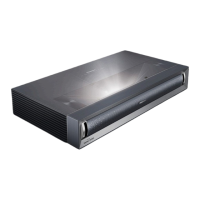
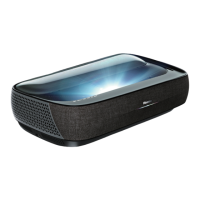
The Hisense Laser Cinema is a sophisticated projection device designed to deliver a large, high-quality display image for an immersive viewing experience. It utilizes a laser module as its light source, capable of projecting images onto a screen with a wide range of sizes (80-120 inches diagonal). The device is intended for home entertainment, offering features that enhance visual and audio performance. It supports various input sources, allowing users to connect external devices such as VCRs, DVD players, set-top boxes, and video cameras. Internet connectivity is also supported via an Ethernet port, enabling access to online content and smart features. The Laser Cinema is equipped with built-in speakers for audio output, and also provides audio output ports for connecting to external audio devices like speakers or an audio amplifier.
A key feature of the Laser Cinema is its smart functionality, which allows users to navigate through menus, access applications, and utilize voice commands through the Google Assistant. It also incorporates accessibility features like Text-to-Speech (TTS) and Video Description to assist visually impaired users by providing audio narration of on-screen menus and relevant program content. The device is designed to be user-friendly, with a remote control that offers quick access to various functions, including power, input source selection, volume control, picture mode, sound mode, and application shortcuts.
Usage Features
Setting up the Laser Cinema involves several steps, starting with mounting the screen (if purchased from Hisense) and then positioning the Laser Cinema unit itself. Due to its weight, it is strongly recommended that two people handle the device when moving it to protect the lens. Before positioning, users are advised to connect all necessary cables (audio, video, Ethernet, and external devices) to the ports on the back of the unit. The Laser Cinema should be positioned parallel to the screen surface, and proper ventilation space must be maintained around the device to prevent overheating. The guide provides specific measurements for minimum clearance (5 cm above, 20 cm on sides) to ensure adequate airflow.
Once positioned, the device can be powered on by plugging in the power cord and pressing the power button. A critical aspect of usage is adjusting the display image to fit the screen correctly. The guide outlines a detailed process for geometric correction, which can be done automatically using a mobile device or manually. For automatic correction, the Laser Cinema and the mobile device must be connected to the same wireless network. Users take a photo of the screen and image with their mobile device, and the app helps complete the correction. Manual geometric correction involves adjusting specific points at the corners and midpoints of the image using the remote control's navigation buttons. The guide also provides instructions for adjusting the image's parallelism and width relative to the screen by moving the Laser Cinema closer or farther and rotating its feet. It emphasizes the importance of not looking directly at the lens when the device is on due to the laser light.
The remote control is central to operating the Laser Cinema. It includes buttons for power on/off, input selection, numerical input, mute/sound restore, media control, quick access to picture and sound modes, application shortcuts, and settings. The remote needs to be paired with the Laser Cinema, a process that involves pressing and holding specific buttons for at least 3 seconds. The remote has an operational range of up to 26 feet in front of the Laser Cinema. For accessibility, the guide explains how to enable Text-to-Speech (TalkBack) and Video Description features through the settings menu, which can broadcast menu contents and provide audio narration for programs.
Maintenance Features
Proper maintenance is crucial for the longevity and optimal performance of the Hisense Laser Cinema. The guide provides several tips for care and problem-solving.
Safety and Handling:
- Avoid touching the device when it is running or immediately after being turned off, as it may be hot.
- Do not tear or modify the laser module, as this can result in personal injury.
- Do not look directly at the lens when the device is on to prevent eye damage from the laser light.
- Keep air vents on both sides clear of any objects to prevent overheating.
- Do not place any object above or in front of the lens, as laser light could cause it to become flammable.
- Ensure the device is turned off before cleaning the lens.
Cleaning:
- Do not wipe the device with oil, as it may damage the exterior or paint.
- If the outside of the Laser Cinema is dirty, wipe it with a damped soft cloth after turning off the device.
- For the lens, do not use ordinary cleaning cloth or touch it with bare hands. Instead, use a dust blower to remove dust. Grease, dirt, and fingerprints should be cleaned carefully by a professional using optical cleaning cloth, lens wiping paper, or professional cleaning solutions to avoid damaging the optical film and affecting image quality.
Remote Control and Batteries:
- When inserting batteries into the remote control, ensure correct polarity (+/-).
- Discard used batteries in a designated disposal area and do not throw them into fire.
- Remove old batteries immediately to prevent leakage.
- If the remote control will not be used for a long time, remove the batteries.
- If battery chemicals leak, clean the battery compartment with a cloth and wash any skin contact immediately.
- Do not mix old and new batteries, or different types of batteries (alkaline, carbon-zinc, rechargeable).
- Discontinue use if the remote control becomes warm or hot.
Troubleshooting:
The guide offers quick problem-solving tips for common issues:
- Delay in picture appearance on startup: This is normal as the Laser Cinema initializes.
- No sound or picture: Check if the power cord is plugged into a powered AC outlet and if the unit is activated from 'Standby' mode. Also, check the LED light indicator for power reception.
- No picture/sound from external source: Verify correct output/input connections and ensure the correct input mode is selected.
- Picture normal, no sound: Check volume settings and ensure 'Mute' mode is off.
- Sound but no picture or black and white picture: Unplug the Laser Cinema for 60 seconds and replug. Check if the 'Color' setting is 50 or higher.
- Distorted/wavy sound/picture: Move nearby electric appliances away from the Laser Cinema or plug the device into a different power outlet.
- "Clicking" sound from plastic cabinet: This is normal and occurs due to temperature changes causing expansion/contraction of the cabinet.
- Remote control not working: Confirm the Laser Cinema has power, change batteries, and ensure batteries are correctly installed.
For more detailed instructions and comprehensive information, users are directed to refer to the E-Manual.