This document serves as a Quick Setup Guide for the Hisense Laser Cinema, Model 120L9G, providing essential information for its setup, usage, and maintenance. It emphasizes the importance of reading the guide carefully and retaining it for future reference.
Function Description
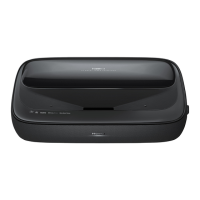
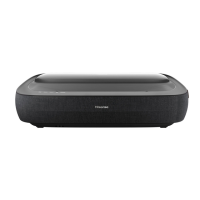
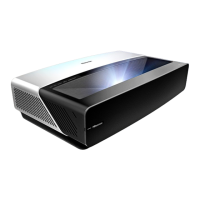
The Hisense Laser Cinema is a sophisticated entertainment device designed to project high-quality images onto a display screen, offering a cinematic experience in a home environment. It utilizes laser technology for image projection, ensuring vibrant and clear visuals. The device integrates various connectivity options, allowing users to connect external audio/video devices, USB memory sticks, and access internet content. It also features built-in wireless capabilities for seamless network connectivity. The Laser Cinema is equipped with an eye protection sensor, a power indicator, and a remote control receiver for convenient operation.
Usage Features
The setup process for the Laser Cinema is designed to be straightforward, though it is recommended that two people handle the device due to its weight and to protect the lens.
- Initial Setup and Positioning: Users are advised to connect all necessary cables (audio, video, Ethernet, external devices) to the back ports of the Laser Cinema before positioning it. The optimal distance from the back panel of the Laser Cinema to the wall is recommended to be 8 1/8 inches, ensuring it is parallel with the screen surface. Proper ventilation is crucial, and users must ensure at least 6 inches of space above and 8 inches on either side of the device to prevent overheating and damage.
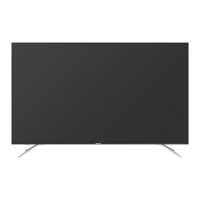
- Screen Installation: If a Hisense screen was purchased, users should refer to the included Screen Installation Guide for mounting instructions.
- Image Adjustment: The guide provides detailed steps for adjusting the projected image to fit the screen perfectly. This includes:
- Parallel Alignment: Rotating the device clockwise or counterclockwise to ensure the bottom of the image is parallel with the screen, especially if one side is higher or lower.
- Horizontal Positioning: Moving the Laser Cinema left or right if the image shifts to one side of the screen.
- Image Width Adjustment: Moving the Laser Cinema closer to the screen if the image is wider than the screen, or farther away if it is narrower.
- Corner Adjustment: Using a wrench to rotate the front and back feet (front-right, back-right, front-left, back-left) clockwise or counterclockwise to adjust the height of the image corners, ensuring the top of the image is parallel with the screen. These adjustments should be made carefully, avoiding direct eye contact with the lens when the device is on.
- Remote Control Operation: The remote control provides comprehensive functionality for navigating the Laser Cinema.
- Basic Controls: Power on/off, input source selection, volume adjustment, channel selection, and mute/restore sound.
- Navigation: D-pad buttons (up/down/left/right) for menu navigation and a confirmation button (OK).
- Special Functions: Quick access buttons for the Home screen, Media, and Apps. It also includes a Google Assistant button for voice commands and media content control buttons.
- Customization: A FAV button allows users to enter customized input sources/apps and access customization settings.
- Pairing: The remote needs to be paired with the Laser Cinema by pressing and holding the pairing button for at least 3 seconds while within 10 feet of the device. The remote operates effectively up to 26 feet in front of the Laser Cinema.
- Screen Setup Menu: This menu offers advanced image correction features.
- Projection Mode: Allows users to flip the image top-to-bottom and/or left-to-right.
- Auto Geometric Correction: Requires the Laser Cinema and a mobile device to be connected to the same Wi-Fi network. Users position the Laser Cinema to fit the display border within the screen, then scan a QR code with their mobile device. The app guides them to take a photo of the screen and image, which is then uploaded for automatic correction.
- Geometric Correction: For manual adjustments, users can select and adjust eight main points (corners and midpoints) using the D-pad buttons. Changes apply automatically, and there's an option to reset to factory defaults.
- Eye Protection: The device incorporates an eye protection feature, automatically shutting down projection if an object or person is too close to the lens. Users are explicitly warned not to look directly into the lens when the device is on due to potential laser light damage.
- Smart Laser Cinema Experience: After initial setup (language, time, network connection), the Home screen becomes the central hub for entertainment. Users can access live channels, Video on Demand, and various other entertainment options.
- Accessibility Features (Text-to-Speech and Video Description): The Laser Cinema supports Text-to-Speech (TTS) and Video Description to assist visually impaired users.
- Enabling Features: These can be enabled or disabled through the Settings Menu under Device Preferences > Accessibility.
- TTS: Converts written text on menus into voice text.
- Video Description: Provides audio narration for main visual elements in certain programs.
Maintenance Features
Proper maintenance is essential for the longevity and optimal performance of the Laser Cinema.
- Handling: Always handle the device with care, especially the lens. It is recommended that two people move the device.
- Temperature and Overheating:
- Avoid touching the device when it is running or immediately after being turned off, as it may be hot.
- Ensure air vents on both sides are clear of obstructions to prevent overheating.
- If the device has been in a warm environment, allow any built-up condensation to evaporate before turning it on.
- Cleaning:
- Do not wipe the device with oil, as it can damage the exterior or paint.
- Avoid contact with rubber or ethylene products for extended periods, as this can cause stains.
- For external cleaning, turn off the Laser Cinema and wipe with a damped soft cloth.
- Lens Care: Do not touch the lens with bare hands or ordinary cleaning cloths. Use a dust blower to remove dust. Grease, dirt, and fingerprints on the lens should be cleaned carefully by a professional using optical cleaning cloth, lens wiping paper, or professional cleaning solutions to avoid damaging the optical film and affecting image quality.
- Clean the lens periodically with a clean cloth, ensuring the Laser Cinema is turned off beforehand.
- Power Management: To turn off the device, press the Power button on the remote control. Do not cut off power directly when the device is working.
- Battery Care (Remote Control):
- Discard batteries in designated disposal areas; do not throw them into fire.
- Remove old batteries immediately to prevent leakage.
- Remove batteries if the remote control will not be used for a long time.
- If batteries leak, clean the compartment with a cloth and wash skin immediately if chemicals touch it.
- Do not mix old and new batteries, or different types of batteries (alkaline, carbon-zinc, rechargeable).
- Discontinue use if the remote gets warm or hot and contact support.