Do you have a question about the Hisense 100L5F and is the answer not in the manual?
Adjusts image by rotating device counterclockwise if lower on left.
Adjusts image by moving device left/right if shifted.
Adjusts eight main points and six smaller points for image alignment.
Warning about looking at the lens; projector shuts down.
Explains TTS and Video Description features for accessibility.
Device tested and found to comply with FCC Class B digital device limits.
Lists trade name, model, responsible party, and FCC compliance statement.
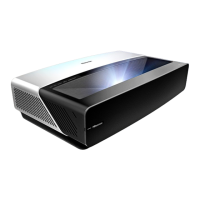
This document serves as a Quick Start Guide for the Hisense Laser Cinema, Model 100L5F, providing essential information for setup, operation, and maintenance. It is designed to help users quickly get their Laser Cinema up and running and to serve as a reference for future use.
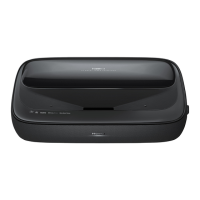
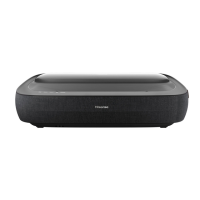
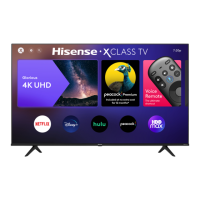
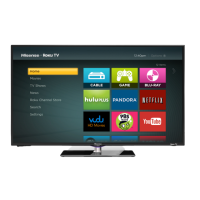
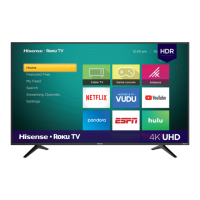
The Hisense Laser Cinema is a sophisticated home entertainment system that projects high-quality images onto a display screen. It functions as a smart cinema, offering various entertainment options beyond traditional television. Users can watch live channels, access Video on Demand for movies, and utilize other entertainment features through its intuitive Home screen. The device is designed to provide a large, immersive viewing experience, making it a centerpiece for home entertainment.
The core functionality revolves around its laser projection system, which delivers a sharp and vibrant picture. It includes multiple connectivity options, such as HDMI, USB, LAN for internet, digital audio output, and RF input, allowing for integration with various external AV devices like VCRs, DVD players, set-top boxes, video cameras, speakers, and audio amplifiers. The device also features built-in wireless connectivity for network access.
A key feature of the Laser Cinema is its smart capabilities, enabling users to navigate menus, access applications, and control various functions using a remote control. It supports Text-to-Speech (TTS) and Video Description functionalities, which enhance accessibility for visually impaired users by converting on-screen text into voice and providing audio narration for relevant programs.
Setting up the Laser Cinema involves several steps, starting with mounting the display screen (if purchased from Hisense) and then positioning the Laser Cinema unit itself. Due to its weight, it is strongly recommended that two people handle the device during movement to prevent damage and ensure safety, particularly for the lens.
Before positioning the unit, users are advised to connect all necessary cables (audio, video, Ethernet, and external devices) to the ports on the back of the Laser Cinema. The unit should be positioned parallel to the screen surface, with a recommended distance of 8 1/8 inches from its back panel to the wall. After plugging in the power cord, the device can be turned on using the POWER button.
Proper ventilation is crucial for the device's operation and longevity. Users are warned against blocking air vents or placing objects on the device, and it should not be placed in narrow, enclosed, or poorly ventilated spaces. Minimum space requirements for ventilation are provided in the guide.
Connecting external devices is straightforward, with clearly labeled ports. USB ports are available for browsing photos, music, and movies, specifically recognizing USB Memory Sticks. When connecting hard disks or USB hubs, it's important to connect their main adapter to the power supply to avoid damage from excessive current consumption. Ethernet connectivity requires a router for internet access.
Adjusting the display image and screen is a critical step to ensure optimal viewing. The guide provides detailed instructions for:
The remote control is an integral part of interacting with the Laser Cinema. It features buttons for power, input source selection, channel entry, special functions (Red/Green/Yellow/Blue), returning to previous sources, quick setup menu access, power/microphone indicator, confirmation, and D-pad navigation. It also includes dedicated buttons for accessing apps, adjusting volume, activating Google Assistant, muting sound, and media control (play/pause/stop/fast forward/rewind). A quick access button for the Accessibility menu (NRT) is also present.
Pairing the remote control to the Laser Cinema is necessary after powering on the device. The remote should be kept within 10 feet of the unit, and the pairing button held for at least 3 seconds. The remote has a working range of up to 26 feet in front of the Laser Cinema.
The Screen Setup Menu guides users through further adjustments, including:
The guide emphasizes several important maintenance practices to ensure the longevity and optimal performance of the Laser Cinema:
The guide also provides quick problem-solving tips for common issues, such as delays in picture appearance (normal during initialization), no sound or picture (check power, remote activation, LED light), external source issues (check connections and input mode), picture normal but no sound (check volume, mute status), sound but black/white picture (unplug/replug, check color setting, try different channels), distorted/wavy sound/picture (move nearby electric appliances, try different power outlet), and blurry/cutting out sound/picture (check antenna direction/position/connection, adjust antenna or fine-tune channel).
For further assistance, Hisense provides support links, FAQs, downloadable firmware, and contact phone numbers for the U.S.A., Mexico, and Canada, including operating hours and email addresses.
| Display Type | DLP |
|---|---|
| Screen Size | 100 inches |
| Resolution | 4K UHD (3840 x 2160) |
| HDR | HDR10, HLG |
| Light Source | Laser |
| Smart TV | Yes |
| Operating System | VIDAA U |
| Built-in Speakers | Yes |
| USB Ports | 2 |
| Wi-Fi | Yes |
| Bluetooth | Yes |
| HDMI Ports | 4 |