Do you have a question about the Hisense WFBL7014V and is the answer not in the manual?
Check for damage and ensure all parts are present after unpacking.
Essential step to prevent damage; cover openings with provided caps.
Place on a level floor, ensure stability, and check ventilation openings are clear.
Connect water supply hose according to local regulations.
Connect drain hose to siphon or sink, ensure vent for integrated systems.
Must be done by a qualified technician; use grounded socket.
Material is recyclable; dispose according to local regulations.
Dispose responsibly according to WEEE directive and local rules.
Install in enclosed spaces; avoid humid areas and flammable fluids.
Avoid wet connections, turn off tap, disconnect before cleaning.
Sort by fabric type, colour, and check care labels.
Empty pockets and secure zippers/buttons to protect laundry and machine.
Treat tough stains with appropriate removers before washing.
Load loosely, avoid overfilling, mix sizes for efficiency.
Use machine-suitable dyes and follow manufacturer's instructions.
Depends on fabric type, colour, temperature, and soiling level.
Follow pack instructions; use correct amount to avoid issues.
Understand compartments for prewash, main wash, and softener.
Clean with a damp cloth; check door seal condition.
Remove, wash parts under running water, and reassemble.
Check and clean filter regularly, especially if draining issues occur.
Check and clean regularly to ensure proper water flow.
Inspect hose for brittleness and cracks; replace if necessary.
Check power connection and socket functionality.
Verify door closure, button press, and water tap status.
Check Rinse Hold, programme selection, door status, foam, and safety system.
Ensure machine is level and transport bolts are removed.
Check load balance, foam levels, and spin speed setting.
Programme time may adapt to foam, load, or water temperature.
Understand error codes like F01, F03, F13, F14, F24, etc., and their causes.
Steps to resolve water inflow, drainage, door lock, overflow, and unbalance faults.
This document is the user's operation manual for a Hisense washing machine, providing comprehensive instructions for its safe and effective use, maintenance, and troubleshooting.
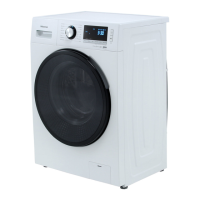
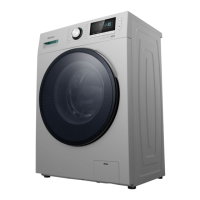
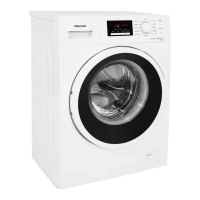
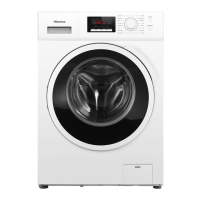
The Hisense washing machine is designed for domestic use, capable of washing up to 7kg of laundry. It offers various wash cycles tailored to different fabric types, colors, and degrees of soiling, ensuring optimal cleaning and care for garments. The machine incorporates automatic safety functions to detect and react to faults, enhancing reliability and user safety. It is equipped with a detergent dispenser featuring separate chambers for prewash, main wash, and softener, allowing for precise dosing of detergents and additives. The machine's operation involves a series of steps from loading laundry and selecting a program to draining water and spinning clothes. It is designed to handle different water temperatures and types of detergents, including high-efficiency, low-foam options. The appliance also includes a child safety device to prevent improper use.
Before First Use: Before operating the washing machine for the first time, it is crucial to remove all packaging materials and transport bolts, which are installed to protect internal components during transit. The appliance must be installed on a solid, level floor surface, ensuring all four feet are stable and the machine is perfectly level. Proper water inlet and drain hose connections are essential, adhering to local water company regulations. The water inlet can be single (cold water only) or dual (hot and cold water), depending on the model. For cold-fill-only models, a Y-piece connector may be required to connect both inlet valves to a single cold tap. An initial short wash cycle without laundry is recommended to remove any residual water from manufacturing tests.
Laundry Preparation: Effective washing begins with proper laundry preparation. Users should sort laundry by fabric type (cottons, mixed fibers, synthetics, wool, handwash items), care label symbols, and color to prevent damage or color bleeding. Delicates and small items, or those with hooks, should be placed in a cloth bag or pillowcase. All pockets must be emptied to prevent damage to both laundry and the machine's drum. Zippers should be closed, and buttons or hooks fastened. Loose belts or ribbons should be tied together. For stained items, pre-treatment with a stain remover or adding it to the main wash chamber is recommended.
Detergent and Additives: The choice and dosage of detergent are critical for optimal washing results. High-efficiency, low-foam detergents are recommended for front-load machines. The detergent type should match the fabric type, color, wash temperature, and degree of soiling. The detergent dispenser has three chambers: one for prewash/soak detergent, one for main wash detergent/stain remover/water softener, and one for fabric softener/liquid starch. Additives should not exceed the "MAX" mark. Liquid detergents can be used for programs with prewash, but powder detergent must be used for the main wash in such cases. The "Start Delay" function (if available) may not be compatible with liquid detergents. Overdosing detergent can lead to excessive foam, reduced washing efficiency, and potential spinning issues, while underdosing can result in grey laundry and calcification of the heating system.
Opening/Closing Door: The door can only be opened when the door opening light is green. Forcibly opening the door while the machine is running can damage the door lock. If the door needs to be opened during a cycle, the power should be turned off or the cycle paused, and then a wait of at least two minutes is required for the door lock to release. The door is opened by holding the handle, pressing the inside handle, and pulling. It should be closed by pressing until it clicks shut.
Child Safety: For models with a child safety device, a plastic screw inside the door can be adjusted with a coin. In the vertical slot position, the door will not lock, while the horizontal slot position allows the door to be locked again.
Appliance Exterior and Control Panel: The exterior and control panel should be cleaned with a soft, damp cloth. A little neutral, non-abrasive detergent can be used if necessary, followed by drying with a soft cloth.
Door Seal: The door seal should be checked periodically and cleaned with a damp cloth when necessary to prevent mold or residue buildup.
Detergent Dispenser: The detergent dispenser should be cleaned regularly. To do this, press the release lever in the main wash compartment, remove the drawer, and then remove the siphon in the softener slot. All parts should be washed under running water and then refitted.
Filter: The machine's filter should be checked and cleaned regularly, at least two or three times a year, especially if draining issues or spin cycle failures occur, or if the pump is blocked by foreign objects. Before cleaning, ensure the water has cooled. The appliance should be stopped and unplugged. The bottom baffle is opened using a slotted screwdriver, and a flat container is placed under the filter door. The emergency drain pipe is used to drain residual water, then the filter is loosened anticlockwise and removed. The filter and its chamber should be cleaned, and the pump rotor checked for free movement. The filter is then re-inserted clockwise and the plinth reinstalled.
Mesh Filter for Water Connection: The mesh filter for the water inlet hose should be checked and cleaned regularly. This involves closing the tap, loosening the inlet hose from the tap, cleaning the internal mesh filter, and re-screwing the hose. The inlet hose on the rear of the washing machine should also be unscrewed, its mesh filter pulled off with pliers, cleaned, and then refitted. After re-connecting, the tap should be turned on to ensure water-tight connections.
Water Supply Hose: The water supply hose should be checked regularly for brittleness and cracks. If damaged, it must be replaced with a new hose of the same type, available from After-Sales Service or a specialist dealer.
Draining Residual Water: Before draining residual water, the appliance must be switched off and unplugged. The plinth is removed, and a container is placed beneath it. The emergency drain pipe is pulled out, its end placed into the container, and the plug rotated and removed to allow water to drain naturally. After draining, the plug is reinstalled, and the detergent box is filled with 1L of water to check for leaks at the pipe plug connection. Finally, the emergency drain pipe is put back.
Troubleshooting: The manual provides a troubleshooting guide for common issues such as the machine not starting, indicator lamps not lighting up, the appliance stopping during a program, residue in the detergent drawer, vibrations during spin cycles, and poor spin results. It also explains fault codes displayed on the screen (e.g., F01 for water inflow, F03 for drainage, F13/F14 for door lock issues, F24 for overflow, and "Unb" for unbalance alarm) and provides steps to resolve them. If issues persist, users are advised to contact After-Sales Service.
Transport/Handling: When transporting the machine, it should not be lifted by the worktop. The mains plug must be pulled out, the tap turned off, and inlet and drain hoses disconnected. All water must be eliminated from the hoses and appliance. The transport bolts must be refitted. Due to the machine's weight (over 55 kg), two persons are needed for moving it.
Electrical Connection: The machine must only be connected to a grounded socket. Extension leads or multi-sockets should not be used. The electrical supply must be adequate for the machine's 10 A current rating, and connections must comply with local regulations. The electrical power cable must only be replaced by a licensed electrician.
| Door color | Black |
|---|---|
| Control type | Buttons, Rotary, Touch |
| Display type | LED |
| Loading type | Front-load |
| Product color | White |
| Built-in display | Yes |
| Appliance placement | Freestanding |
| Drum capacity | 7 kg |
| Spin-drying class | B |
| Maximum spin speed | 1400 RPM |
| Noise level (spin) | 72 dB |
| Noise level (wash) | 55 dB |
| Number of washing programs | 16 |
| Cycle time (quick washing program) | 15 min |
| Energy consumption washing per cycle | - kWh |
| Annual water consumption washing | 8200 L |
| Annual energy consumption washing | 137 kWh |
| Package depth | 550 mm |
| Package width | 660 mm |
| Package height | 890 mm |
| Package weight | 72000 g |
| Depth | 515 mm |
|---|---|
| Width | 595 mm |
| Height | 845 mm |
| Weight | 68000 g |