Do you have a question about the Hisense WFPV9014EMT and is the answer not in the manual?
Crucial safety warnings and precautions for operating the washing machine safely.
Detailed steps for initial setup and preparation before the first operation.
Guidelines on safe disposal, installation location, and general operating advice.
Overview of the washing machine's components and their functions.
Specific instructions for opening and closing the machine door correctly.
Procedure for running an initial cleaning cycle before washing laundry.
Advice on sorting laundry by fabric type, color, and proper loading techniques.
Guidance on selecting, using, and dosing detergents and additives for best results.
Step-by-step instructions for cleaning the washing machine's filter.
Method for safely removing any remaining water from the appliance.
Routine cleaning and maintenance procedures for the machine's parts.
A comprehensive guide to diagnosing and resolving common washing machine issues.
Critical steps to remove transport bolts before appliance operation.
Guide to leveling the washing machine for optimal stability and performance.
Instructions for correctly connecting the water supply inlet hose.
Steps for securely connecting the drain hose for proper water discharge.
This document serves as a comprehensive user and installation guide for a Hisense washing machine, detailing its operation, maintenance, and safety precautions.
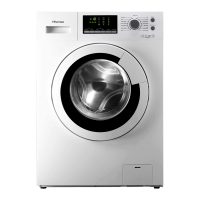
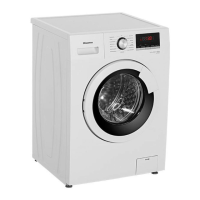
The Hisense washing machine is designed for domestic use, offering various wash cycles and features to clean different types of fabrics. It is equipped with an automatic enzyme phase for stain removal and an imbalance detection and correction system to ensure stable operation during spin cycles. The machine supports both powder and liquid detergents, with a dedicated dispenser for prewash, main wash, stain removers, water softeners, and fabric softeners. It is designed to handle maximum washing capacities of 6/7/7.5/8/9 kg, depending on the model. The appliance is intended for use in household and similar applications, including staff kitchen areas, farmhouses, hotels, motels, bed and breakfast environments, and communal laundrettes.
Before the first wash cycle, it is recommended to run a short wash cycle without laundry to remove any residual water from manufacturing tests. Users should open the tap, close the door, add about 30 ml of detergent to the main wash chamber, and then select and start a short program.
Laundry should be sorted by fabric type, care label symbol, and color. New colored articles should be washed separately. For optimal washing efficiency and distribution, items of different sizes should be washed together. Delicates, small items like nylon stockings and belts, and items with hooks (e.g., bras) should be placed in a cloth bag or pillowcase with a zip. Curtain rings should be removed or curtains washed with rings inside a cotton bag. All pockets must be emptied to prevent damage to laundry and the machine drum. Zips should be closed, and buttons or hooks fastened; loose belts or ribbons should be tied together.
For stain removal, a stain remover can be added to the main wash chamber for red wine, coffee, tea, grass, and fruit stains. Heavily-soiled areas can be pre-treated with stain remover. Only dyes suitable for washing machines should be used, following the manufacturer's instructions, as plastic and rubber parts can be stained by dyes.
To load laundry, open the door, load articles one at a time loosely into the drum without overfilling, observing the load sizes specified in the quick reference guide. Overloading can lead to unsatisfactory washing results and creased laundry. Close the door firmly until it clicks shut.
The detergent dispenser has three chambers for prewash/soak detergent, main wash detergent (including stain remover and water softener), and fabric softener. For powder detergent, the separator in the main wash chamber should be placed in the higher position, with its hooks on the upper end of the back guide rails. For liquid detergent, the separator should be in the lower position, secured by the front guide rails, touching the bottom of the main wash chamber. High-efficiency, low-foam detergents are recommended for front-load machines. The choice and dosage of detergent depend on fabric type, color, wash temperature, degree and type of soiling, size of wash, and water hardness. Too much detergent can cause excessive foam, reducing washing efficiency and potentially preventing spinning. Insufficient detergent can lead to grey laundry and calcification of the heating system, drum, and hoses. Liquid detergents can be used for programs with prewash, but powder detergent must be used for the main wash in such cases. Liquid detergents should not be used with the "Delay" function. For highly concentrated detergents, a special detergent ball or bag should be placed directly inside the drum. Solvents (e.g., turpentine, benzine) should not be used in the washing machine.
The door can only be opened when the door opening light on the control panel is green. Never force the door open while the machine is running. If the door needs to be opened during a cycle, turn off the power or pause the cycle and wait at least 2 minutes for the door lock to release.
The washing machine is equipped with various automatic safety functions to detect and react to faults. Common issues include the machine not starting (check power plug, socket, and door closure), the screen flashing (check door, "Start/Pause" button, and water tap), or the appliance stopping during a program (check door, "Start/Pause" button, excessive foam, or safety system activation). Residue in the detergent drawer may indicate incorrect installation of the cover grid or separator, or dirty parts. Machine vibrations during spin cycles can be caused by an unlevel machine, unremoved transport bolts, or an imbalance in the load. Poor spin results may be due to heavy items, excessive foam, or an incorrect spin speed setting. The program time displayed may lengthen or shorten due to factors like foam, load imbalance, or water temperature.
Regular maintenance is crucial for the longevity and optimal performance of the washing machine.
The exterior and control panel can be cleaned with a soft, damp cloth and a little neutral (non-abrasive) detergent, then dried with a soft cloth. The door seal should be cleaned with a damp cloth when necessary and its condition checked periodically.
The filter should be checked and cleaned regularly, at least two or three times a year, especially if the appliance is not draining properly or fails to perform spin cycles, or if the pump is blocked by foreign objects. Before draining, ensure the water has cooled. To remove the filter, stop and unplug the appliance. Depending on the model, use a removal tool or push down on tabs to open the bottom baffle. Place a container beneath it. Slowly turn the filter counterclockwise until water drains out, then wait until all water has drained. Unscrew and remove the filter completely, clean it and the filter chamber, and check that the pump rotor moves freely. Re-insert the filter clockwise until it is tight, then reinstall the plinth.
The detergent dispenser should be cleaned by pressing the release lever, removing the drawer, and then removing the cover grid and separator. All parts should be washed under running water. After cleaning, refit the separator and grid into the drawer and re-insert the drawer into its housing.
The water supply hose should be checked regularly for brittleness and cracks and replaced if necessary with a new hose of the same type. The mesh filter for the water connection should also be checked and cleaned regularly. To do this, close the tap, loosen the inlet hose, clean the internal mesh filter, and screw the hose back onto the tap. Then, unscrew the inlet hose from the rear of the machine, pull off and clean the mesh filter from the washing machine connection using universal pliers. Refit the mesh filter and screw the inlet hose back on. Turn on the tap and ensure all connections are water-tight. No kinks should be present in the hose. The appliance must not be connected to the mixing tap of an un-pressurized water heater. If the hose is too short, replace it with a suitable length of pressure-resistant hose. The washing machine can be connected without a non-return valve.
For models with dual inlets, the red-marked inlet hose connects to the hot water tap and the inlet valve with the red filter, while the blue-marked hose connects to the cold water tap and the inlet valve with the blue filter. Connections must be tightly fixed and not inverted. For single cold fill connections, a Y-piece connector is needed to connect both inlet valves to the cold fill tap.
In case of faults, the troubleshooting guide provides steps to remedy common problems. If issues persist, contact After-Sales Service. Before transporting the appliance, pull out the mains plug, turn off the tap, disconnect inlet and drain hoses, eliminate all water, and fit the transport bolts. Two persons are needed to move the machine if it weighs over 55 kg.
| Type | Front Load |
|---|---|
| Product Type | Washing Machine |
| Capacity | 9 kg |
| Spin Speed | 1400 RPM |
| Energy Efficiency Class | A |
| Noise Level (Spinning) | 72 dB |
| Display Type | LED |
| Color | White |
| Water Consumption | 49 L |
| Programs | Cotton, Rinse, Drum Clean, Quick Wash, Wool, Spin |
| Dimensions (H x W x D) | 85 x 60 x 59.5 cm |