4
Introduction
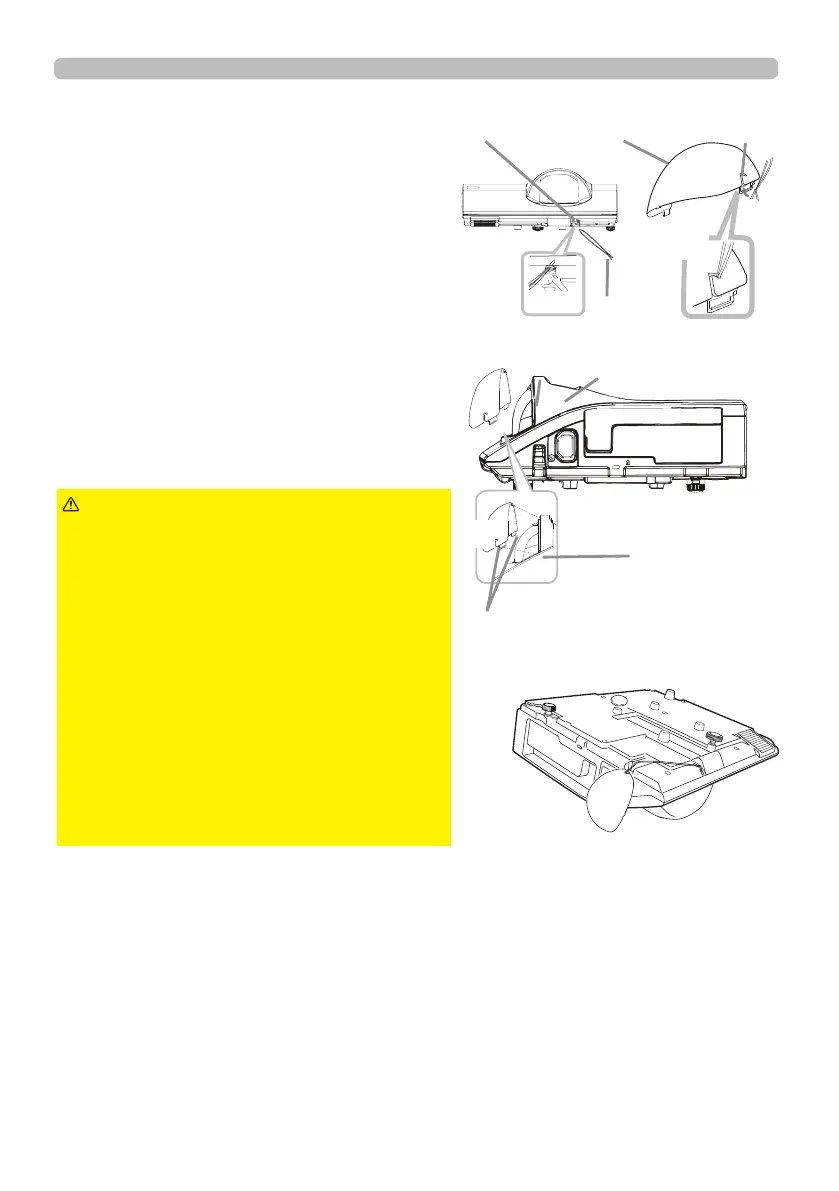
Fastening the lens cover
To avoid losing the cover, please fasten the lens
cover to the projector using the included strap.
Put the strap end into the slit of the lens
cover with the knot on the side of the lens.
Make sure that the strap is inserted to the
end of the slit.
Fasten the strap to the strap hole as shown
in the gure for step 1. Please note that the
knot on the strap is used to fasten it to the
lens cover in step 2.
1.
2.
►Do not hang the
lens cover in front of the lens when the
projector is mounted upside down such as
when mounted on the ceiling. Otherwise,
the lens cover may block the light from the
projector or hit the lens, which may cause
damage to it. When mounting the projector
upside down, hang the lens cover on the
side of the projector or place it on the
projector. For instance, let the strap put
through the concave portion around the
security bar to hang the lens cover (refer
to the gure).
►Be careful not to damage the lens while
handling the lens cover.
CAUTION
Lens cover
Strap slit
Strap hole
Strap
1
2
Insert the upper tab (1 part) of the lens cover
between the upper case and lens as shown
in the gure for step 3. Then, t the right/left
tabs (2 parts) to attach the lens cover.
3.
Upper tab
Right/Left tabs
Upper caseLens
3
 Loading...