Do you have a question about the Hitachi CP-CX300WN and is the answer not in the manual?
Details the projector's key features, including optics, filter system, and HDMI port.
Instructs users to verify package contents against the concise manual.
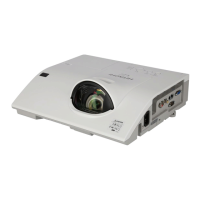
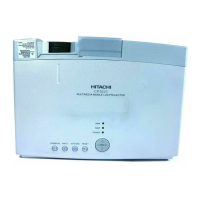
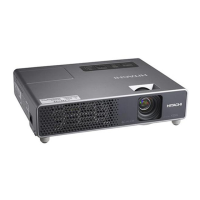
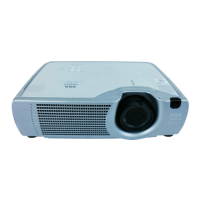
Identifies the main parts of the projector unit with numbered labels.
Details the buttons and indicators on the projector's control panel.
Lists and describes the various input and output ports on the projector.
Identifies the buttons on the remote control unit.
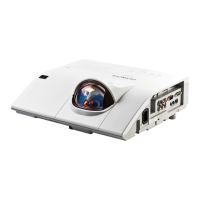
Provides guidance on projector placement, screen type, and stability.
Explains the projector's compatibility with VESA DDC 2B and Plug-and-Play features.
Provides step-by-step instructions for inserting batteries into the remote control.
Explains the range and reception conditions for the remote control signal.
Details the procedure for powering on the projector and its indicators.
Explains how to adjust the audio volume using the remote control.
Describes how to mute the projector's sound temporarily using the MUTE button.
Guides users on how to select the desired input source for the projector.
Explains how to navigate and select items within the EASY MENU.
Explains how to navigate and select items within the ADVANCED MENU.
Describes common indications and their meanings within the On Screen Display.
Adjusts the aspect ratio of the displayed image for different signal types.
Controls the magnification ratio of the projected image.
Corrects vertical keystone distortion for a properly aligned image.
Selects predefined picture modes for optimal viewing based on content.
Adjusts power consumption and lamp brightness for energy saving.
Resets all EASY MENU items to their default factory settings.
Provides access to the comprehensive ADVANCED MENU options.
Adjusts the overall brightness level of the projected image.
Adjusts the difference between the darkest and brightest parts of the image.
Adjusts the tonal gradation of the image for better detail in shadows and highlights.
Adjusts the color temperature, affecting the overall color cast of the image.
Adjusts the intensity or saturation of colors in the image.
Adjusts the balance between green and magenta in the image.
Adjusts the clarity and detail of edges in the image.
Controls the iris for optimal contrast in bright and dark scenes.
Saves and loads custom picture settings for quick recall.
Sets the aspect ratio for various input signal types.
Adjusts the overscan setting to fit the image within the screen boundaries.
Adjusts the vertical position of the projected image.
Adjusts the horizontal position of the projected image.
Adjusts the horizontal phase to eliminate flicker in the image.
Adjusts the horizontal size of the projected image.
Automatically adjusts image position and size for optimal display.
Selects the progressive scan mode for video signals.
Adjusts the video noise reduction level for cleaner images.
Selects the color space (e.g., RGB, SMPTE) for optimal color reproduction.
Selects the video format for S-Video and Video ports.
Sets the HDMI format for optimal signal compatibility.
Adjusts the digital color range for HDMI input signals.
Sets the computer input signal type for COMPUTER IN ports.
Controls the frame lock function for specific signals to ensure proper display.
Sets the display resolution for computer input signals.
Adjusts the magnification level of the projected image.
Adjusts the picture position without moving the projector.
Adjusts the vertical position of the picture for specific projector models.
Adjusts the horizontal position and size of the picture for specific models.
Corrects vertical keystone distortion by shrinking image edges.
Automatically enables ECO mode at startup, adjusting lamp brightness.
Selects energy-saving modes to reduce power consumption and lamp brightness.
Configures projector mounting orientation (e.g., ceiling, desktop).
Sets the projector's standby power consumption and network behavior.
Configures the output signal to the monitor port, including standby settings.
Adjusts the audio output volume level.
Enables or disables the built-in speaker.
Selects the audio input source and configures related functions like C.C.
Sets the display language for menus and OSD.
Temporarily blanks the screen with a selected color or preset.
Automatically blanks the screen after a period of inactivity.
Configures the screen displayed when the projector starts up.
Allows capturing and displaying a custom startup image.
Locks the MyScreen setting to prevent unauthorized changes.
Displays various system messages and status indicators.
Assigns custom names to input ports for easier identification.
Sets a template for displaying images or slideshows.
Configures closed captioning display options for video content.
Automatically searches for active input signals in a specified order.
Enables or disables the direct power-on function without using the remote.
Sets a timer for automatic power-off after a period of inactivity.
Configures the USB Type B port for mouse or USB display functions.
Displays the accumulated usage time of the projector lamp.
Displays the usage time of the air filter, indicating replacement needs.
Assigns frequently used functions to dedicated buttons for quick access.
Selects the picture input port to be used by the My Source function.
Accesses service menus for altitude, auto adjust, ghost, and filter message settings.
Contains sub-sections for service functions like key lock and communication.
Contains sub-sections for service functions like communication type and serial settings.
Includes service sub-sections like response limit time and cloning.
Contains service sub-sections for information display and factory reset.
Configures wireless network connection settings, including SSID and security.
Details wireless setup options like DHCP, IP Address, and Subnet Mask.
Covers wireless setup for Date/Time, Channel (CH), and Encryption.
Allows setting the network name (SSID) for wireless connection.
Displays detailed information about the wireless LAN connection status.
Configures wired network connection settings.
Covers wired setup for Time Difference, Date/Time, and Wired Information.
Sets a custom name for the projector on the network.
Transfers and manages images from a computer to the projector.
Enables or disables AMX Device Discovery for integration with AMX systems.
Features for controlling presentations, including presenter mode and multi-PC display.
Covers presentation settings like multi-PC mode and display user name.
Restarts network functions or performs network diagnostics.
Changes the projector's security password.
Sets or disables a password for the MyScreen feature.
Enables or disables PIN lock for projector usage.
Sets or disables a password for the MY TEXT feature.
Configures the display of custom text messages.
Allows writing and editing custom text messages.
Locks the cloning function to prevent unauthorized copying of settings.
Enables presentations directly from a USB storage device without a computer.
Details the thumbnail mode for selecting and managing images.
Explains operating controls and the setup menu for images.
Describes menu operations for sorting, slideshows, and file management.
Details Full Screen Mode and operations for still images.
Explains operations for playing movies in Full Screen mode.
Configures and starts slideshows of images from USB storage.
Explains the format and structure of the playlist file for slideshows.
Details hardware and software requirements for USB display on Windows.
Describes the Right-Click and Floating menus for the LiveViewer application.
Details options for optimizing performance, transmission speed, and image quality.
Details hardware and software requirements for USB display on Mac.
Describes the menu options within the LiveViewer application for Mac.
Details options for optimizing performance, transmission speed, and image quality.
Provides instructions for safely replacing the projector lamp.
Details the procedure for cleaning and replacing the air filter.
Covers general upkeep and care for the projector's components.
Lists and explains messages that may appear during projector operation.
Explains the meaning of different indicator lamp states and combinations.
Resets all projector settings to their factory defaults.
Guides users to identify common issues that are not actual machine defects.
Provides legal terms for using the projector software.
| Contrast Ratio | 10, 000:1 |
|---|---|
| Throw Ratio | 1.5 - 1.8:1 |
| Display Type | 3LCD |
| Screen Size | 30 - 300 inches |
| Brightness | 3000 lumens |
| Resolution | WXGA (1280 x 800) |
| Connectivity | HDMI, VGA, USB |
| Keystone Correction | Vertical: ±30 degrees |
| Video Modes | 480i, 480p, 576i, 576p, 720p, 1080i, 1080p |
| Lamp Type | UHP |
| Output Connectors | Audio Out |
| Noise Level | 30 dB (Eco mode) |