29
CP-X505(EDX35N)
6-7 Lens
WARNING
• Before replacing the projector lens, be sure to read this manual, the “User's Manual-Safety Guide” and the
“Optional Lens User's Manual” of the LCD projector for use with this lens.
• Do not place the lens in a location subject to direct sunlight or other strong lighting or near heat-radiating
equipment.
• Do not subject the lens to shocks.
• Be sure to unplug the LCD projector before replacing the lens.
• Do not touch the fan of the LCD projector during operation.
• Before replacing the lens, be sure to turn off and unplug the LCD projector, and allow at least 45 minutes
for the projector to fully cool.
• When attaching, take care so that dust not enter inside.
CAUTION
• When replacing the lens, do not touch the LCD panels or polarizing plates of the LCD projector or subject
them to shocks.
• When replacing the lens, be careful not to damage the connectors or wires inside the LCD projector.
• After replacing the lens, part of the lens may stick out from the LCD projector.
ATTENTION
• Do not touch the lens directly with your hands or fi ngers.
This can dirty the lens and cause deterioration in image quality.
•
The lens is a precision optical device. Carefully handle the lens without subjecting it to shocks or vibrations.
• When resting the lens on a surface, place the lens face down on a soft cloth.
• Select Lens type in OPTION-SERVICE-LENS TYPE Menu after changing the Lens.
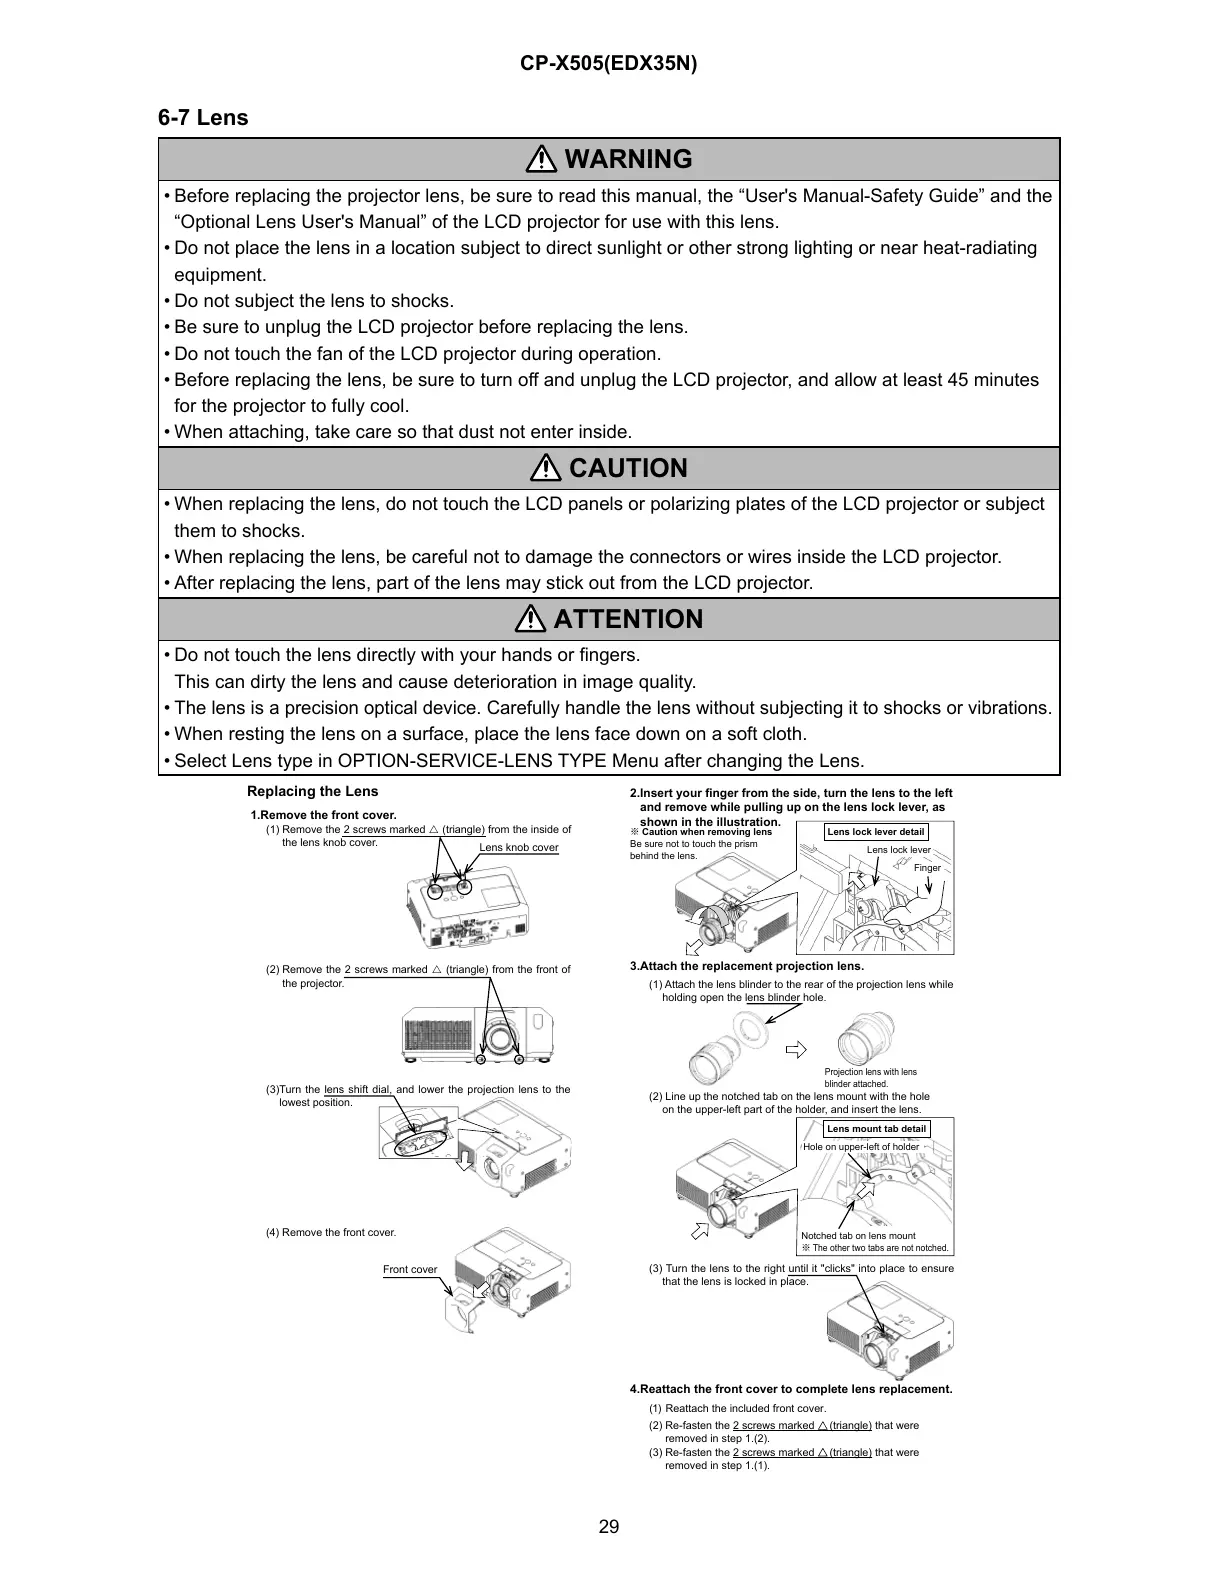
Replacing the Lens
1.Remove the front cover.
(1) Remove the 2 screws marked
U
(triangle) from the inside of
the lens knob cover.
Lens knob cover
(2) Remove the 2 screws marked
U
(triangle) from the front of
the projector.
(3)Turn the lens shift dial, and lower the projection lens to the
lowest position.
2.Insert your finger from the side, turn the lens to the left
and remove while pulling up on the lens lock lever, as
shown in the illustration.
Lens lock lever detail
Lens lock lever
3.Attach the replacement projection lens.
(2) Line up the notched tab on the lens mount with the hole
(2) Re-fasten the 2 screws marked (triangle) that were
removed in step 1.(2).
(3) Re-fasten the 2 screws marked (triangle) that were
removed in step 1.(1).
on the upper-left part of the holder, and insert the lens.
Lens mount tab detail
Hole on upper-left of holder
Notched tab on lens mount
※
The other two tabs are not notched.
(3) Turn the lens to the right until it "clicks" into place to ensure
that the lens is locked in place.
4.Reattach the front cover to complete lens replacement.
(1) Attach the lens blinder to the rear of the projection lens while
(1) Reattach the included front cover.
holding open the lens blinder hole.
Projection lens with lens
blinder attached.
※
Caution when removing lens
Be sure not to touch the prism
behind the lens.
Finger
(4) Remove the front cover.
Front cover
 Loading...