Do you have a question about the Hitachi CPX7 and is the answer not in the manual?
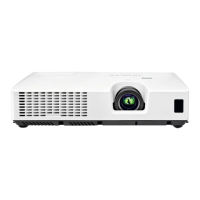
This document describes the Hitachi CPX7/CPX8/CPX9 projector, a liquid crystal projector designed for displaying images from various input sources. It emphasizes safe operation and proper maintenance to ensure product longevity and optimal performance.
The Hitachi CPX7/CPX8/CPX9 is a versatile projector capable of displaying images from a range of devices, including computers, video players (VCR/DVD/Blu-ray Disc players), and other signal sources. It supports both 4:3 and 16:9 aspect ratios, allowing for flexible display options depending on the content. The projector features multiple input ports, including COMPUTER IN (D-sub 15 pin mini), S-VIDEO (mini DIN 4 pin), VIDEO (RCA), and HDMI, enabling connection to a wide array of modern and legacy devices. It also includes audio input/output ports (Stereo mini) for integrated sound or connection to external audio systems, and a MONITOR OUT port for connecting to an external display. The projector is equipped with a 200W UHB lamp for projection and a 1W speaker for basic audio output.
Setup and Arrangement: The projector can be arranged for both horizontal surface placement and ceiling suspension. Detailed tables and illustrations are provided to help determine the optimal screen size and projection distance based on the model (CPX7 or CPX8/CPX9) and desired aspect ratio (4:3 or 16:9). When placing the projector, it's crucial to maintain a space of at least 30 cm from walls and other objects to avoid blocking the lens or vent holes. For ceiling mount installations, specific mounting accessories and professional service may be required.
Powering On/Off: To power on, first ensure the power cord is firmly connected to the AC IN port and a suitable power outlet. The POWER indicator will light up in steady orange. After removing the lens cover, press the STANDBY/ON button on the projector or the remote control. The projection lamp will light up, and the POWER indicator will blink green before turning steady green when fully on. If the DIRECT POWER ON function is activated, the projector will turn on automatically upon power supply connection. To power off, press the STANDBY/ON button. A "Power off?" message will appear, requiring a second press of the STANDBY/ON button to confirm. The lamp will turn off, and the POWER indicator will blink orange during the cooling process, eventually turning steady orange. It is crucial to allow the projector to cool for at least 10 minutes after turning it off before turning it on again, and to avoid turning it off shortly after turning it on, as this can damage the lamp.
Adjusting Projection: The projector features elevator feet and knobs for adjusting its height and tilt, allowing for horizontal placement on uneven surfaces or tilting the front up to 12 degrees for optimal screen angle. To adjust, pull up the elevator knobs to loosen the feet, position the projector to the desired height, then release the knobs to lock the feet. Fine adjustments can be made by twisting the feet manually.
Displaying and Adjusting the Picture: After connecting a signal source, activate it and ensure it sends a signal to the projector. Use the INPUT button on the projector or the remote control (VIDEO or COMPUTER buttons) to select the desired input source. The VOLUME +/- buttons adjust the audio level, and the MUTE button silences it. The ASPECT button on the remote control cycles through aspect ratio modes. The zoom ring adjusts the screen size, and the focus ring sharpens the picture. For a blank screen while the lamp is on, use the BLANK function to prevent damage that could occur from physically blocking the projection light.
Lamp Replacement: The projector lamp has a finite lifespan, and prolonged use can lead to darker pictures or poor color tone. Early replacement is recommended. The lamp type number is DT01141. To replace the lamp, first turn off the projector, unplug the power cord, and allow it to cool for at least 45 minutes. Loosen the screw on the lamp cover, slide and lift it off. Then, loosen the two screws on the lamp itself and carefully remove it by the handle. Insert the new lamp, firmly retighten its screws, and then replace and fasten the lamp cover. After replacement, turn on the projector and reset the lamp time through the OPTION menu (LAMP TIME item) to ensure accurate tracking of lamp usage. It is critical to only loosen the designated screws and avoid touching the inner space of the projector.
Air Filter Cleaning and Replacement: The air filter should be checked and cleaned periodically, or when prompted by indicators or messages. The projector contains two types of filters: coarse and fine meshed. The air filter set type number is UX36761. To clean, turn off the projector, unplug the power cord, and allow it to cool. Use a vacuum cleaner on and around the filter cover. Pull up the filter cover knobs to remove it. Vacuum the filter vent. Carefully remove the fine meshed filter (leaving the coarse meshed filter in the cover if possible) and vacuum both sides of it. Also, clean the coarse meshed filter inside the cover. If either filter is damaged or heavily soiled, replace them with new ones. Reassemble the filters, ensuring the fine meshed filter's stitched side is up, and place the filter unit back into the projector. After cleaning or replacement, reset the filter time using the FILTER TIME item in the EASY MENU. Regular cleaning is essential to prevent dust buildup, which can lead to internal overheating, fire, or malfunction.
General Safety and Care: Always handle the projector and its components with care. Avoid placing the projector in smoky, humid, or dusty environments. Do not look directly into the lens or openings when the lamp is on, as the strong light can be harmful. Ensure proper ventilation by maintaining clear space around the projector's vents. When carrying the projector, remove all attachments, including power cords and cables. If any abnormalities occur (smoke, strange odor, excessive sound), immediately stop using the projector and unplug it. For internal maintenance, always consult a dealer or service personnel.
| Resolution | 1024 x 768 (XGA) |
|---|---|
| Contrast Ratio | 500:1 |
| Lamp Life | 2000 hours (Normal mode), 3000 hours (Eco mode) |
| Display Type | LCD |
| Projection Technology | 3LCD |
| Noise Level | 35 dB (Normal mode), 29 dB (Eco mode) |
| Input Ports | HDMI, VGA, Composite Video, S-Video |