ENGLISH
3.1 UNIT INSTALLATION
3.1.1 ,QLWLDOFKHFN
Check to ensure that the following accessories are packed with
the unit.
N O T E
,IDQ\RIWKHVHDFFHVVRULHVDUHQRWSDFNHGZLWKWKHXQLWSOHDVHFRQWDFW
\RXUFRQWUDFWRU
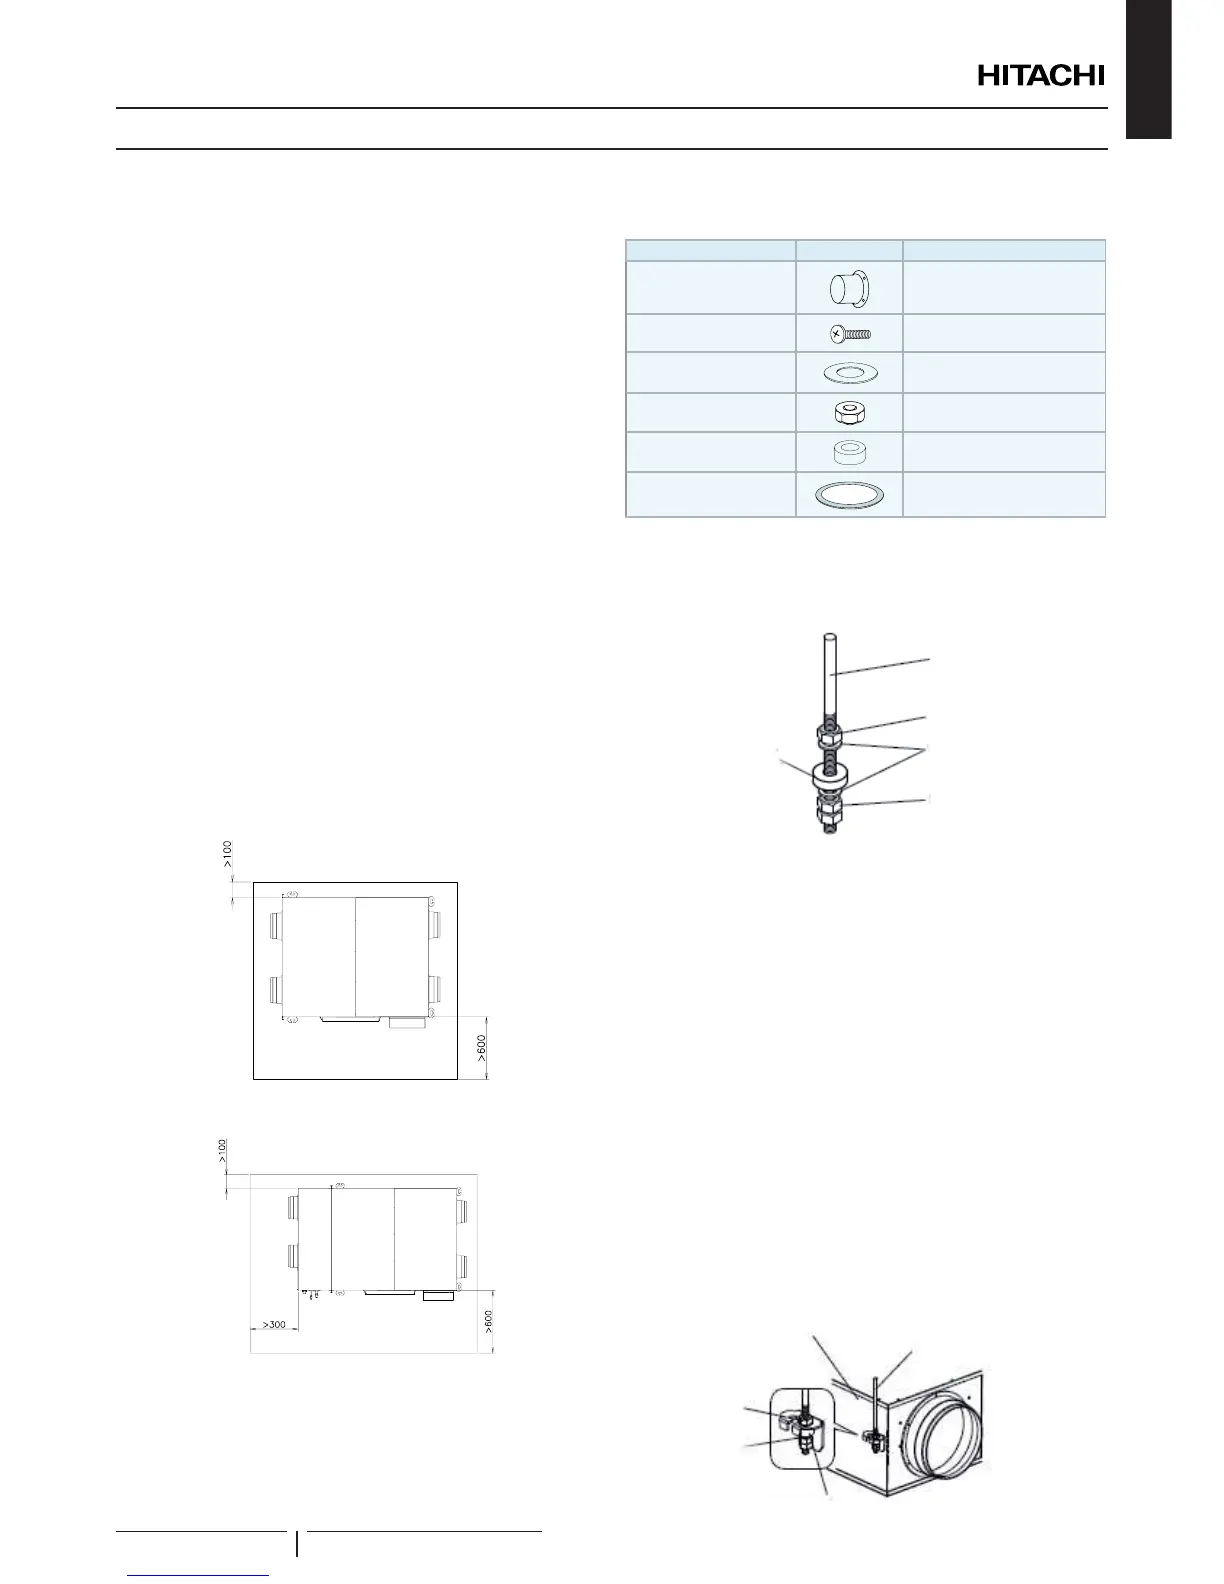
Accesory Appearance Quantity
Duct adapter 4
Screw
Washer
Nut
9LEUDWLRQ$EV5XEEHU
4
Rubber duct joint
4
3.1.2 ,QVWDOODWLRQ
Install the KPI unit with a proper clearance around it paying
careful attention of installation direction for the piping, wiring and
maintenance working space, as shown below.
Service space
• Install the unit with a proper clearance around it for operation
DQGPDLQWHQDQFHZRUNLQJVSDFHDVVKRZQLQEHORZ¿JXUH
• Consider the air distribution from the unit to the space of
the room, and select a suitable location so that uniform air
temperature in the room can be obtained.
.3,((
(mm)
.3,;(
(mm)
• Avoid obstacles which may hamper the air intake or the air
GLVFKDUJHÀRZ
• Select a position for introducing the outside air where no
H[KDXVWRUFRPEXVWLRQJDVHVZLOOEHVXFNHGLQWRWKHXQLWDQG
where it will not be covered by snow.
0RXQWLQJWKHVXVSHQVLRQEROWV
1 Preparing the sling Bolts.
Rubber isolator
$QFKRUEROW0RU0
Nut
Nut
Washer
2 Hanging the Unit.
- Hang the suspension bracket on the anchor bolts and
DGMXVWLQVXFKDZD\WKDWWKHXQLWLVLQVWDOOHGKRUL]RQWDOO\
- Tighten up securely using double nuts in order to prevent
looseness.
C A U T I O N
:KHQVXVSHQGLQJWKHPDLQXQLWIURPWKHFHLOLQJGRQRWKDQGOHLWLQVXFK
DZD\WKDWIRUFHZLOOEHDSSOLHGWRWKHFRQWUROER[
N O T E
,QFDVHWKDWVOLQJEROWVDUHWRRVKRUWUHDWWDFKWKHVXVSHQVLRQEUDFNHWLQ
DQDOWHUQDWLYHSRVLWLRQ
3 Remove the screws at the top mounting position.
4 Remove the suspension bracket and attach them at higher
mounting position.
5 Tighten up the screws in the screw hole where the
suspension brackets were removed in order to prevent air
leaks.
KPI unit
 Loading...