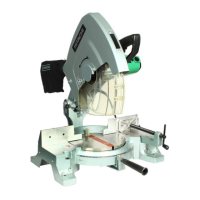
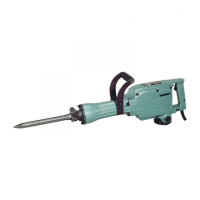
APPLICATIONS
o
Woodworking
jobs
centered on grooving and
beveling.
For example, grooving beveling, cutting, copying, Engraving,
shape
cutting,
combinations
and
others.
PRIOR
TO
OPERATION
1
.
Power
source
Ensure that the
power
source to be
utilized
conforms
to
the
power
requirements
specified on
the product nameplate.
2. Power switch
Ensure
that
the power switch
is
in
the
OFF
position.
If
the
plug is
connected to a
power
receptacle while
the power switch is
in
the
ON position, the power
tool
will start operating
immediately,
inviting
serious accident.
3. Extension
cord
When the work area is removed
from the
power
source,
use an
extension cord of sufficient
thickness
and rated
capacity. The extension
cord
should
be
kept
as
short
as practicable.
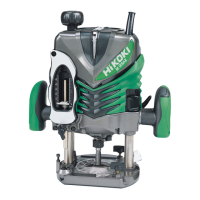
4.
Setting
the attachment angle of the
handle
As Fig. 2 shows, the handle attachment
angle
can be set
in three stages. Use a plus head screwdriver to loosen
the
machine
screw
attached
to the
handle,
adjust the
handle
to the
desired
position and
re-tighten
the machine
Handle
screw.
Machine
screw
Fig. 2
MOUNTING AND DISMOUNTING BITS
Caution: Be sure to switch
power
OFF and
disconnect
the attachment plug from the power
receptacle
to
avoid serious trouble.
1
. Mounting Bits:
(1)
Insert
the
bit
deeply
in
the
collet
chuck
hole.
As
shown in Fig.
3,
press the lock plate, tighten
the
collet nut
and
then
use the accessory wrench to
firmly
tighten the
codec chuck.
Caution
Ensure that
the collet chuck
is
firmly tightened after
inserting
a
bit. Failure to
do so
will result in damage
to the
collet
chuck.
Model
M12V,
M12SA
Be sure
to use a chuck
sleeve
when
using
bits
of
1/4"
(6.35mm)
or
3/8"
(9.5mm). First
insert
the
chuck
sleeve
deeply in
the
collet
chuck, then
insert
Fi
9-
3
the
bit in the
chuck
sleeve.
Tighten
the
collet
chuck
firmly
as in
step
(1
).
2.
Dismounting
Bits:
When dismounting
the
bits, do
so
by
following
the steps
for
mounting
bits
in
reverse order.
9

 Loading...