--- 6 ---
9-1. Disassembly
(1) First, remove the bit. If further disassembly is attempted with the bit mounted on the router, it may cause
damage to the cutting edges of the bit and/or serious injury to the handler.
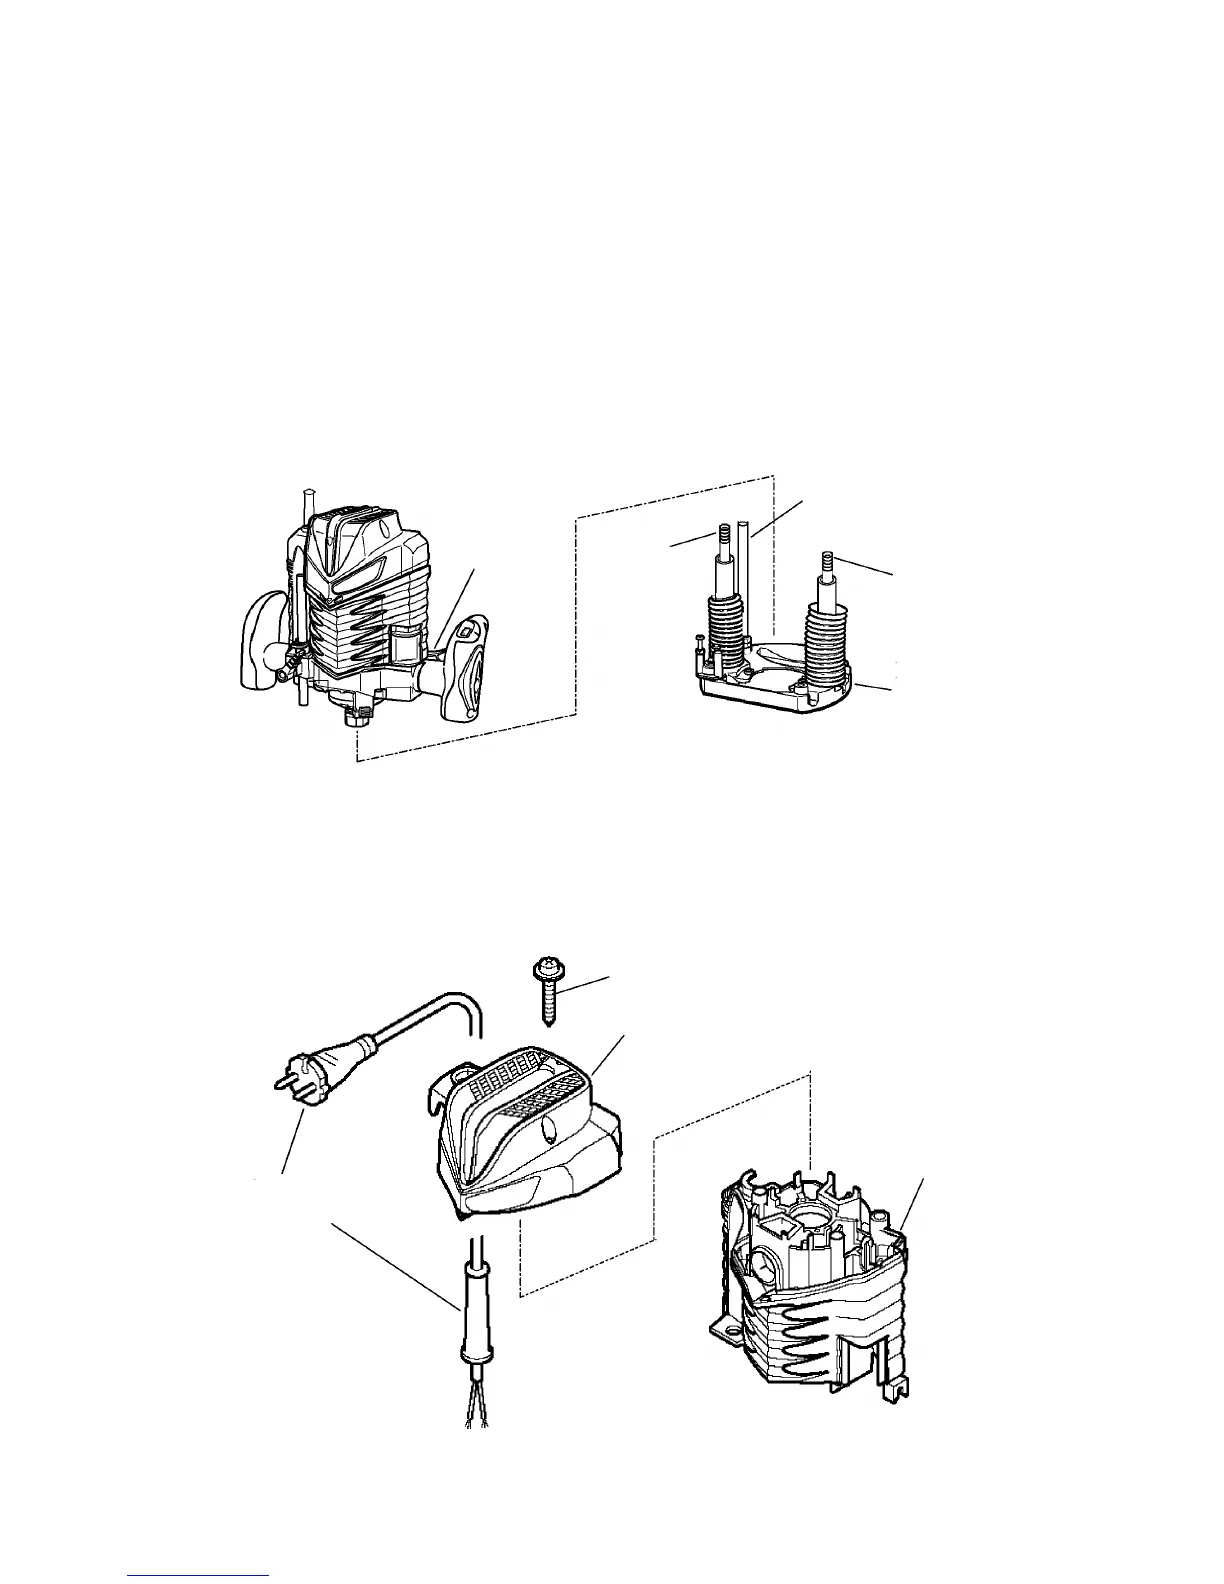
(2) Removal of the Base [76] ([75]) (Fig. 3)
(a) Stand the router upright so that the bottom surface of the Base [76] ([75]) is directed downward.
(b) Lock Lever (A) [49] ([48]).
(c) With a 13-mm wrench, remove the Screw M8 [62] ([61]).
(d) Release Lever (A) [49] ([48]) and disassemble the Base [76] ([75]) from the main body. As the Springs
[41] [42] ([40]) ([41]) are installed within the columns of the Base [76] ([75]), be sure to support the main
body by firmly gripping the handle during disassembly.
Screw M8 [62] ([61])
Lever (A)
[49] ([48])
Spring
[41] ([40])
Spring
[42] ([41])
Base
[76] ([75])
Fig. 3
(3) Removal of the Head Cover [9] ([7]) (Fig. 4)
Loosen and remove the three Tapping Screws (W/Flange) D4 x 25 (Black) [16] ([14]), and move the Head
Cover [9] ([7]) toward the Cord [2] ([2]).
Fig. 4
Cord
[2] ([2])
Housing Ass'y
[27] ([26])
Tapping Screw (W/Flange)
D4 x 25 (Black) [16] ([14])
Head Cover [9] ([7])