GB
Translation of original user instructions
21
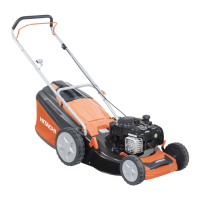
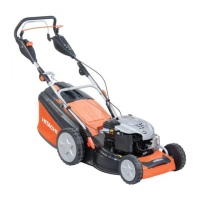
Petrol lawnmower
Operating fluids
Petrol Motor oil
Grade
Regular petrol /
unleaded
Refer to the motor
manufacturer's
instructions
Filling
capacity
Refer to the motor
manufacturer's
instructions
about 0.6 l
Safety
Warning!
Never leave a motor running in an enclosed
space. Toxic hazard!
Store petrol and oil in suitable containers
2QO\¿OORUHPSW\SHWURODQGRLORXWGRRUVZKHQWKH
motor is cold
1HYHU¿OOSHWURORURLOZKHQWKHPRWRULVUXQQLQJ
'RQRWRYHU¿OOWKHIXHOWDQNSHWUROH[SDQGV
Do not smoke while refuelling
Do not open the fuel tank while the motor is running
or if the motor is hot
Replace damaged fuel tank or fuel tank cap
Always close the fuel tank tightly
,IIXHORYHUÀRZVQHYHUDWWHPSWWRVWDUWWKHPRWRU
Instead, move the machine away from the fuel con-
taminated area. Avoid any attempt to start the igni-
tion until the fuel vapours have evaporated.
If motor oil has leaked out:
Do not start the motor
Soak up the leaked motor oil using an oil bind-
ing agent or rag and dispose of it properly
Clean the unit
Used oil should not be:
disposed of with domestic rubbish
poured into the sewage system, drains, or
onto the ground
We recommend to collect the used oil in a closed
container and to deliver it to a suitable recycling or
service station.
Adding petrol
1. Unscrew the tank cap, and keep in a clean place.
2. Pour in petrol using a funnel.
3. )LUPO\UHSODFHWKHFDSRQWKH¿OOHURSHQLQJDQG
clean it.
Adding motor oil
1. 8QVFUHZWKH¿OOHUFDSDQGNHHSLQDFOHDQSODFH
2. Pour in oil using a funnel.
3. )LUPO\UHSODFHWKHFDSRQWKH¿OOHURSHQLQJDQG
clean it.
Initial startup
Caution!
The equipment should not be used if the cutting
gear and/or fastenings are loose, damaged or
worn.
Carry out a visual inspection before each start-
up.
The camera symbol on the following page refers
to the illustrations on Page 4–6.
Adjusting the cutting height
Caution - Risk of injury!
Adjust the cutting height only with the motor
switched off and when the mower blade has
come to a standstill.
ƒ Always set all the wheels to the same cutting
height.
ƒ Cutting height adjustment depends on the
particular model.
Central adjustment (
1)
1. To release the lever, press to the side and hold.
2. Push the lever to the left or right to select the
desired cutting height.
3. Let the lever click into position.
 Loading...