--- 36 ---
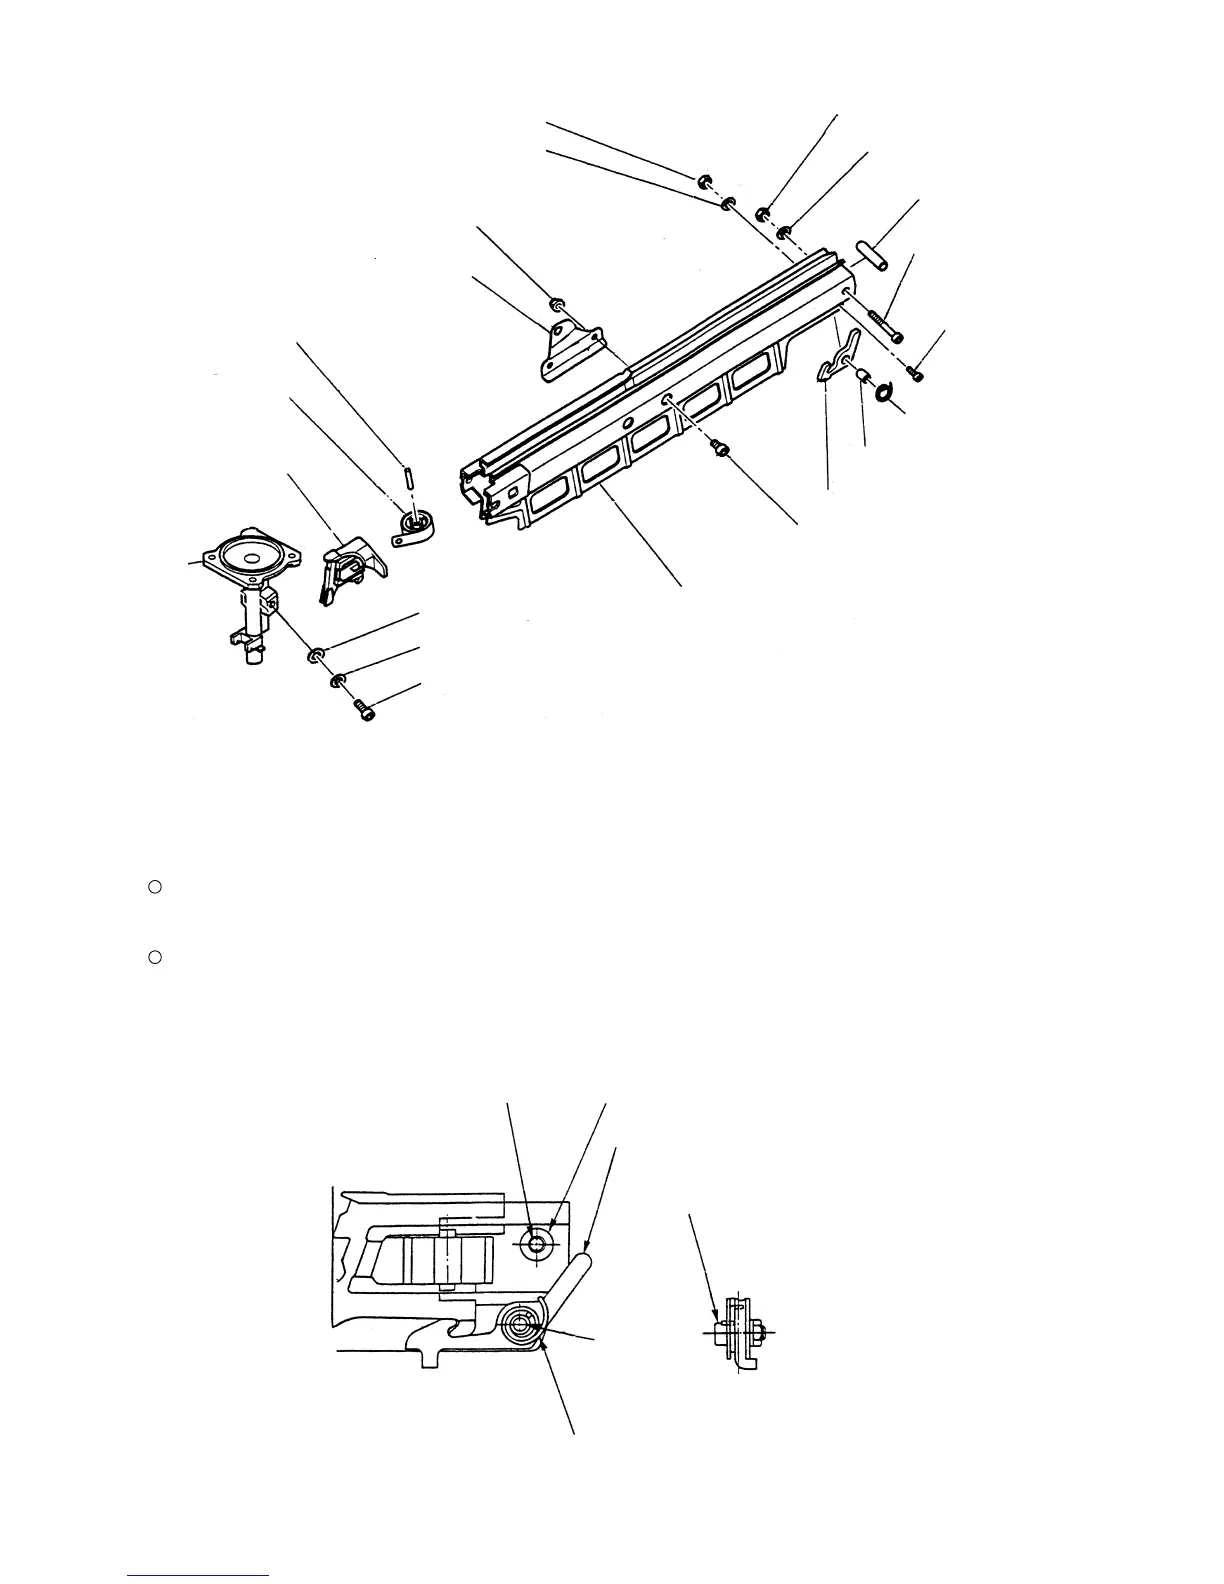
Fig. 20
Nylon Nut M5 [80]
Spring Washer M4 [79]
Nose [32]
Hex. Socket Hd. Bolt
M6 x 12 [53]
Magazine [82]
Collar [88]
Nail Feeder [75]
High Tension Bolt M6 x 18 [29]
Handle Arm (B) [37]
Spring Washer M5 [81]
Nylon Nut M4 [78]
Stopper Spring [89]
Hex. Socket Hd.
Bolt M4 x 15 [85]
Hex. Socket Hd.
Bolt M5 x 45 [84]
Sleeve [83]
Stop Lever [87]
Washer [86]
Spring Washer M6 [30]
Needle Roller [77]
Ribbon Spring [76]
Nylon Nut M6 [36]
(b) Reassembly
Reassembly can be accomplished by following the disassembly procedures in reverse.
Note the following points.
Press the Magazine [82] against the Nose [32] side to minimize the clearance between the Magazine [82]
and the Nose [32] as described in 10-2-(3).
Mount the Stop Lever [87] and the related parts as shown in Fig. 21. When mounting the Stopper Spring
[89], hook an end of the Stopper Spring [89] on the Stop Lever [87] and insert the other end into the small
hole of the Magazine [82].
Sleeve [83]
Fig. 21
Stop Lever [87]
Hex. Socket Hd. Bolt M4 x 15 [85]
Collar [88]
Stopper Spring [89]
Hex. Socket Hd.
Bolt M5 x 45 [84]
Nose
[32]


 To Next Page