--- 23 ---
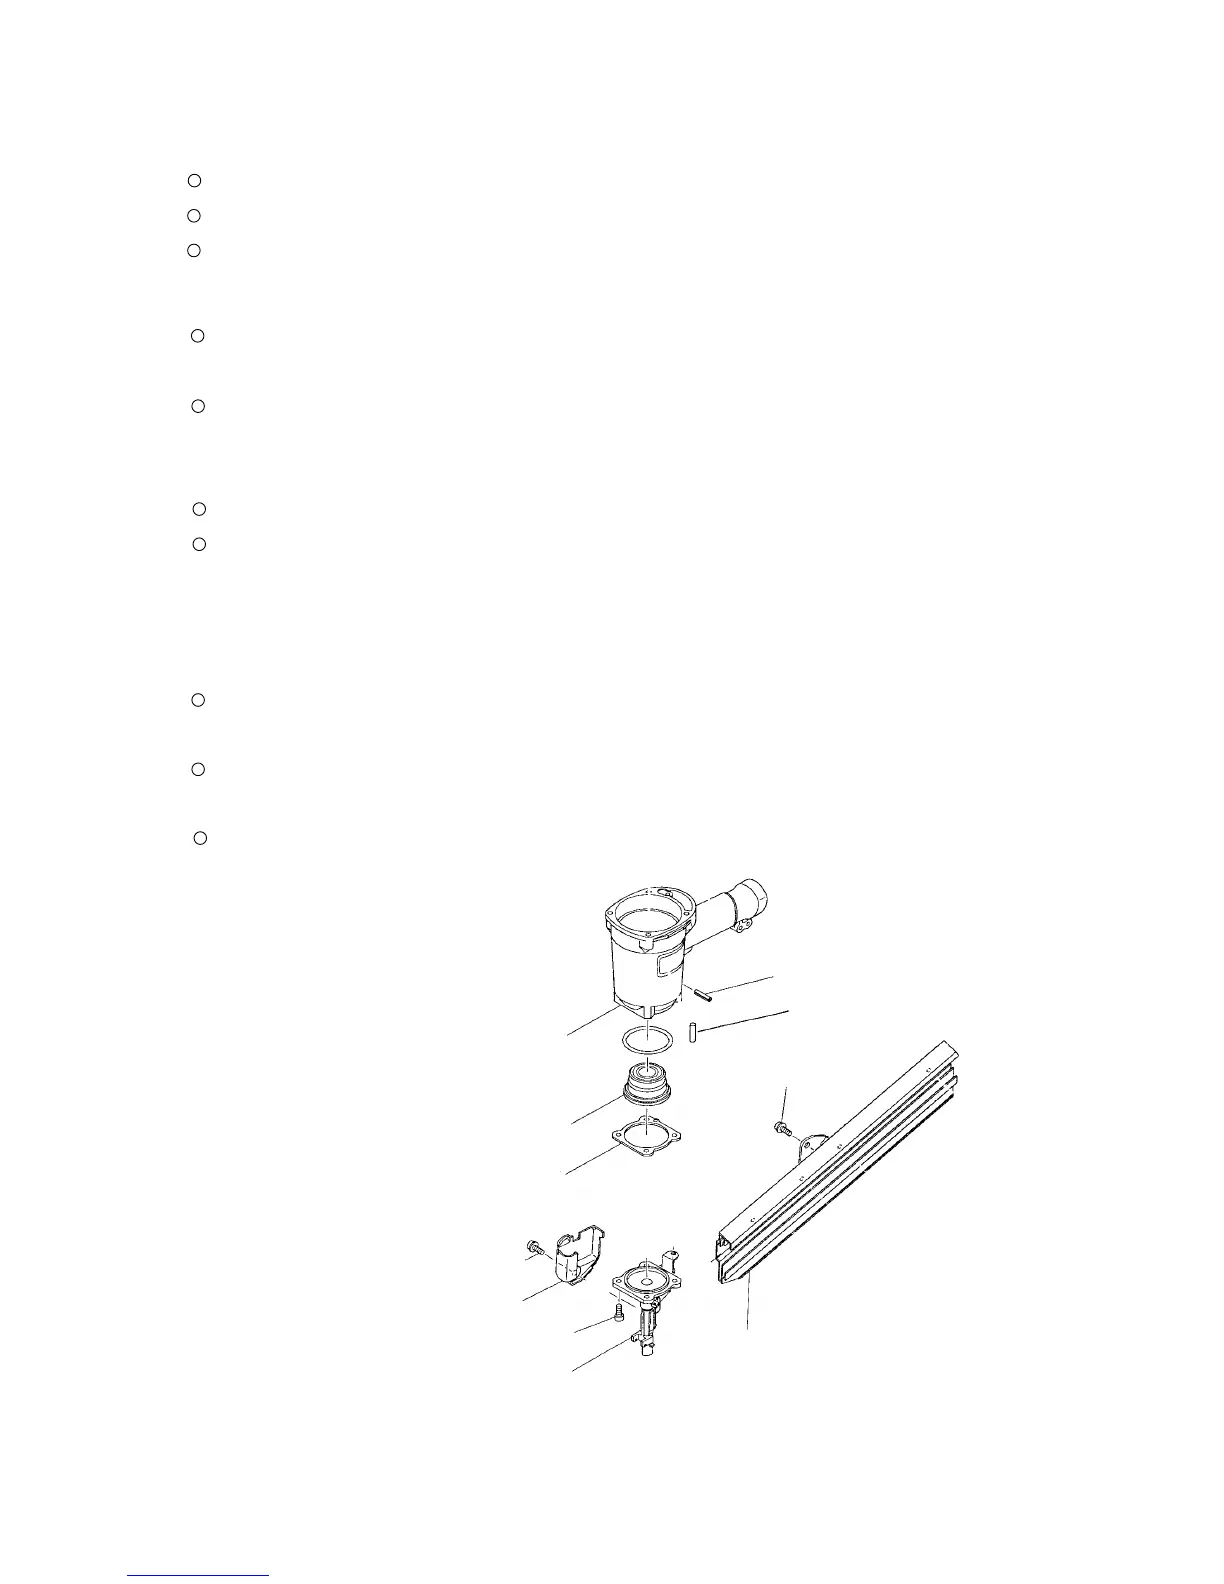
Fig. 14
(3) Piston Bumper (B) [28], Gasket (A) [29] and related parts (See Figs. 14 and 15.)
Tools required
Hexagon bar wrench (5 mm, 6 mm)
Roll pin puller (3 mm (0.118") dia.)
Screwdriver
(a) Disassembly
Pull out the Roll Pin D3 x 30 [43] and remove the Nylock Bolt (W/Flange) M6 x 12 [30] to remove the Guard
[31].
Pull the Nail Feeder Ass'y [69] backward and insert a screwdriver or a rod into the stopper hole for the Nail
Feeder Ass'y [69] as shown in Fig. 15. (This is to prevent the Nail Feeder Ass'y [69] from moving forward
when removing the Magazine [72].)
Remove the Nylock Bolt (W/Flange) M8 x 16 [34] and pull out the entire magazine section backward.
Remove the four Nylock Hex. Socket Hd. Bolts M8 x 22 [32]. Then Piston Bumper (B) [28] and Gasket (A)
[29] can be removed together with the Nose [33].
(b) Reassembly
Disassembly procedures should be followed in the reverse order. Note the following points.
Plunger (B) [54] is apt to come off during disassembly. Be sure to check that Plunger (B) [54] is securely
mounted during reassembly.
Pressing the Magazine [72] against the Nose [33], secure them with the Nylock Bolt (W/Flange) M8 x 16
[34] with a minimum clearance between the Magazine [72] and the Nose [33].
Mount the Roll Pin D3 x 30 [43] without fail.
Nylock Bolt (W/Flange)
M6 x 12 [30]
Nylock Hex. Socket
Hd. Bolt M8 x 22 [32]
Magazine [72]
Guard [31]
Gasket (A) [29]
Piston Bumper (B) [28]
Nose [33]
Nylock Bolt (W/Flange)
M8 x 16 [34]
Plunger (B) [54]
Roll Pin D3 x 30 [43]
Body Ass'y [26]


 To Next Page