Do you have a question about the Hitachi RAR-6N1 and is the answer not in the manual?
Instructions for installing batteries into the remote controller.
Instructions for fixing the remote controller holder to a wall.
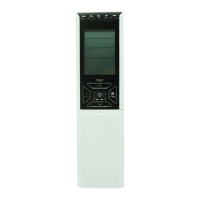
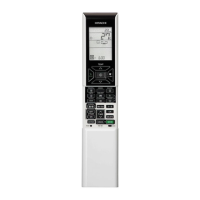
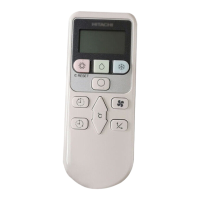
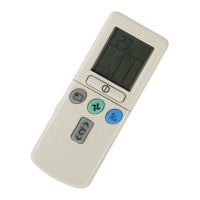
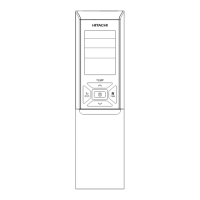
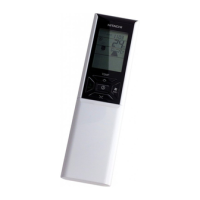
General description of the remote control's purpose, handling, and components like signal window, sensor, and display.
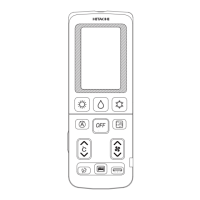
How to use TEMP, START/STOP, FAN SPEED, and ECO buttons.
Functions of POWERFUL, INFO, CLEAN, LEAVE HOME, ECO SLEEP TIMER buttons.
Functions of ON/OFF TIMER, WEEKLY TIMER, MODE SELECTOR, SILENT, AUTO SWING buttons.
Important notes on handling and placing the remote controller.
Automatic restart feature after power interruption.
How the unit automatically selects HEAT or COOL based on room temp.
Conditions for heating and optimal temperature range.
Explanation of the automatic defrosting cycle.
How the unit reduces humidity and recommended temperature.
Conditions for cooling and recommended temperature range.
Using the unit solely as an air circulator.
How to activate and cancel vertical and horizontal air swing.
How to use the POWERFUL button for maximum output.
Conditions and limitations for POWERFUL operation.
How to set the fan speed to ultra slow for quiet operation.
Conditions and limitations for SILENT operation.
Energy saving by auto temperature adjustment and power limit.
Conditions and limitations for ECO operation.
Energy saving via presence detection and temperature shifting.
How temperature shifts based on occupancy duration.
Setting Leave Home for continuous temperature maintenance.
Setting Leave Home for a specific number of days.
Conditions and limitations for Leave Home mode.
How to activate the one-touch cleaning cycle.
How to stop the cleaning cycle.
Notes on the CLEAN function, especially for multi-connections.
Setting a specific time to turn the unit off.
Setting a specific time to turn the unit on.
Setting both turn-on and turn-off times.
How to cancel any set timer reservations.
Setting a timer for energy-saving sleep with reduced fan speed.
How to stop the ECO Sleep Timer.
Combining ECO Sleep Timer with an ON Timer.
How to cancel both ECO Sleep and ON Timer settings.
Initial setup of weekly timer programs.
Choosing between Mode A/B and activating/deactivating the weekly timer.
How to disable the weekly timer.
Editing schedules by copying data from one day to another.
How to delete program reservations or entire days/modes.
Displaying the temperature around the remote controller.
Displaying energy usage data for heating and cooling.
Syncing current time and date from the indoor unit.
Displaying error codes when the unit fails.
Preventing changes to the HEATING mode.
Allowing changes to the HEATING mode.
Preventing changes to COOLING/DEHUMIDIFYING modes.
Allowing changes to COOLING/DEHUMIDIFYING modes.
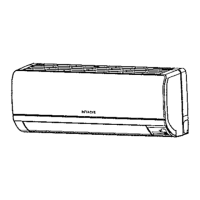
This document describes the Hitachi RAR-6N1 Remote Controller, designed to operate an indoor air conditioning unit. It provides detailed instructions for installation, operation, and maintenance, ensuring optimal performance and longevity of the device.
The remote controller serves as the primary interface for controlling the indoor air conditioning unit. It allows users to select various operating modes, adjust temperature and fan speed, set timers, and access special functions.
Operating Modes: The remote controller supports several operating modes:
Special Functions:
Timer Functions:
Information Function (INFO): Displays the temperature around the remote controller and monthly power consumption. After changing batteries, it transmits the current calendar and clock from the remote controller to the indoor unit. It can also retrieve the current calendar and clock from the indoor unit. In case of an air conditioner failure, it displays an error code.
Battery Installation: The remote controller uses two AAA.LR03 (alkaline) dry batteries. To install, slide off the cover, insert batteries matching the polarity marks, and replace the cover. Batteries last approximately 1 year, but should be replaced sooner if the display fades or reception degrades.
Remote Controller Holder: The remote controller can be fixed to a wall or pillar using the provided screws. Choose a location where signals can easily reach the indoor unit.
Signal Transmission: Point the signal transmitting/receiving window towards the indoor unit when controlling it. The range of control is about 7 meters, but may be shorter if indoor lighting is electronically controlled. A transmission sign lights up when a signal is sent.
Display: The LCD displays the selected room temperature, current time, timer status, selected function, and airflow rate. The LCD turns off after about 3 minutes of inactivity during OFF condition, or 10 minutes during clock setting, but remains on during TIMER setting.
Buttons:
Operation Mode Lock: The remote controller can be set to fix the HEATING, COOLING, or DEHUMIDIFYING modes (including FAN operation). This prevents accidental changes to the operating mode. To lock, simultaneously press ECO and POWERFUL buttons (for HEATING) or ECO and SILENT buttons (for COOLING/DEHUMIDIFYING) for about 5 seconds when the remote controller is OFF. To unlock, repeat the same button combination or press the RESET button (which will clear all stored information). This function will not activate if TIMER reservations are active.
Remote Controller Care:
Battery Replacement:
Troubleshooting Signal Communication:
Auto Restart Control: In case of a power failure, operation will automatically restart with the previous operation mode and airflow direction once power is resumed. To prevent this, switch off the power supply before power is restored. Auto Restart Control is not available when Timer or Sleep Timer mode is set.
Calendar and Clock Setting: Calendar and clock settings are crucial for timer functions. If batteries are changed or if there is a power failure, the calendar and clock need to be reset. This is done by pressing the RESET button, then directing the remote controller towards the indoor unit and pressing the INFO button to transmit the calendar and clock from the indoor unit.
General Precautions:
| Type | Remote Control |
|---|---|
| Brand | Hitachi |
| Model | RAR-6N1 |
| Compatible Devices | Hitachi Air Conditioners |
| Power Source | Battery |
| Battery Quantity | 2 |