Do you have a question about the Hitachi RAS-2-HVNP and is the answer not in the manual?
General notes on reproduction, amendments, and printing errors for the manual. Overview of Hitachi UTOPIA series, IVX Premium/Standard, and indoor units.
Explanation of DANGER, CAUTION, and NOTE symbols used in the manual for safety, and norms compliance.
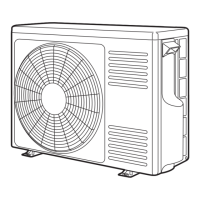
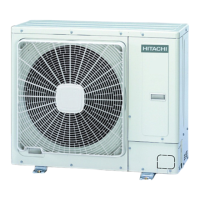
Classification of outdoor and indoor unit models, and product guides for units and accessories.
Crucial safety precautions for unit installation, covering DANGER and CAUTION points.
Instructions for safely hanging and transporting the outdoor unit using ropes.
Provides basic dimensions and clearance requirements for unit installation for various models.
Foundation and mounting requirements, including securing units and providing drainage.
Details on installing optional accessories like air flow guides and snow protection hoods.
Guidelines for selecting and preparing copper pipes, including flaring work and brazing principles.
Step-by-step instructions for connecting piping to specific outdoor unit models.
Chart showing applicable height differences and tables for piping size combinations.
Procedures and tables for calculating additional refrigerant charge based on piping length.
Procedures for using existing pipes with new units, including cleaning or renewal kits.
Pre-installation checks for electrical components, compliance with codes, and impedance.
Describes power source and ground cable connections to the ring core and terminal board.
Explains the function of DIP switches for test run modes and other settings.
Recommended minimum wire sizes for power and transmitting cables based on model.
Details DIP switch settings for multi-unit systems and illustrates connection examples.
Provides detailed wiring diagrams for various outdoor unit models and power supplies.
Describes control logic for compressor frequency, expansion valves, fan, and valves during operations.
Details PCB connectors, switches, and LED indications for specific outdoor unit models.
Explains compressor protection mechanisms and safety device settings for outdoor units.
Flowcharts illustrating cooling, dry, heating, automatic, and defrost operation sequences.
Describes control functions like freezing protection, high pressure prevention, and discharge gas temperature.
Lists available input/output ports and describes the function of various optional signals.
Guides on setting optional functions using PCB switches and describes their functions.
Lists optional functions configurable via remote control switches like PC-ART.
Covers pre-run checks, safety warnings, connection verification, and initial setup.
Step-by-step guide for performing test run via PC-ART remote control.
Explains how to perform a test run using DIP switches on the outdoor unit PCB.
Checklists for verifying operation during test run and compressor checks.
Procedures for checking unit status via 7-segment display, power supply failures, and transmission issues.
Lists alarm codes for units and provides troubleshooting steps based on these codes.
Guides for troubleshooting using the PC-ART remote control and the outdoor unit's 7-segment display.
Detailed steps for checking major components like DIP-IPM inverter, capacitors, and fan motors.
Exploded views and parts tables for cycle/structural and electrical components.
Exploded views for cycle/structural, electrical parts, and parts name list.
Exploded views for cycle/structural and electrical parts, and parts name list.
Exploded views for cycle/structural, electrical parts, and parts name list.
General safety warnings and notes before performing any service operations.
Procedures for removing common outdoor unit components like pipe cover, front cover, fan, and compressor.
Detailed servicing procedures for specific premium series outdoor units.
Detailed servicing procedures for standard series outdoor units.
Specifications, time chart, protective functions, and overload control for the inverter.
Details on thermistors used in outdoor units and their resistance characteristics.
Details the specifications, drive circuit, and activation mode of the electronic expansion valve.
Explains the function of high pressure switches and sensors for protection.
Specifications and circuit diagrams for noise filters used in 3-phase and single-phase systems.
Specifications for reactors used in 3-phase and single-phase inverter systems.
Explains the reliable mechanism for low vibration/sound and the principle of compression.
Steps to check power source, wiring, compressor burnout causes, cooling issues, and alarms.
Provides a template for recording service and maintenance activities performed on the unit.
Details how to use the 7-segment display for recording service and maintenance data.
Step-by-step procedure for performing pump-down to safely replace the compressor.
| Brand | Hitachi |
|---|---|
| Model | RAS-2-HVNP |
| Category | Air Conditioner |
| Language | English |