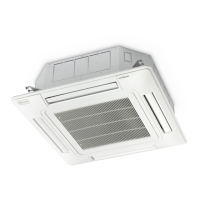
3.2.2 Mounting Position of the Indoor Unit
4-Suspension bolts
(W3/8 or M10) (Field Supplied)
Surface of ceiling
Nut (Field Supplied)
Washer (Accessory)
(Unit: mm)
10 Min.
* Indicates the dimension
between a lower face of
indoor unit and surface of
ceiling.
Model a
3.0HP~4.0HP 248
5.0HP~6.5HP 298
Fig. 3.5 Mounting Position
Liquid Pipe Connection
Gas Pipe Connection
Drain Pipe Connection
Wiring hole (∅32.5 hole)
(for spare)
Wiring hole (30 X 30)
(for cable)
118 (Drain Pipe)
127 (Liquid Pipe Connection)
102 (Gas Pipe Connection)
(Unit: mm)
Fig. 3.6 Indoor Unit and Air Panel
3.2.3 Mounting the Indoor Unit
1 Mount the nuts and washers into the suspension bolts.
102
Suspension Bolt (Field Supplied)
Nut (Field Supplied)
*Washer with Insulation (Accessory)
Suspension Bracket (Attached Indoor Unit)
*Washer (Accessory)
Surface of Ceiling
Approx. 52
Approx. 50
(Unit: mm)
Nut (Field Supplied)
* Place the washer so that the surface with insulation faces downwards.
Fig. 3.7 Mounting Nuts and washer
2 Lift the indoor unit by hoist, and do not apply any force on the drain pan.
3 Secure the indoor unit using the nuts and washer.
Suspension Bolt
Suspension bracket
Drain pan
Fig. 3.8 Mounting the Indoor Unit
NOTE:
If a false ceiling is already constructed, complete all piping and wiring work inside the ceiling before xing the indoor unit
.
INSTALLATION AND MAINTENANCE
HO2019289HA
16

 Loading...


