4
4
DRAIN PIPING
4 DRAIN PIPING
4.1. GENERAL
CAUTION:
- Do not create an upper-slope or rise for the drain
piping, since drain water will flow back to the unit and
leakage to the room will occur when the unit operation
is stopped.
- Do not connect the drain pipe with sanitary or sewage
piping or any other drainage piping.
- When the common drain piping is connected with
other indoor units, the connected position of each
indoor unit must be higher than the common piping.
The pipe size of the common drain pipe must be large
enough according to the unit size and number of units.
- Drain piping will require insulating if the drain is installed
in a location where condensation forming on the outside
of drain pipe may drop and cause damage. The
insulation for the drain pipe must be selected to insure
vapor sealing and prevent condensation forming.
- Drain trap should be installed next to indoor unit. This
trap must be designed to good practice and be checked
with water (charged) and tested for correct flow. Do not
tie or clamp the drain pipe and refrigerant pipe together.
NOTE:
Install drainage in accordance with national and local
codes.
After performing drain piping work and electrical wiring,
check to ensure that water flows smoothly as in the
following procedure:
Checking with Drain-Up Mechanism and Float
Switch
- Switch ON the power supply.
- Pour approximately 1.8 liters of water into the drain pan,
then float switch up and drain pump start working
automatically.
- Check to ensure that the water flows smoothly or
whether no water leakage occurs. When water cannot be
found at the end of the drain piping, pour another
approximately 1.8 liters of water into the drain pan.
- Switch OFF the power supply after.
NOTE:
Pay attention to the thickness of the insulation when
the left side piping is performed. If it is too thick,
piping can not be installed in the unit.
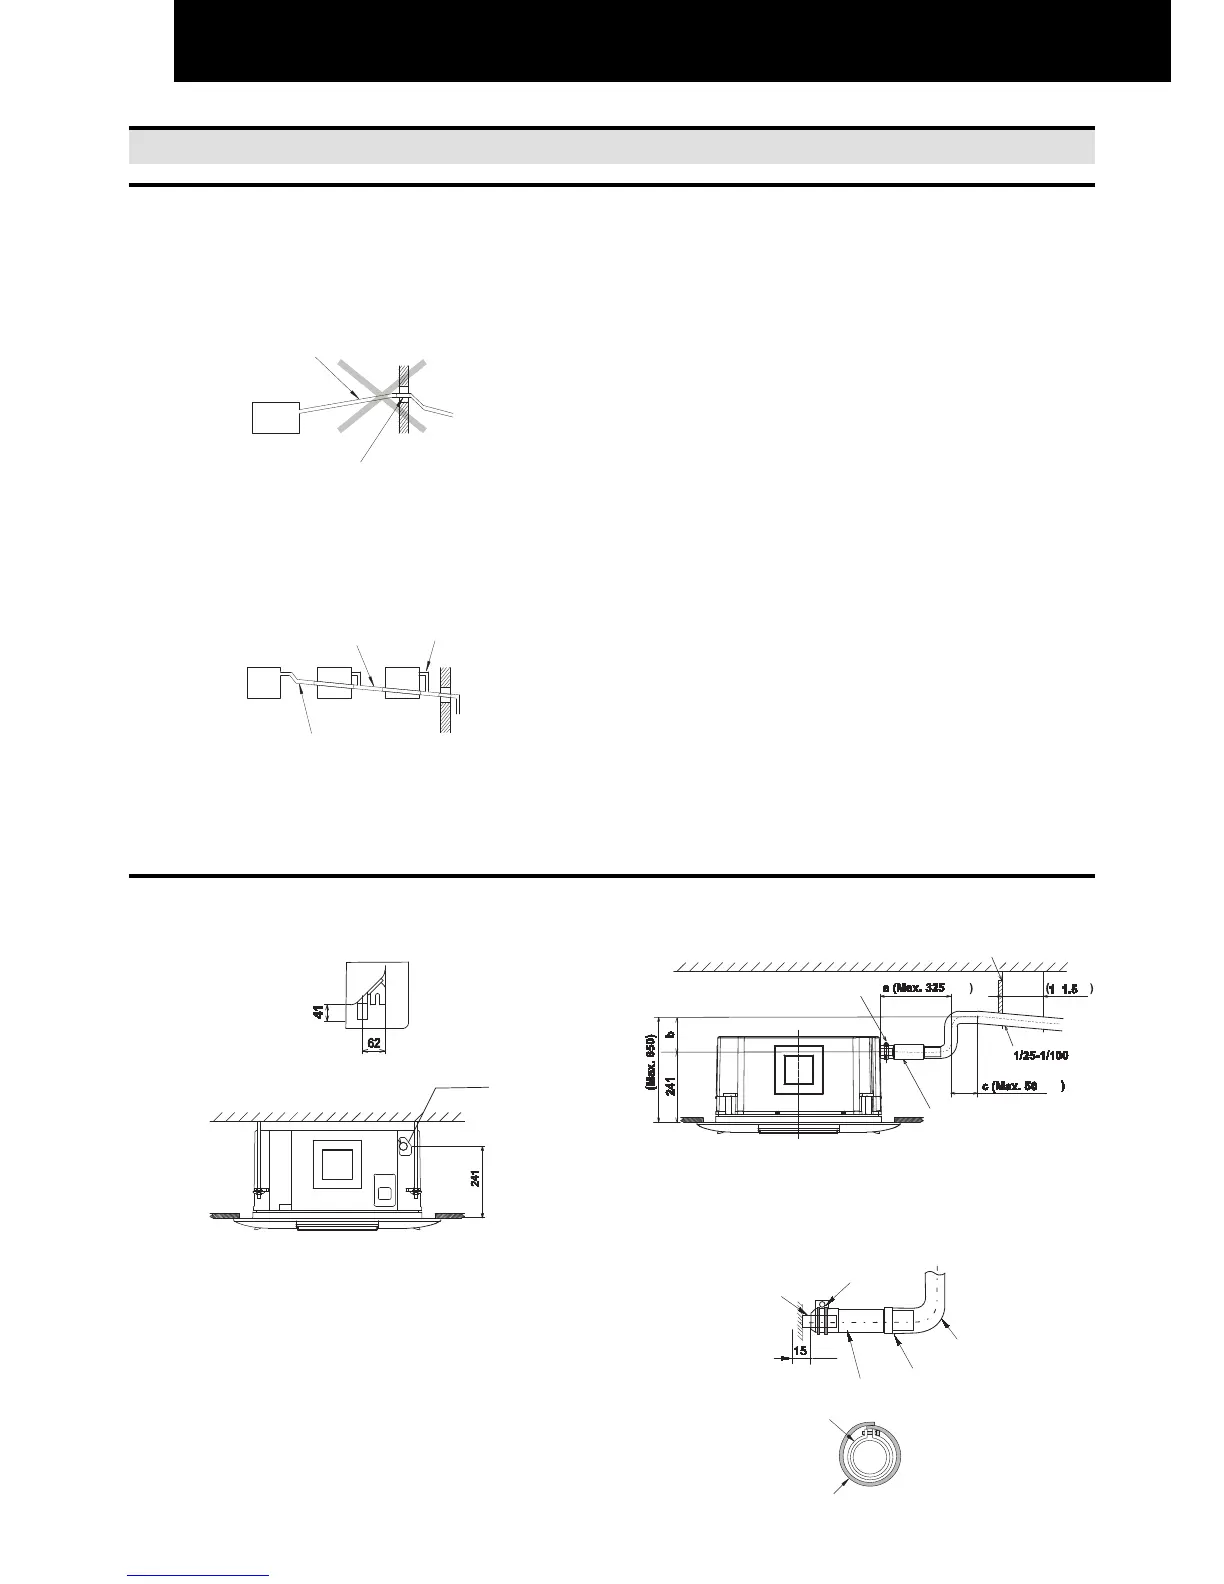
4.2. DRAIN PIPE CONNECTION
1. The position of the drain pipe connection is shown
below.
2. Prepare a polyvinyl chloride pipe with a 32mm outer
diameter (VP25).
3. Fasten the tubing to the drain hose with an adhesive
and the factory-supplied clamp. The drain piping must
be performed with a down-slope pitch of 1/25 to 1/100.
4. Do not apply excessive force to the Drain Pipe
connection. It could cause a damage.
5. Do not use a bent or twisted Drain Hose. It will cause
water leakage.
6. Respect the following dimensions: a + b + c ≤ 780mm
mm
mm
m
~
7. Insulate the drain pipe after connecting the drain hose.
Do not use adhesive between the Drain Pipe connection
and the drain hose.
Incorrect: Upward Slope
Incorrect: Rising Part
INCORRECT
 Loading...


