3
REFRIGERANT PIPING
3
NOTE:
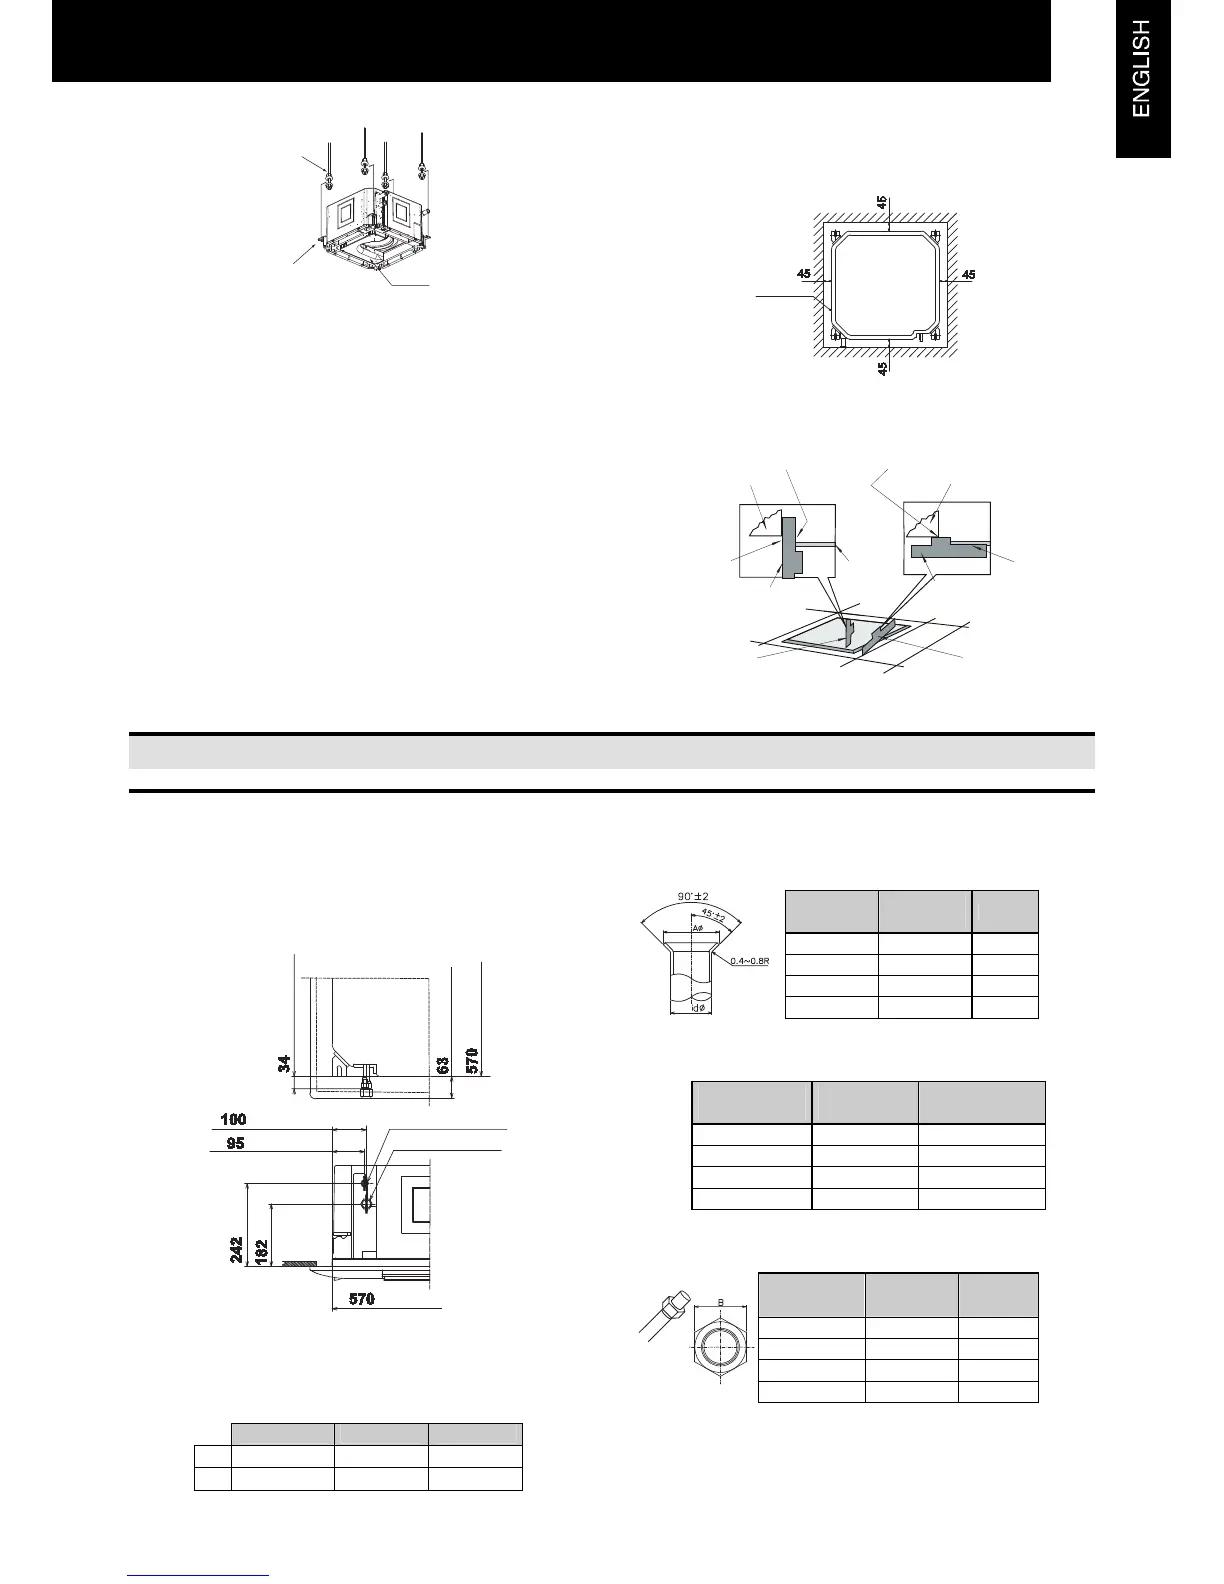
- If a false ceiling has already been installed, complete all
piping and wiring work inside the ceiling before hooking-
up the indoor unit.
- Secure the indoor unit using the nuts and flat washers.
Space Adjusting Between Indoor Units and
False Ceiling Opening
- Check the level of the drain pan by a water level to avoid
incorrect operation of the drain discharge mechanism in
the indoor unit.
- Tighten the nuts of the suspension brackets after the
adjustment is completed. Apply LOCK-TIGHT paint to the
bolts and nuts in order to prevent them from loosening. If
not done, abnormal noises or sounds may occur and the
indoor unit may come loose.
- Adjust the indoor unit to the correct position by checking
with the pattern for installation.
(mm)
1. For ceiling already completed with panels.
3 REFRIGERANT PIPING
3.1. PIPING CONNECTION
3.1.1. PIPING POSITION
Piping connection position is the following, which is
available from all directions, top, left or right.
(mm)
3.1.2. PIPING CONNECTION SIZE
Piping size
mm (in)
Model RCIM 1.0/1.5 2.0
O
Gas Piping 12.70 (1/2) 15.88 (5/8)
P
Liquid Piping 6.35 (1/4) 6.35 (1/4)
Flare Pipe Dimensions
(mm)
Nominal
Diameters
Outer
Diameters
A
+0/-0.4
1/4 6.35 9.1
3/8 9.53 13.2
1/2 12.70 16.6
5/8 15.88 19.7
Thickness of Copper Pipes
(mm)
Nominal
Diameters
Outer
Diameters
Thickness
1/4 6.35 0.80
3/8 9.53 0.80
1/2 12.70 0.80
5/8 15.88 1.00
Flare Nut Dimensions
(mm)
Nominal
Diameters
Outer
Diameters
B
1/4 6.35 17
3/8 9.53 22
1/2 12.70 26
5/8 15.88 29
Suspension bolts (4)
Suspension Bracket
Electrical Box
Indoor Unit
Indoor Unit
 Loading...


