Do you have a question about the Hitachi RPK-0.8FSNQS and is the answer not in the manual?
Immediate hazards resulting in severe personal injury or death.
Hazards or unsafe practices that could result in severe personal injury or death.
Hazards or unsafe practices that could result in minor personal injury or property damage.
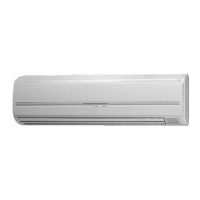
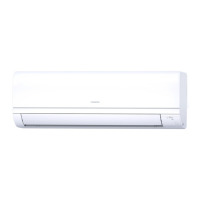
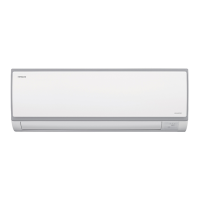
Lists available indoor unit types and their nominal capacities.
Do not press switches with items other than fingers; do not touch the CHECK switch.
Describes how to set the desired temperature between 17°C and 30°C.
Explains the difference between set and actual room temperature.
Details operation of touch-sensitive control switches.
Mentions control of up to 16 indoor units by one remote.
Supply power 12 hours before startup after long shutdown; ensure outdoor unit is clear of snow/ice.
Explains louver behavior during swing and defrost operations.
Describes how to start, stop, and control the swing louver operation.
Compressor protection against frequent starts/stops.
Prevents oil accumulation in the heat exchanger.
Switches to fan mode to avoid frost on the indoor heat exchanger.
Manages fan speed for comfortable heating and defrosting.
Indoor fan maintains slow speed after heating stop.
Performs defrosting when needed to prevent ice buildup.
Stops heating operation if outdoor temperature is too high.
Do not operate without air filter to protect the heat exchange from clogging.
Instructions for cleaning the air filter using vacuum or water.
Press "RESET" after cleaning to clear the FILTER indicator.
Stop operation for drain overflow or smoke; contact contractor.
Contact contractor with unit details and issue description.
Check if SET TEMP is set correctly.
Check airflow, filter, obstructions, and operating conditions.
Describes normal smells, sounds, steam, and dew.
Perform installation, piping, and wiring according to manual.
Do not install near strong electromagnetic wave radiators.
Transport product close to installation location before unpacking.
Precautions for safe handling and preventing damage to the unit.
Do not install in flammable environments to avoid fire or explosion.
Check wall strength; do not install outdoors to prevent hazards.
Lists essential accessories included with the indoor unit.
Ensure proper clearance around the unit for operation and maintenance.
Choose location for optimal air distribution, avoiding obstacles, oil, and corrosive environments.
Diagrams showing dimensions for mounting and clearance.
Securely attach the mounting bracket to the wall.
Hook the indoor unit onto the bracket, ensuring it is firmly secured.
Step-by-step guide for safely removing the front panel.
Instructions for correctly reinstalling the front panel.
Avoid strong forces or hitting the front panel to prevent breakage.
Use R410A; avoid flammable gases for leakage tests due to explosion risk.
Prepare and select correct copper pipe sizes based on model capacity.
Describes right, left, and rear side piping connection possibilities.
Table specifying dimensions for liquid refrigerant pipes.
Table specifying dimensions for gas refrigerant pipes.
Specifications for torque when tightening flare nuts.
Guidance on insulating refrigerant pipes for efficiency.
Instructions on using the unit spacer for pipe connections.
Standard and alternative directions for drain pipe connections.
How to connect the drain pipe and check for smooth water flow.
Avoid sanitary/sewage connections and tying pipes together.
Turn off power before wiring; protect wires from animals to prevent fire.
Tighten screws to torque; use accessory packing for protection.
Verify components, voltage, wire capacity, and earth connection.
How to connect remote control, indoor/outdoor unit wires, and power supply.
Ensure checks are complete before operating; verify resistance, valves, and power.
Table detailing fuse capacity, freeze protection, and thermostat settings.
Tables for selecting power source wire sizes based on standards.
Diagram showing dip switch locations on the indoor unit PCB.
Guides for setting control model, unit number, and other functions.
Steps to enter the field setting mode for filter indication.
How to choose the specific indoor unit for configuration.
Guide to setting filter indication intervals (100, 1200, 2500 hours).
How to exit the setting mode and return to standard operation.
| Brand | Hitachi |
|---|---|
| Model | RPK-0.8FSNQS |
| Category | Air Conditioner |
| Language | English |