4
OPERATION
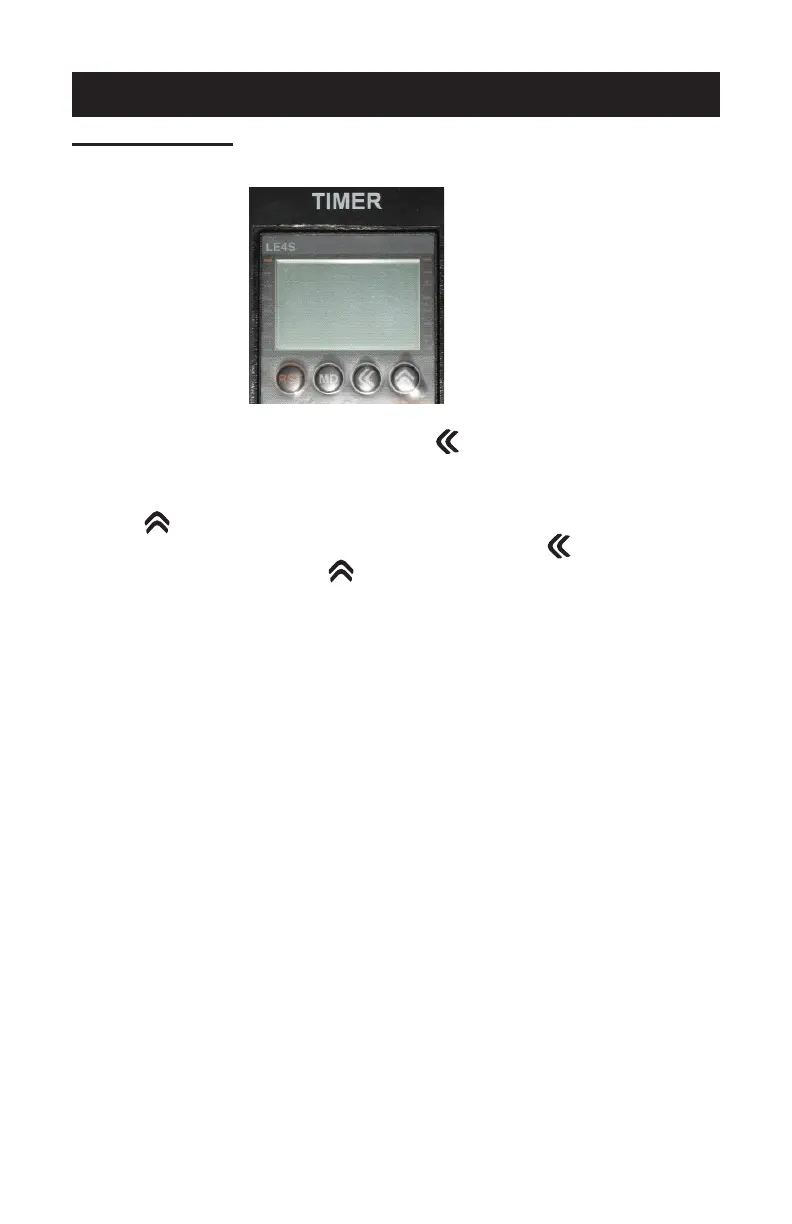
DIGITAL TIMER
1. Turn Main Power “On”. Timer will illuminate.
2. To change time setting, press the button on the front of the
timer face. Timer will display “Minutes” and “Seconds”.
3. To program the desired number for the fl ashing column, press
the button; once for each digit. The counter will loop from
0-9. To change to the next column, press the button and
again press the button until the desired number is reached.
4. Once the new time is entered, press the “MD” button on the
face of the timer to lock in this new setting. Failure to press
the “MD” button will not “lock” in the new setting.
5. Press the “Start” button on the control panel. This will start the
timer and turn the exposure lamp on.
6. Timer will count down and when time reaches zero, the expo-
sure lamp will extinguish.
7. If at any time you want to extinguish the exposure lamp before
time expires, you may do so by pressing the “RST” button on
the face of the timer.
NOTE: Read your emulsions exposure instructions.
1. Set for the optimum exposing time for the screen you are
going to expose. See “Determining Your Optimum Exposure
Time” below or your fi lled in chart in this manual if you have
already determined your exposing time.
2. Push start button to initiate your set exposure time.
3. At the end of the set exposure time as indicated by the timer
beeping, you can turn off the power switch, remove the weight-
ed board, rubber drape, foam block and the exposed scree
9
REPAIRS
2. Make sure vacuum pump is not plugged in.
3. Remove the oil drain cap and drain the contaminated oil into
a suitable container. Tilt the vacuum pump toward the oil drain
port.
4. Once all the oil has been drained, re-secure the oil drain cap
back onto the oil drain port.
5. Remove the exhaust/oil fi ll cap and add oil until it is seen in the
middle of the oil sight glass. Re-secure exhaust/oil fi ll cap.
LID REALIGNMENT
NOTE: The vacuum is sealed under the lid by means of rubber
gasket under the lid frame. This rubber gasket may compress
over time. If the vacuum does not occur, the rubber gasket may
be compressed. These problems can be alleviated by lowering
the hinges.
CAUTION: It is important to do this operation with the lid up, failing
to do so could cause injury due to the sudden release of pres-
sure on the gas spring!
1. Fully open the lid.
2. Using a pencil, tape, or other suitable indicator, place a mark on
the frame of the unit corresponding with a mark on the lower leaf
of the hinges.
3. Using a 9/16” wrench, loosen the four bolts fastening the lower
leaf of the hinges.
4. Let each hinge drop approximately 1/16” using the
indicator placed on the hinge in step 2.
5. Tighten all four bolts securely and test unit. If this does not work
repeat this process and drop the hinges another
1/16”
Warning: Lowering the hinges too much can place excess pressure
on the glass and frame of the unit and should be avoided. If
the lid is diffi cult to close or does not stay closed under it’s own
weight, the hinges should be raised.
NOTE: If the blanket fails to pull a vacuum, check the Troubleshoot-
ing Chart for possible causes. If you determine that your blanket
has begun to leak, it needs to be replaced. New blanket material
can be ordered from HIX Corporation.
 Loading...