10
REPAIRS
NOTE: Mark from which side the aluminum strips were located so
that they can be replaced in the same location.
1. Begin with the lid in the open position. Remove the plastic cap
from the lid end of one of the gas springs. While holding the
lid, pull the end of the gas spring straight out and off of the ball
connector as you continue to manually hold the lid up.
Caution: It is important to do this operation with the lid up, failing to
do so could cause injury due to the sudden release of pressure
on the gas spring!
2. Remove the vacuum hose from the lid.
3. Gently lay lid back down onto glass. Using two 9/16” wrenches,
remove the 4 nuts and bolts holding the lid to the hinges.
4. Remove the entire lid assembly from the frame and lay upside
down on a fl at surface.
5. Mark from which side of the aluminum strips were located so that
they can be replaced in the same location.
6. Remove all screws from the aluminum stips.
7. Remove the blanket material and any adhesive still
attached to the lid frame.
8. Lay new blanket material across the lid in the proper orientation
allowing the material to sag down to your working surface.
9. Seal the rubber to the blanket frame with the included adhe-
sive.
10. Replace the aluminum strips on the same side that they were
removed. Tighten all screws securely. Caution: over tightening
screws may strip the threads in the lid frame.
11. Trim any excess blanket material by running a sharp utility knife
along the outside of the aluminum frame.
3
OPERATION
WARNING: During operation, make sure the lid is latched on both
sides to prevent UV light exposure to eyes or skin.
LOADING SCREEN / STARTING VACUUM
Maximum screen sizes:
23” x 31”
NOTE: Put the screen in the center of the glass. Keep at least 2”
from any edge of the glass to prevent damage to the vacuum
blanket rubber.
1. Raise the lid and place frame in center of glass, screen side
down.
NOTE: When using wood frames with tape and staples, be sure to
tape over tape and staples to prevent damage to class.
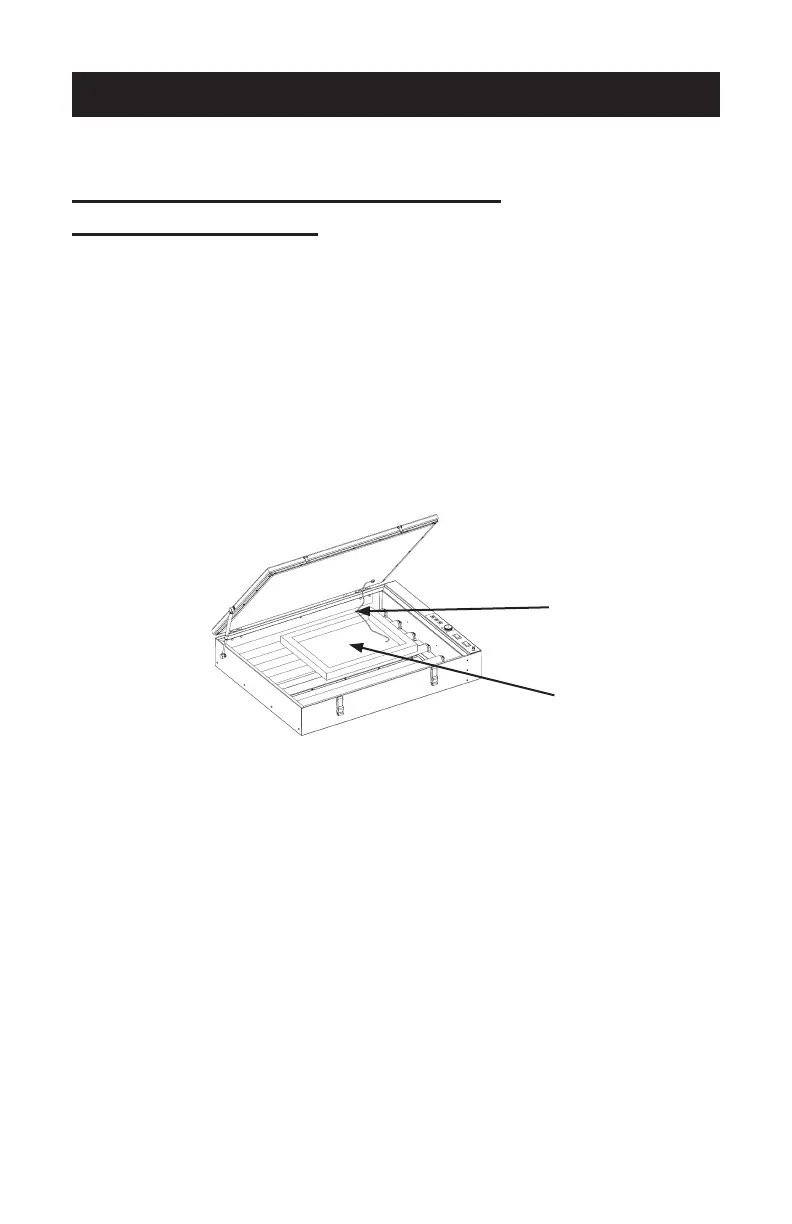
2. Place bleeder cord inside frame as close to the frame side as pos-
sible. (See illustration above) NOTE: This cord facilitates vacuum
and releasing or draining off the vacuum after exposure.
3. Close lid and latch with the rubber latch-hooks.
4. Turn vacuum pump power switch “ON”.
5. Check for proper draw down of blanket.
Bleeder Cord
Screen
 Loading...