EasyManua.ls Logo

Hoist Fitness 4600 User Manual

Hoist Fitness 4600
46 pages
To Next Page IconTo Next Page
Page #1 background imageLoading...
Page #1 background image
Question and Answer IconNeed help?

Do you have a question about the Hoist Fitness 4600 and is the answer not in the manual?

Hoist Fitness 4600 Specifications

General IconGeneral
BrandHoist Fitness
Model4600
CategoryHome Gym
LanguageEnglish

Summary

Hoist 4600 Assembly Instructions

Step 1: Getting Started and Tools

Tools Required for Assembly

Lists all necessary tools for assembling the Hoist 4600 fitness system.

Step 2: Frame Assembly

Frame Assembly: Base and Pulldown Connections

Attaches base tubes and pulldown components to the center base connector.

Frame Assembly: Upright Connections

Connects the main upright support structures to the base tubes.

Frame Assembly: Top Mount and Top Tube Connections

Connects the main top mount and top tubes to complete the frame structure.

Step 3: Weight Stack Assembly

Weight Stack Assembly: Vertical Bench Side Components

Installs the weight stack and guide rod mount for the vertical bench side.

Weight Stack Assembly: Combo/Pulldown Side Components

Installs weight stacks and guide rod mounts for the pulldown and combo sides.

Step 4: Vertical Bench Frame Assembly

Vertical Bench Frame: Seat and Back Mount Attachment

Connects the seat frame and back mount to the vertical bench main upright.

Vertical Bench Frame: Pad Installation

Attaches the padded seat and back components to the vertical bench assembly.

Step 5: Frame Assembly

Frame Assembly: Swivel and Calf Raise Components

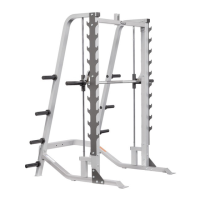
Connects the swivel mechanism, calf raise stand, and related components.

Frame Assembly: Pulldown Section Components

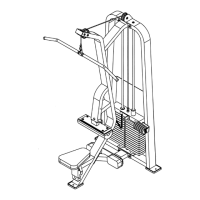
Assembles the pulldown section, including uprights, crossmembers, and seat mount.

Frame Assembly: Pulldown Pad Installation

Attaches the padded seat and main upright components for the pulldown station.

Step 6: Combo Frame Assembly

Combo Frame: Brace, Roller, and Pivot Assembly

Connects seat brace, swing roller, and leg pivot assembly to the main frame.

Combo Frame: Back Mount and Pec Pulley Assembly

Installs the back mount and pulley mount for the combo section.

Combo Frame: Pec Arm Assembly

Assembles the right and left pec arms, including bearings and mounts.

Combo Frame: Leg Ext/Curl Arm Assembly

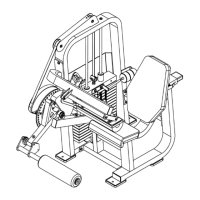
Installs bushings, roller bars, shims, and pads for the leg extension/curl arm.

Weight Ratios: Combo Side Overview

Weight Ratios: Vertical Bench Side Overview

Weight Ratios Chart

Step 13: Final Assembly and Adjustments

Final Assembly: Pillow Block and Press Arm Installation

Installs pillow block bearings and the press arm onto the pivot shaft.

Final Assembly: Press Arm Handles and Ab Strap Attachment

Connects the press arm handles and the ab strap for final adjustments.

Weight Ratios: Pulldown Side Overview

Step 7: Vertical Bench Cable Installation

Vertical Bench Cable: Pulleys in Lower and Upper Slots

Installs pulleys and routes the vertical bench cable through lower and upper frame slots.

Vertical Bench Cable: Final Routing and Pulley Installation

Routes the vertical bench cable through the upright and secures the final pulley.

Step 8: Pulldown Cable - #2

Pulldown Cable: Routing Through Main Top Mount and Pulleys

Routes the pulldown cable through the main top mount and installs pulleys.

Step 8: Pulldown Weight Stack Cable Installation

Pulldown Weight Stack Cable: Attachment to Top Plate

Connects the pulldown weight stack cable to the top plate of the weight stack.

Step 9: Pulldown Swivel Cable Installation (#3)

Pulldown Swivel Cable: Housing, Pulley, and Plate Installation

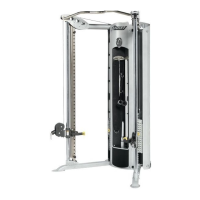
Routes the swivel cable through housing, installs pulleys, and attaches floating pulley plates.

Pulldown Swivel Cable: Base Tube Pulley and U-bracket Attachment

Mounts a pulley on the base tube and attaches the cable's U-bracket.

Step 10: Combo Pec Cable Installation (#4)

Combo Pec Cable: Pec Cam Routing and Pulley Installation

Routes the combo pec cable through the cam and installs pulleys on the mount.

Combo Pec Cable: Left Pec Cam Attachment

Connects the end of the combo pec cable to the left pec cam mechanism.

Step 11: Combo Weight Stack Cable Installation (#5)

Combo Weight Stack Cable: Floating Pulley Bracket Attachment

Connects the weight stack cable to a floating pulley bracket.

Combo Weight Stack Cable: Top Guide Rod Mount Pulley Installation

Mounts a pulley on the combo top guide rod mount for cable routing.

Combo Weight Stack Cable: Attachment to Weight Stack Top Plate

Connects the end of the combo weight stack cable to the top plate.

Step 12: Combo Leg Ext/Curl Cable Installation (#6)

Combo Leg Ext/Curl Cable: Tubing and Pulley Routing

Routes the leg ext/curl cable through pivot tubing and mounts pulleys.

Combo Leg Ext/Curl Cable: Arm and Base Tube Pulley Connections

Connects the leg arm and mounts a pulley on the combo base tube.

Owners Manual Addendum: Important Updates

Addendum: New Cable Routing Diagram (Replaces Pages 4 & 5)

Provides updated cable routing instructions, superseding original pages 4 and 5.

Addendum: Updated Parts Diagram (Replaces Page 15)

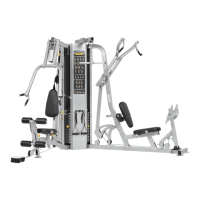
Presents an updated diagram of the machine's parts, replacing page 15.

Addendum: Pre-assembled Parts Diagram (Replaces Page 16)

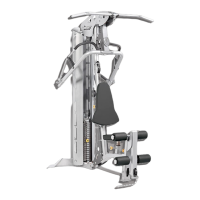
Shows pre-assembled components, updating the diagram from page 16.

Related product manuals