Do you have a question about the Holley Sniper EFI 550-849 and is the answer not in the manual?
Details engine compatibility and prerequisites for the Sniper EFI system.
Outlines necessary fuel pump, line, and pressure specifications for the system.
Lists all tools needed to properly install the Sniper EFI system.
Instructions for converting the throttle body for draw-through boosted applications.
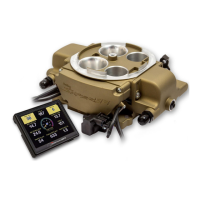
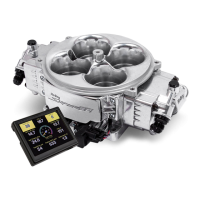
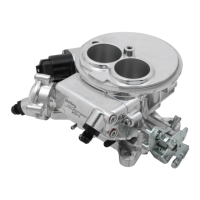
Illustrates the fuel inlet and outlet connections on the Sniper EFI throttle body.
Shows the orientation and location of fuel system components for installation.
Provides instructions and illustrations for assembling fuel hoses correctly.
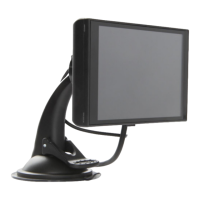
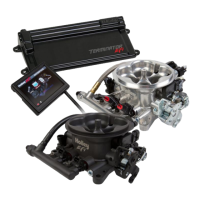
Shows connections for the handheld display unit.
Illustrates wiring for connecting Holley gauges.
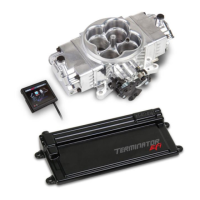
Details the wiring and function of the 7-pin main harness connector.
Describes the 10-pin connector and its populated wires for I/O functions.
Explains the 8-pin connector used for specific Sniper EFI models.
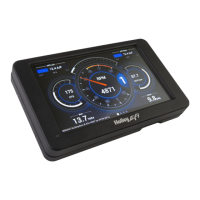
Information about connecting the handheld touch screen display.
Identifies the connector for the coolant temperature sensor.
Identifies the connector for the oxygen sensor.
Best practices and recommendations for EFI system wiring.
Prohibits and warnings regarding EFI system wiring.
Connection details for the 7-pin harness to the throttle body.
Connection details for the optional 10-pin harness.
Connection details for the optional 8-pin harness.
Describes connecting the handheld display to the throttle body.
Describes connecting the coolant temp sensor.
Describes connecting the oxygen sensor.
Explains the 12V switched pink wire connection and requirements.
Explains the battery positive red wire connection.
Explains the battery negative black wire connection.
Details the optional blue wire for fuel pump power.
Instructions for safely disconnecting the touch screen LCD display.
Detailed procedure for removing unused wires from connectors.
Wiring diagram and explanation for connecting to a coil for RPM input without timing control.
Introduces the optional ignition timing control feature of the Sniper EFI system.
Detailed instructions for setting up MSD distributors for timing control.
Steps to remove the distributor for preparation.
Instructions for removing and locking out distributor vacuum advance.
Steps to remove the Holley Dual Sync distributor.
Steps for installing the Holley Dual Sync distributor.
Overview of various screens and navigation methods on the 3.5" handheld display.
How to use slider bars for adjusting parameters on the display.
How to use radio buttons for selecting options on the display.
How to use lists and scroll bars for selecting items on the display.
Guidance on following on-screen prompts and instructions.
Enables slider bar adjustment of individual data points or entire curve.
Enables single point or whole curve adjustment using a stylus.
Locks all data points to shift the entire curve up or down.
Allows point-by-point curve adjustment for fine tuning.
Enables live telemetry on the graph screen for easier tuning.
Instructions on powering the system and accessing the setup wizard via the Home Screen.
Check ECU power, battery charge, and wire connections.
Describes the initial engine crank and startup process.
Guidance on checking parameters after the engine starts and warms up.
How to verify ignition timing with a timing light when not using ECU timing control.
Steps to set distributor and verify timing when ECU controls timing.
Adjusting the throttle blades based on IAC position readings.
How to change ignition settings like type, rev limiter, and dwell.
Modifying Air/Fuel ratios for idle, cruise, and WOT.
Managing the self-tuning feature for fuel learning.
Adjusting the target engine idle speed.
Adjusting ignition timing for idle, cruise, and WOT.
Typical target AFR values for smooth idle.
Typical target AFR values for smooth operation.
Target AFR for WOT, with notes on power and engine damage.
Adjusting fan ON/OFF temperatures for cooling fans.
Modifying engine parameters like cylinders and displacement.
Setting up system type and fuel injector flow.
Configuring ignition type, rev limiter, and dwell.
Setting a fixed ignition timing value for initial setup.
Adjusting the number of cylinders for engine configuration.
Entering the actual engine displacement size.
Selecting camshaft type (Stock/Mild, Street/Strip, Race).
Changing calibration for different Sniper EFI models.
Verifying fuel injector flow matches installed injectors.
Adjusting base system fuel pressure.
Changing calibration for different ignition setups.
Distributor crank pulse value for timing control.
RPM threshold for injector cutoff.
Value to sync timing at higher RPMs.
Changes points output dwell time.
Retrieves the commanded static timing value.
Sets the commanded timing to the chosen value.
Clears the static timing value.
Navigates back to the Ignition Setup Menu.
Adjustments for coolant enrichment, load acceleration, cranking, and afterstart fuel.
Adjusts acceleration enrichment based on coolant temp and TPS rate.
Enables or disables closed loop operation for AFR correction.
Sets the maximum ECU deviation for target AFR.
Adjusts the gain for closed loop operation speed.
Enables open loop operation below a specified RPM.
Sets minimum coolant temp for closed loop operation.
Sets limits for fuel map changes based on closed loop operation.
Transfers learned fuel data to the base fuel table.
Adjusts IAC motor behavior for idle control during decel and startup.
Configures a secondary rev limiter activated by an input.
Retards ignition timing based on input or time.
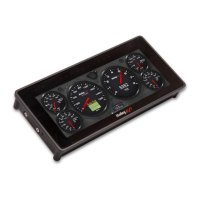
Displays live data in a list format or as gauges.
Shows live data in a gauge format with multiple readings.
Illustrates setting scales and warning thresholds for AFR gauges.
Defines target air/fuel ratios for idle, cruise, and WOT.
Explains the "accelerator pump" function for adding fuel.
Details the fuel prime function for quicker engine starts.
Enables or disables closed loop operation.
Enables/disables minimum coolant temp for closed loop.
Sets minimum coolant temp for closed loop operation.
Turns self-tuning on or off.
Adjusts the target HOT idle speed.
Typical ignition timing values for idle.
Typical ignition timing values for cruising.
Ignition timing values for wide open throttle.
Actual ignition timing during cranking.
Adjusting fan ON/OFF temperatures for cooling fans.
Modifying engine parameters like cylinders and displacement.
Setting up system type and fuel injector flow.
Configuring ignition type, rev limiter, and dwell.
Setting a fixed ignition timing value for initial setup.
Adjustments for coolant enrichment percentage.
Adds fuel based on MAP sensor changes.
Dictates fuel injected during cranking.
Fuel added shortly after engine starts.
Adjusts acceleration enrichment based on coolant temp and TPS rate.
Enables or disables closed loop operation.
Sets the maximum ECU deviation for target AFR.
Adjusts the gain for closed loop operation speed.
Enables open loop operation below a specified RPM.
Adjusts IAC motor behavior for idle control during decel and startup.
Selects IAC motor application type.
Controls IAC position during cranking and after start.
Allows customization of target idle speed at all coolant temperatures.
Configures a secondary rev limiter activated by an input.
Retards ignition timing based on input or time.
View and manage saved ECU calibrations.
Displays detailed ECU info and firmware upgrade options.
Options for screen recalibration and startup behavior.
Settings for enabling/disabling nitrous activation and RPM limits.
Configures timing and AFR for nitrous activation.
Boost control settings for launch.
Boost control safety settings.
Boost control curve based on RPM.
Boost control curve based on time.
Advanced table configuration requiring software.
Advanced table configuration requiring software.
Procedure for starting and stopping data logging using the handheld.
Steps for uploading calibration via prompts and ignition cycling.
Steps to view configuration using PC software and SD card.
Verifies all sensors are reading properly on the handheld.
Navigates to diagnostics for sensor errors.
| Brand | Holley |
|---|---|
| Model | Sniper EFI 550-849 |
| Category | Automobile Accessories |
| Language | English |