PAGE 7
Before proceeding, ensure the spare watering planner
has been completed. From your planner you should be
aware which stations are allocated to each program.
Set one program at a time to ensure that the schedules
are completed correctly.
Example: SET PROGRAM 1
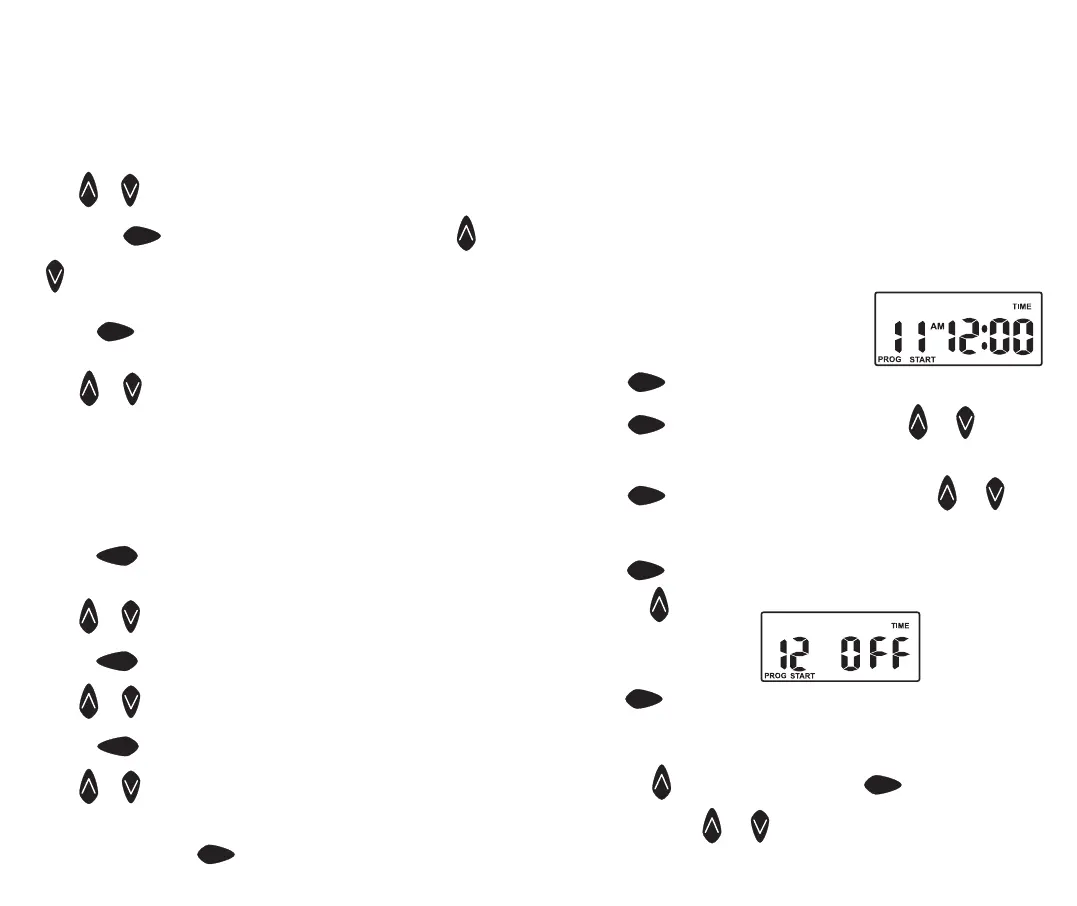
Step 1. Set Start Times
Turn the dial to Set Start Times and ensure that “Prog 1”
is flashing.
The display will show:
Press
next
and “Start 1” willl flash..
Press
next
and the “hour” will flash. Use or to
adjust.
Note: Ensure AM / PM position is correct
Press
next
and the “minutes” will flash. Use or to
adjust, if required. Each program has up to four start
times and should you require a second start time,
Press
next
and “Start1” will flash. Advance to start 2 by
pressing
.
The display will show.
Press
next
and proceed as per setting Start 1.
Tip: To turn an active start time off, turn the dial to the Set
Start times position, Select the start number required
using the button and then press
next
until the “hour”
is flashing. Use
or until “OFF” is shown.
Tip: “OFF” position is between 12 and 1.
ProgrammingProgramming
Set Current Time & Correct Day
Turn the dial to Set Clock/Calendar position. The hour
will be flashing.
Use or to adjust. Note: AM / PM must be set correctly.
Press the
next
button and the “minutes” will flash. Use or
to adjust.
Press
next
and the “day of the week” will flash.
Use
or to set correct day.
Set Calendar (Optional)
Note: The calendar only needs to be set when selecting
Odd/Even day watering in areas where water restrictions
may require this feature.
Press
back
button until the year, month and day are shown.
the “year” will be flashing.
Use
or to adjust, if required.
Press
back
button and the “month” will flash.
Use
or to adjust.
Press
back
and the “day” will flash.
Use
or to adjust.
Tip: To return to the clock,
press
next
, or turn dial to another position.
PAGE 6