Do you have a question about the Holmes 32510091 and is the answer not in the manual?
Provides instructions for safe and correct fan care, including fuse replacement.
Guide for cleaning the fan housing, blades, and grills using mild soap solution.
Instructions on how to clean the fan's main body, base, and pole safely.
Recommendations for storing the fan when not in use to protect it from dirt.
Details the warranty period and coverage against workmanship and defects.
Provides contact information for warranty claims and customer support.
Covers precautions against electric shock, water immersion, and proper plug usage.
Instructions for safe fan usage, avoiding hazards like fumes and damaged cords.
Details limitations on continuous use, children's use, and unauthorized parts.
Step-by-step guide for assembling the fan components.
How to operate the fan's speed settings and oscillation.
Instructions on how to adjust the fan head's upward angle.
Guide on how to adjust the fan's height using the extension pole.
This document describes a 16-inch outdoor misting fan, designed for household use to provide cooling and air circulation. It features both fan operation and a misting function, making it suitable for use in various weather conditions, including circulating warm air during colder seasons.
The primary function of this device is to provide personal cooling through air movement and misting. The fan operates with multiple speed settings (low, medium, high) and an oscillation feature to distribute air across a wider area. The misting function, when connected to a standard garden hose, allows for the release of fine water mist, enhancing the cooling effect, especially in outdoor environments. The fan's height and tilt angle are adjustable, enabling users to direct airflow and mist precisely where needed.
The fan is designed for straightforward operation with user-friendly controls.
Regular cleaning and maintenance are essential to ensure the fan's longevity and safe operation.
The fan is designed for household use and is not intended for commercial or industrial applications. It is not meant for continuous operation. The use of attachments not recommended by the manufacturer is discouraged. The power cord should be kept away from high-traffic areas, hot surfaces, open flames, and should not be run under carpeting or furniture. If the fan malfunctions or is damaged, it should be discarded, and customer service contacted.
| Model | 32510091 |
|---|---|
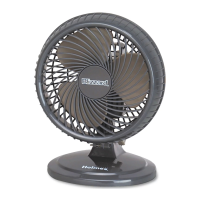
| Type | Table Fan |
| Speeds | 3 |
| Power Source | Corded Electric |
| Voltage | 120V |
| Color | White |
| Material | Plastic |
| Oscillation | Yes |
| Tilt Adjustment | Yes |
| Height Adjustment | No |