This document outlines the features, usage, and maintenance of a portable air conditioner, designed for indoor use. The device utilizes R290, an environmentally friendly hydrocarbon refrigerant, which is odorless and has a low ozone depletion effect.
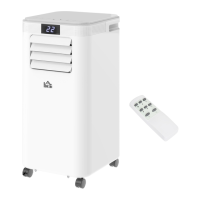
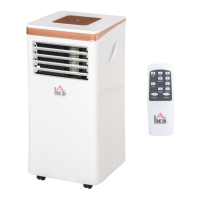
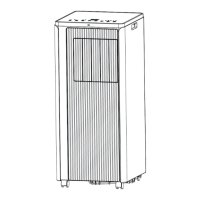
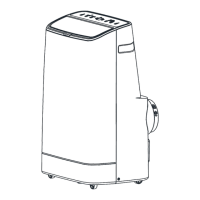
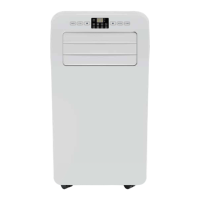
The air conditioner offers multiple functions, including cooling, dehumidification, and fan operation, with continuous water drainage capabilities. It features a compact and streamlined design, presenting an aristocratic aesthetic. The control panel is equipped with an LED display, enhancing its visual appeal and elegance. For user convenience, a high-quality remote control with a user-friendly design is included. The outdoor interface is strategically placed high to facilitate assembly and ensure smooth heat pipe flow. Additionally, the unit incorporates air filtration and a timing switch function. To ensure longevity and safety, it includes protection functions such as automatic compressor restart after three minutes and other various protective measures.
Usage Features:
The air conditioner is designed exclusively for indoor use. Proper installation requires adherence to local grid interconnection rules and ensuring the unit is correctly grounded. If there are any questions regarding electrical installation, it is recommended to consult the manufacturer's instructions or a professional electrician. The machine should be placed on a flat, dry surface, maintaining a distance of at least 50 cm from surrounding objects or walls. After installation, it is crucial to ensure the power plug is intact and securely connected to the power outlet, with the power cord arranged neatly to prevent tripping or accidental disconnection.
To maintain optimal performance, the air inlet and outlet must be kept free from obstructions. When installing drainage pipes, ensure they are properly connected, not distorted, or bent. When adjusting the upper and lower wind-guide strips of the air outlet, gentle handling is advised to prevent damage. When moving the machine, it must be kept in an upright position. The unit should be kept away from flammable substances like gasoline, flammable gas, stoves, and other heat sources. Unauthorized disassembly, overhaul, or modification of the machine is strictly prohibited, as it can lead to malfunctions, personal injury, or property damage. In case of a machine failure, contact the manufacturer or professionals for repair. The air conditioner should not be installed or used in bathrooms or other humid environments. To turn off the machine, always pull the plug. Avoid placing cups or other objects on the unit to prevent liquids from spilling into the air conditioning system. Do not use insecticide sprays or other flammable substances near the air conditioner. For cleaning, disconnect the power supply and wipe the unit with a half-wet soft cloth. For stubborn dirt, a mild detergent can be used.
The appliance can be used by children aged 8 years and above, as well as individuals with reduced physical, sensory, or mental capabilities, provided they receive supervision or instruction on safe usage and understand the associated hazards. Children should not play with the appliance. Cleaning and maintenance should not be performed by children without supervision. If the supply cord is damaged, it must be replaced by the manufacturer, its service agent, or similarly qualified persons to avoid hazards. The appliance must be installed in accordance with national wiring regulations. Operating the air conditioner in wet rooms like bathrooms or laundry rooms is not recommended.
Control Panel Operation:
When the machine is first powered on, a buzzer will sound, and the unit will enter standby mode.
- Power Key: Press to turn the machine on or off.
- Mode Selection Key: In power-on mode, press to cycle through cooling, dehumidifying, and fan modes.
- Fan Speed Selection Key: In cooling or fan mode, press to select high or low wind speed. In dehumidifying mode, this key is inactive, and the fan automatically operates at low speed.
- Up Key and Down Key: Use these keys to adjust the setting temperature or setting time. When setting temperature, select the desired temperature (not available in fan or dehumidifying mode). When setting time, select the required time.
- Sleep Mode: In cooling mode, press the SLEEP key to activate sleep mode, which operates the unit in an energy-saving and quiet manner.
- Timing Key: In power-on mode, press to set a timer for the unit to turn off. In power-off mode, press to set a timer for the unit to turn on. When the timing symbol flashes, use the UP and DOWN keys to select the desired timing value, which can be set from 1 to 24 hours, adjusted in one-hour increments. Note that sleep mode cannot be activated in dehumidifying or fan modes. The "water full" lamp will illuminate, and a buzzer will sound for a few seconds when the inner unit chassis water is full, causing the compressor to stop.
Remote Control Operation:
The remote control offers similar functionalities:
- Power: Turns the machine on or off.
- Timer: Sets the timing.
- Down: Lowers temperature and timing set value.
- Mode: Switches between cooling, fan, and dehumidifying modes.
- Up: Increases temperature and timing set value.
- Fan: Switches between high and low wind speed.
- Sleep Mode: Activates sleep mode.
Protection Functions:
- Frost Protection: In cooling, dehumidifying, or economic power-saving modes, if the exhaust pipe temperature is too low, the machine automatically enters a protection state. It will revert to normal operation once the exhaust pipe temperature rises to a certain level.
- Overflow Protection: When the water in the water pan exceeds the warning level, the machine will sound an alarm, and the "FULL" indicator light will flash. At this point, the drainage pipe or water outlet needs to be moved to a sewer or other drainage area to empty the water. Once the water is emptied, the machine returns to its original state.
- Automatic Defrosting: (Only in cooling models) The machine has an automatic defrosting function, achieved through four-way valve reversing.
- Compressor Protection: To extend the compressor's service life, it features a 3-minute delay booting protection function after being turned off.
Installation and Adjustment:
Before using the mobile air conditioner, keep it upright for at least two hours. The unit can be easily moved within a room, but it must remain in an upright position and be placed on a flat surface. Avoid installing or using it in bathrooms or other humid environments.
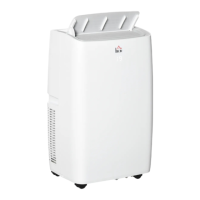
Heat Pipe Assembly:
- Take out the outer connector and exhaust pipe assemblies, and remove their plastic bags.
- Insert the heat pipe assembly (the exhaust joint end) into the back panel vent slot by pushing it to the left, completing the assembly.
Window Sealing Plate Components Installation:
- Partially open the window and mount the window sealing plate assembly. Components can be placed horizontally or vertically.
- Extend the various components of the window sealing plate assembly, adjusting their opening distance until both ends contact the window frame, then fix the components.
- Notes: The flat end of the exhaust pipe joints must be snapped into place. The pipe should not be distorted or bent significantly (greater than 45°), and its ventilation must not be blocked.
Body Installation:
- Move the machine with the installed heat pipe and fittings in front of the window, ensuring a minimum distance of 50 cm between the body and walls or other objects.
- Elongate the exhaust pipe and snap its flat end into the hole of the window sealing plate assembly.
- Important Notice: The exhaust hose length should be between 280mm and 1,500mm, based on the air conditioning specifications. Do not use extension tubes or replace it with different hoses, as this may cause malfunctions or overheating if the exhaust flow is blocked.
Drainage Instructions:
The machine offers two drainage methods: manual drainage and continuous drainage.
Manual Drainage:
- When the machine stops due to a full water tank, turn off the power and unplug the unit.
- Notes: Move the machine carefully to avoid spilling water from the bottom pan.
- Place a water container below the side water outlet at the back of the unit.
- Unscrew the drainage cover and unplug the water plug; water will automatically flow into the container.
- Notes: Keep the drainage cover and water plug properly. The body can be tilted slightly backward during drainage. If the container cannot hold all the water, reinsert the water plug into the water outlet as soon as possible to prevent spills onto the floor or carpet. Once the water is discharged, reinsert the water plug and tighten the drainage cover.
Continuous Drainage (Optional): (Applicable only in dehumidifying mode)
- Unscrew the drainage cover and unplug the water plug.
- Insert the drainage pipe into the water outlet.
- Connect the drainage pipe to a bucket.
Maintenance Features:
Before performing any cleaning or maintenance, turn off the machine and unplug it.
Clean the Surface:
Wipe the machine's surface with a wet, soft cloth. Avoid using chemical solvents such as benzene, alcohol, or gasoline, as these can damage the air conditioning's surface or the entire machine.
Clean the Filter Screen:
If the filter screen is clogged with dust, the air conditioning's effectiveness will be reduced. It is essential to clean the filter screen every two weeks.
Clean the Upper Filter Screen Frame:
- Unscrew the screw fixing the EVA filter net and back shell with a screwdriver, then remove the EVA filter net.
- Place the EVA filter screen in warm water with a neutral detergent (around 40°C / 104°F) and rinse it clean. Dry it in the shade.
Unit Storage:
- Unscrew the drainage cover, unplug the water plug, and discharge the water from the water pan into other containers or by tilting the body.
- Turn on the machine and set it to low-wind ventilation mode. Maintain this state until the drainage pipe is dry, ensuring the inside of the body is dry to prevent mildew.
- Turn off the machine, unplug the power plug, and wrap the power cord around the wrapping post. Reinstall the water plug and drainage cover.
- Remove the exhaust pipe and store it properly.
- Cover the air conditioning with a plastic bag. Store the unit in a dry place, out of reach of children, and take measures to control dust.
- Remove the batteries from the remote control and store them properly.
- Note: Ensure the body is placed in a dry place and all machine components are stored properly.
Troubleshooting:
Users are advised not to repair or disassemble the air conditioning unit themselves. Unqualified repairs will void the warranty and may cause damage to users or property. The manual provides a table of common problems, their reasons, and solutions. For issues not listed or if recommended solutions do not work, contact a professional service organization.
Environmental Treatment:
The abandoned machine should not be disposed of with unsorted waste. Such waste must be placed separately for other special uses to ensure proper environmental treatment.