9
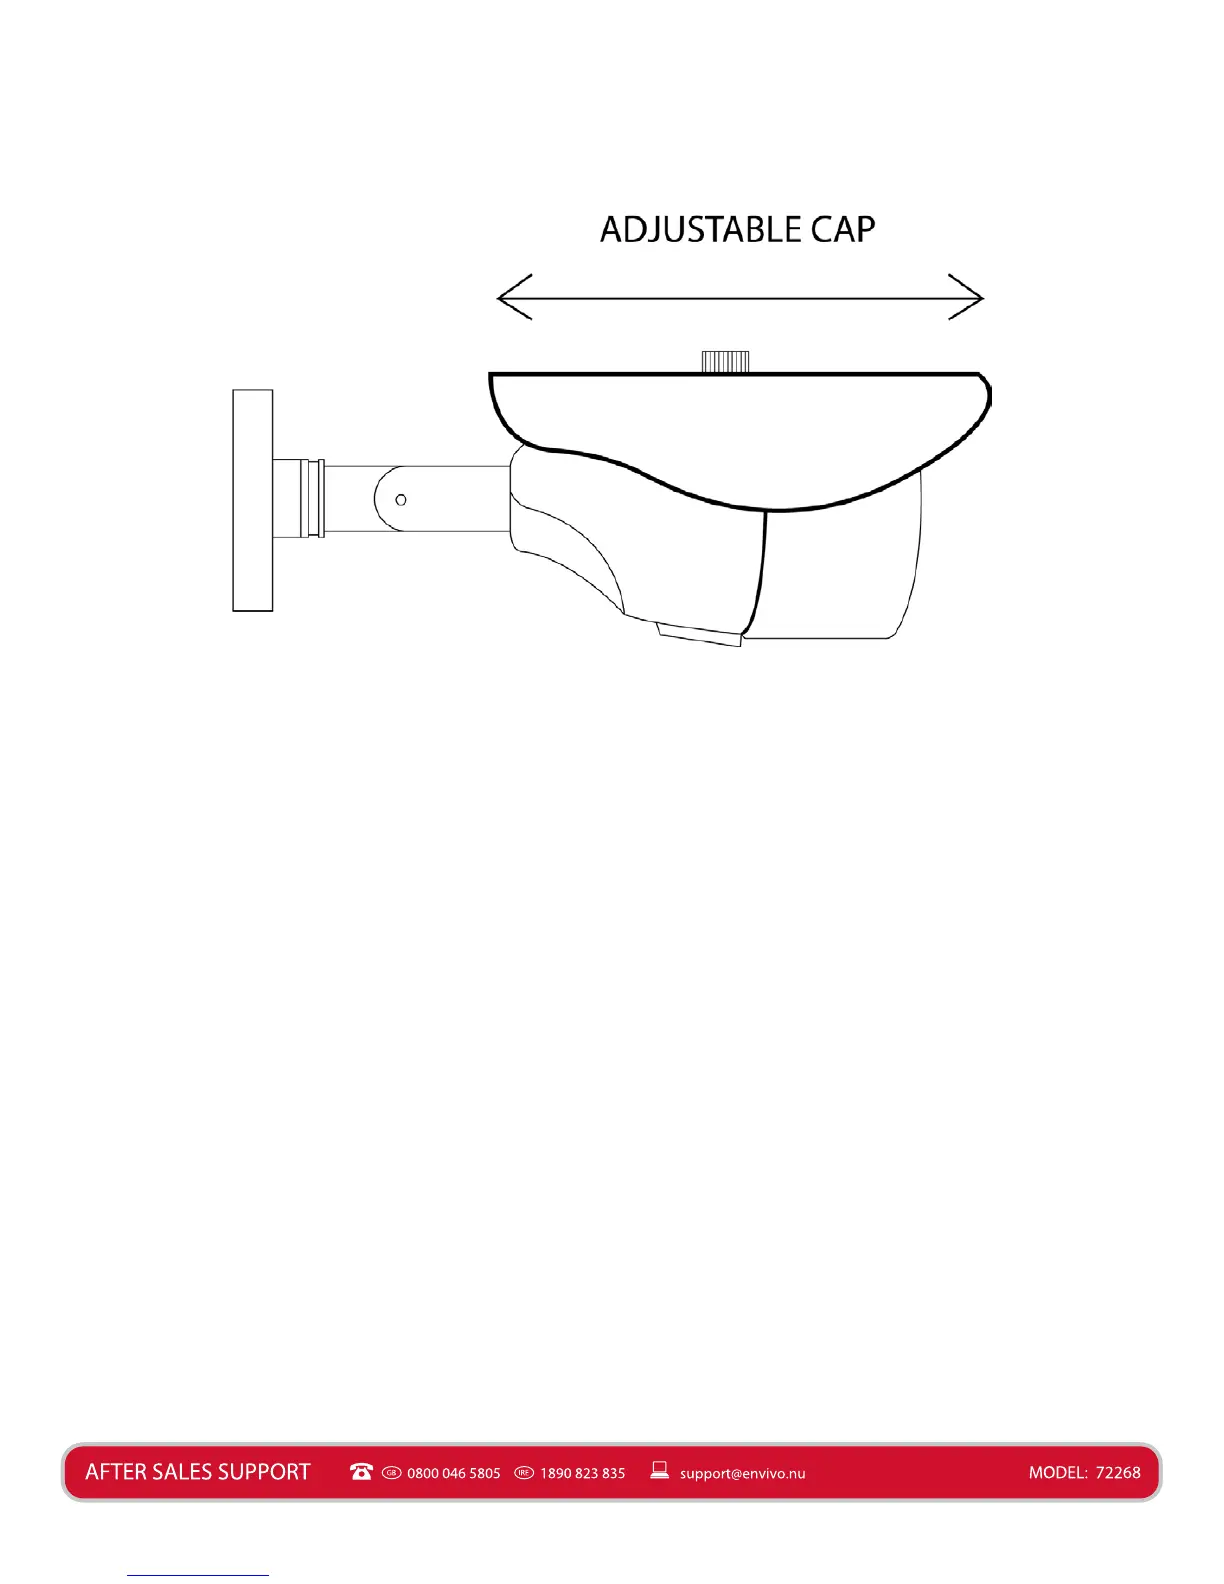
It is possible to adjust the cap of the camera. If you get distorted colours or glare then try and
adjust the cap of the camera, as this will help in many situaons.
Mounng Camera
Before you ax the camera in posion, please ensure the cable is of adequate length to reach
the Monitor or DVR.
NOTE: It is recommended that you test the product before nal installaon.
1. Ensure that the surface you want to mount the camera on is solid and can support the
weight of the CCTV Camera.
2. Accurately mark on the wall the posion of the holes to be drilled.
3. Drill the holes to the correct depth in the wall, as indicated by the plugs.
4. Insert plugs into the drilled holes.
5. Secure the camera to the wall using the provided screws.
Connecons
This CCTV Camera can be used in two dierent ways. Connected directly to a monitor (not
included) for live video from the camera (Basic System Connecon).
It is also possible to connect the CCTV Camera to a DVR (not included) if you already have
a DVR and other CCTV Cameras, and want to use this CCTV Camera as an extra camera for
your exisng DVR Kit. This will allow you to record video from the CCTV and watch the video
remotely (Only works on some DVRs) (Extended System Connecon).